Choosing the right magazine size can make or break your publication’s appeal. The dimensions you select influence not only the visual impact but also the functionality, cost, and overall reader experience. Thus, the size of your magazine is a key part of its identity—it influences how your content is presented and perceived.
Your chosen dimensions, whether compact or large, play a key role in engaging your audience and shaping the reading experience. Different sizes have distinct advantages, shaping your publication's design and experience.
In this blog, we’ll examine the standard magazine dimensions, offering insights into what works best for various types of content. We’ll also explore how choosing the right size can elevate your magazine and make it stand out on the shelf.
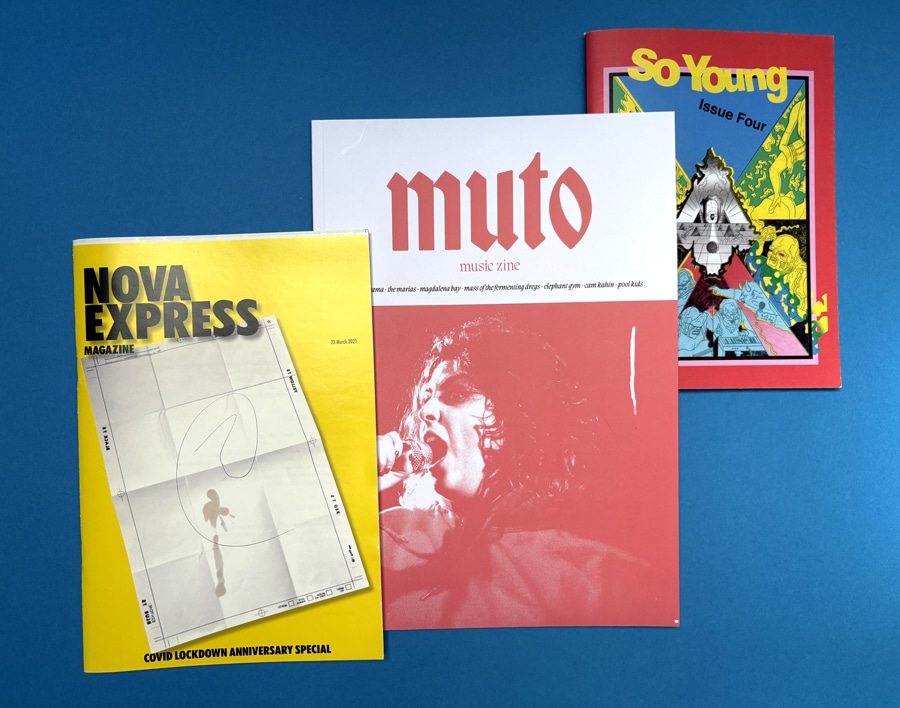
Magazine sizes vary based on geography, audience preferences, and content type. Smaller formats are more portable, while larger ones provide ample space for detailed visuals and text. There are common US dimensions, European dimensions, and custom dimension options available in the market.
The typical magazine size in the United States is a letter size, measuring 8.5 by 11 inches. However, other common US magazine dimensions are also gaining popularity due to their unique advantages. Check out the table below to see the most common US Magazine dimensions:
Portrait | Landscape | Square |
3.5" x 8.5" | 6" x 4" | 5.5" x 5.5" |
4" x 6" | 8.5" x 5.5" | 8.5" x 8.5" |
4.25" x 11" | 11" x 8.5" | |
5.5" x 8.5" | ||
6" x 9" | ||
8.5" x 11" |
Like in the US, European publishers use a range of sizes too. A crucial factor to appreciate here is the consistent proportion followed among the A series formats, where cutting an A4 sheet in half gives two A5 sheets, each maintaining the same aspect ratio. Let's examine the most commonly used dimensions in European magazines:
European Magazine Format | Dimensions (in mm) |
DIN A4 | 210mm x 297mm |
DIN A5 | 148mm x 210mm |
DIN A6 | 105mm x 148mm |
Apart from the standard sizes, magazines are available in special sizes and custom dimensions. These magazine templates are popular for niche publications or those dealing with artistic subjects that push the boundaries of creativity. Square formats are particularly prevalent among such unique content.
The options vary greatly, from pocket-friendly digests to larger broadsheets. Looking to match the size of your favorite magazine? Ex Why Zed has got you covered. Whether it's the refined proportions of Vogue UK, the soft minimalism of Kinfolk, or the compact creativity of Monocle, we can print it—all from just one copy.
Seen something square like Creative Review? Sure, we can do that too—but heads up: that size runs on our larger presses and can get a bit pricey if you're ordering under 700 copies. Want the same vibe without the sting? Scale it down to 210x210mm and keep it cost-effective.
Planning a bigger run? Let’s talk smart choices. The 280x220mm format (like Grand Designs or Elle Decoration) hits the sweet spot—big on visual impact, easy on production. Whatever you’re inspired by, we’ll help you create something just as iconic.
The digest size, 5.5 by 8.25 inches, is popular for compact magazines, newsletters, and shorter publications. Its small footprint makes it cost-effective and easy to handle, perfect for readers on the go. With less binding material required, it’s an economical and convenient option for publishers and consumers.
The half-letter size, measuring 8.5 by 5.5 inches, is ideal for niche publications. Offering a balance between space and portability, it’s perfect for readers interested in specific topics. This format is incredibly convenient for collectors, as it’s easy to store while providing ample content space.
The letter size (8.5 by 11 inches) is the standard magazine printing size in the U.S., favored by many publishers for its ample space for content and visuals. While it offers generous dimensions, this size can be more expensive due to higher material and postage costs.
The A4 size, 8.3 by 11.7 inches, is widely used, especially in Europe. It strikes an ideal balance between space and portability, offering plenty of room for content while fitting comfortably into most bags. This size is perfect for general interest magazines, appealing to a broad audience.
Square magazines, often seen in lifestyle and fashion publications, offer a unique visual appeal. Commonly 5.5 by 5.5 or 8.5 by 8.5 inches, their distinct shape makes them stand out on shelves, providing readers with a fresh experience. However, their unconventional format typically comes with higher production costs compared to traditional rectangular magazines.
The broadsheet size (22.5 by 35 inches) is the largest standard magazine format, often favored for artistic and specialty publications. However, it presents challenges in terms of production costs and reader convenience; its unique, large-scale format appeals to audiences who value a distinctive and immersive reading experience.
The tabloid size (11 by 17 inches), offering double the space of a standard letter-sized magazine, is popular among publishers in entertainment and celebrity genres. Its larger canvas allows for more content and striking visuals. However, the downside is its bulk, making it less convenient to hold while reading. Read more about this size in our Newspaper size articles.
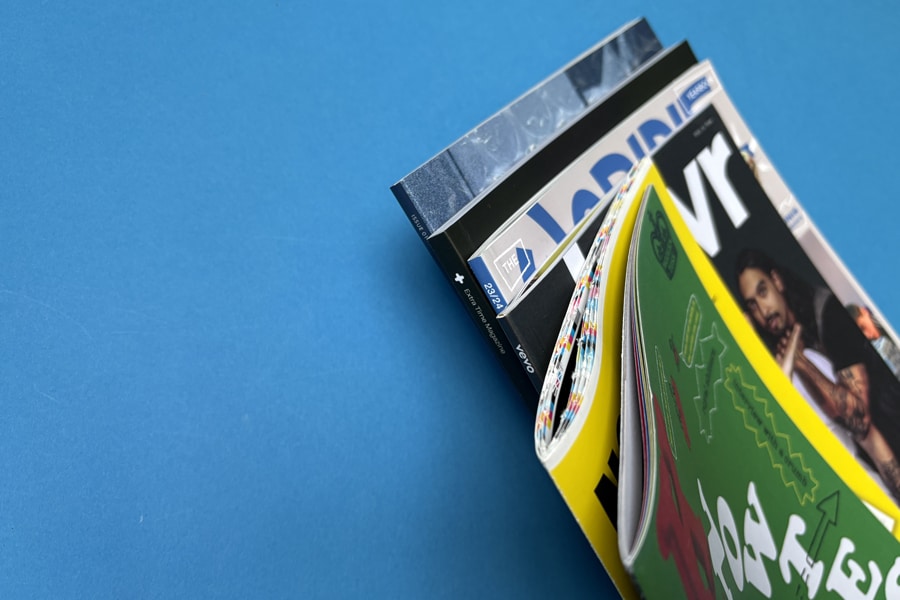
Choosing the right binding option becomes crucial for a professional finish to your publication. From saddle-stitching and perfect binding to wire-o options, there's plenty to choose from depending on your budget, page count, and style preference.
Here are key differences between the three:
Once you've chosen the right binding—whether it’s the sleek, premium feel of perfect binding or the classic simplicity of saddle stitching—the rest should be smooth sailing. With Ex Why Zed's Magazine Services, we make the process hassle-free. Just upload your PDF, and our team will handle the technicalities, from free file checks to lightning-fast delivery. Need a quick turnaround? We can have stapled magazines delivered to you in just 3 days.
Plus, with instant pricing, free paper samples, and hands-on support from real people, you’re not just getting a print service—you’re getting a partner who makes your magazine look and feel its best.
The thickness or length of a magazine can vary broadly from an eighth of an inch to as much as three centimeters. This primarily depends on the page count, which varies greatly among different publishers and issues. It is worth noting that a magazine's dimensions significantly impact its readability, portability, and production costs.
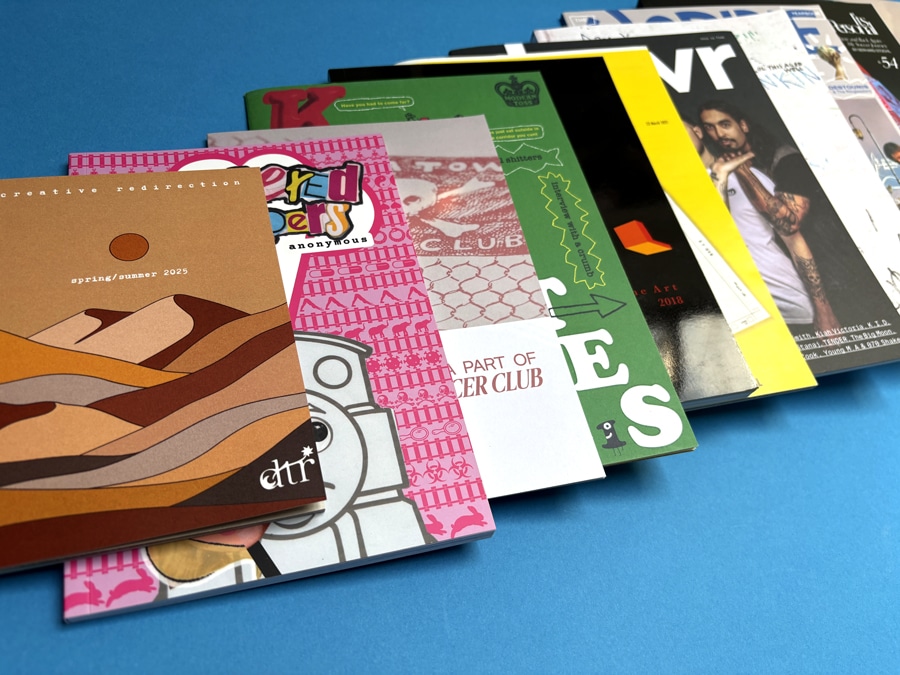
Your magazine deserves to stand out—and Ex Why Zed makes that happen with a full spectrum of format options. Whether you’re going for a sleek portrait design, a bold landscape layout, or a modern square finish, we offer the flexibility to match your creative vision.
Every magazine is printed with sharp detail, vibrant colors, and professional binding. With us, you’re not just picking a size—you’re choosing how your story is told. Contact us now and make your magazine worth publishing!
Magazines are a powerful medium for sharing information, sparking creativity, and engaging readers. While often overlooked, a magazine's size and format are crucial elements that influence how readers experience its content. Magazine companies offer a variety of sizes, from compact digests to expansive broadsheets, tailored to specific content and audience needs.
Selecting the right size and format also allows publishers to craft a visually compelling product that resonates with readers. While understanding standard sizes is a great starting point, modern printing technology offers endless customization possibilities to achieve a professional look. We hope this blog helps you navigate your magazine’s journey, whether refining your format or exploring new dimensions.
Typically, a standard magazine cover in the US measures 8.5 inches by 11 inches. But for publications like Vogue, it usually measures 9.5 inches by 12 inches.
The optimal size choice should ideally depend on the type of content, the target audience, production costs, and the physical convenience for readers to carry and read.
The most common print magazine sizes generally include 8.5×11 inches and 5.5×8.5 inches. The European standard measures often use formats like A4, A5, and A6.
A magazine's size is measured by its width and height in inches or millimeters. These measurements are typically established in the initial stages of design and layout.
We know your time is precious but when you come to prepare your artwork definitely take 5 minutes to read through our step by step file set up pages. The illustrated guides make the process super easy and will answer 99% of the questions you may have.
One for the cover spreads, one for the inside pages. Easy.
The cover file will be two pages and will be your outer and inner cover spreads. To make things super easy we have a video tutorial and downloadable templates here.
Have a watch of this video then carry on down this page once you have prepared the cover spreads.
Your perfect bound cover PDF has 2 pages:
Page 1 is the outer cover spread with the back cover on the left, the correct spine size through the middle and the front cover on the right.
Page 2 is the inside front cover on the left, a blank area through the middle for the width of the spine (this is where we bind on your inside pages so ideally this area will be left white). The inside back cover is on the right.
The inside pages are a lot easier and are one file supplied as single pages in reading order. The first page of this file is the first right hand page of your book. The running order of your book is: front cover, inside front cover then the first right hand page.
It might be easier to design your work as spreads, so when you come to export it from InDesign to pdf, choose Pages and InDesign will work it's magic.

We do need 3mm bleed on the edges of your pages. When you come to prepare your artwork for print and before you send it to us, watch this video which shows how to add bleed and why we need it. We won't go to print without the bleed so adding it from the start saves time.
Your export settings in Adobe InDesign should look like this.
Three things to notice:
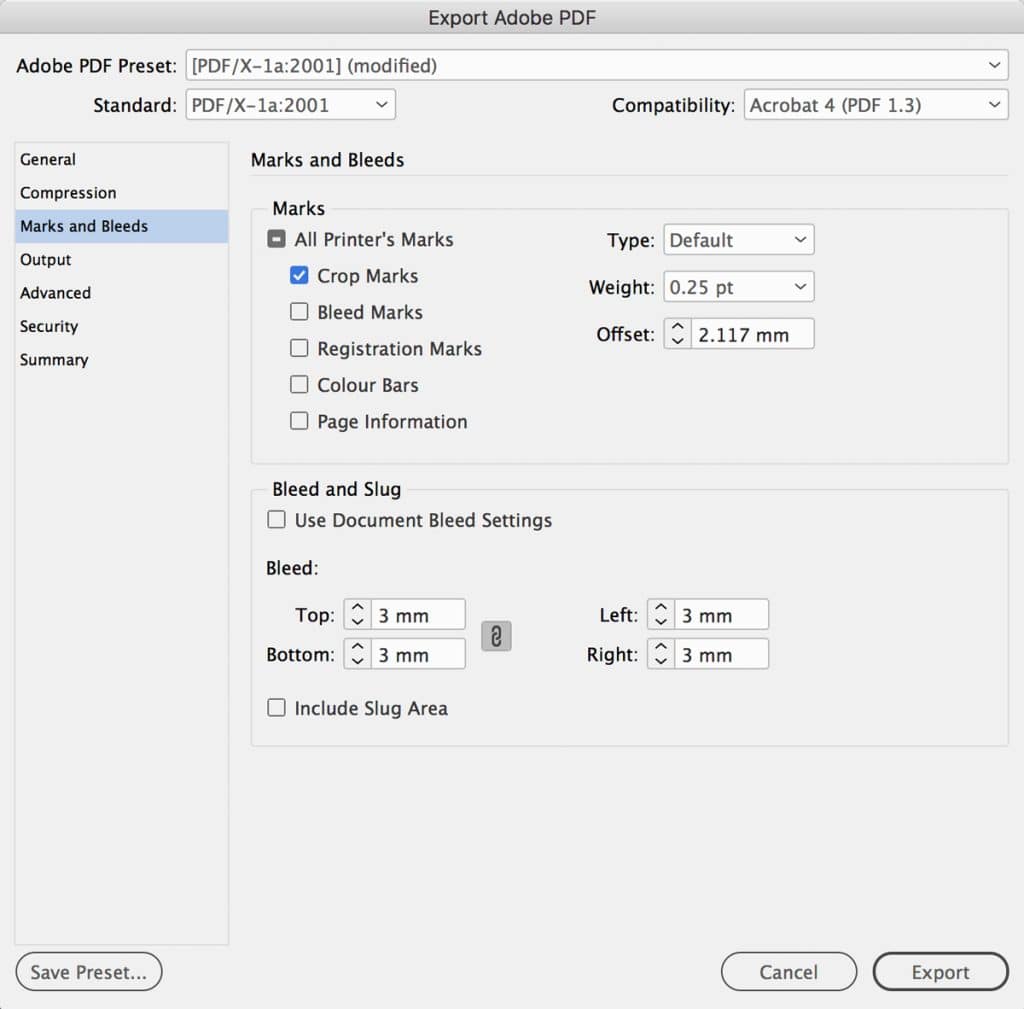
Ideally, your file will be saved as PDFx1a:2001 when exported. If this is not available, do just choose the best quality output possible. You can select this from the top drop-down menu when you export to PDF.
[We just need a PDF so use your personal favourite design program]
All of our website's guides on file set-up are for Adobe InDesign which you can get on a one-week free trial. However, as long as you can export your finished work to a high res pdf, do feel free to use your favourite program. Other options are Affinity Publisher, Quark Express, Illustrator, and even Word or Publisher. The same principles and guides still apply when preparing your layout. Canva is a possibility too but is primarily for digital design that will be used on website and on screen, rather than in print.
So, you don't need to have InDesign to send work to print with us, as long as you can send us a high quality pdf then we can print for you. The export setting will be different depending on which program to use but always choose 'High Quality' or 'Maximum' to ensure the work is crisp and in focus when printed.
If you are an Art Student then learning InDesign now will add an extra string to your bow and additional asset on you C.V for when you go to find a job after Uni.
If you cannot set up your artwork, do ask. We have a wealth of print knowledge and if it is a simple fix to make your files print ready, we will do our best to help.
If you have never printed anything before and this all sounds like a foreign language, don’t worry, remember we are here to help on email, phone and live chat. If it is out of office hours then all of the answers are all in the Resource section on our website too.
A great reading experience goes beyond a gripping plot or groundbreaking research—it's also about quality. The process behind binding plays a crucial role in this, with Perfect Binding being one of the most popular techniques for its durability and sleek finish. Favored by authors, businesses, and organizations alike, this technique ensures a professional look at an affordable price.
From business reports to product brochures, Perfect Binding is the method behind many well-presented materials. Let’s dive into how this efficient and versatile process transforms a simple manuscript or design into a polished, ready-to-use product.
Perfect Binding, also known as softcover novel binding, is a popular way to create sleek, professional-looking books. It involves clamping and gluing the interior pages at the spine before wrapping them in a soft cover. Once the glue sets, the edges are trimmed for a crisp, clean finish—hence the name “perfect” binding.
If you've ever picked up a softcover book at a bookstore, chances are it was perfect-bound. These books have a square spine, a sturdy cover (usually made of thicker paper or cardstock), and often a glossy coating for extra durability.
This binding method isn’t just for novels. Businesses and organizations also use perfect binding for reports, catalogs, manuals, and magazines because it looks polished and is cost-effective. Whether you're publishing a book or printing marketing materials, perfect binding offers a great balance of quality and affordability.
If you want more insights on perfect binding options, please check out Ex Why Zed binding options here.
Perfect Binding may seem simple, but its success lies in the careful selection of three essential components that work together to create a polished, durable finished product. Let’s break it down:
Pro-tip- Check out the highly detailed guidelines related to Perfect Binding offered by Ex Why Zed to better understand the process and how to ace it.
Like any other binding method, perfect binding has its own benefits and limitations. We'll explore them below.
Perfect Binding isn’t just about making books look good—it offers a host of practical benefits for both publishers and readers. Here’s why this binding method is a game-changer:
By combining cost efficiency, flexibility, and visual appeal, Perfect Binding ensures a superior experience for both publishers and readers. Whether you’re creating a small run of custom reports using tools like InDesign or launching a new book, this binding method helps you deliver quality without compromise.
Make sure you reach out to a trusted publishing house like Ex Why Zed, which has a quote request form available to explore efficiency and cost-effectiveness in the publishing industry.
While Perfect Binding is an excellent choice for many projects, it does have some drawbacks and it's not without its challenges. Here’s what you need to keep in mind before choosing this method for your book or publication:
Despite these challenges, Perfect Binding remains a reliable and versatile option for many publishing needs. Understanding its limitations allows you to make more informed decisions and choose the best method based on your specific project requirements.
The first and most crucial step in perfect binding is preparing the book block—the collection of pages that make up the book. The pages are gathered flush at the spine and held securely, usually with clamps. Then, a guillotine or manual knife is used to trim the spine edge, and squaring the page edges, ensuring it’s square and aligned.
For a clean, professional look, the spine must be perfectly straight. Any misalignment here can lead to uneven edges once the binding process begins. Think of it like framing a picture—you need precision to make the final product shine.
In high-output settings, machines take over this task, quickly and accurately cutting the spine edge. Once the book block is properly prepared, it’s ready for the next key step.
The choice of adhesive is crucial in perfect binding as it determines how resilient your book will be and how long it will last. Generally, Polyvinyl Acetate (PVA) or Polyurethane Reactive (PUR) glue is a popular choice among bookbinders due to its excellent adherence and flexibility. This key feature prevents the pages from cracking at the spine when the book is opened.
|
Criteria |
PVA |
PUR |
|---|---|---|
|
Adhesion |
Strong |
Very strong |
|
Flexibility |
High |
Very high |
|
Cure Time |
Short |
Moderately long |
Beginning from the middle to each outer edge, a paste brush is used to spread the glue evenly. After the initial coat, it is allowed to dry for about 5-10 minutes. For modest spines, two or three more coats are sufficient. For hefty ones, four to five additional coats might be required.
After the adhesive is applied, the cover is attached—a crucial step in determining the final look of your book. Many publishers opt for heavier cardstock or paper, often with a satin, glossy, or textured finish to give the book an extra touch of appeal.
To ensure the cover fits perfectly, pre-scored lines are made on either side of the spine, which helps the cover bend easily and align correctly. The spine of the cover is then pressed evenly against the still-wet glue of the book block. After a minute or two, remove the clamps.
The pre-scored lines allow the front and back covers to fold into place smoothly. Once aligned, apply even pressure using weights or a book press to ensure the cover dries flat and secure. This step guarantees a polished, professional finish—like the final touch of a masterpiece before it’s ready for the shelf.
The book cover often serves as a reader's first introduction to the content inside, making it a vital part of perfect bound book creation.
When it comes to perfect-bound books, the cover is everything. It’s the first impression, and it needs to grab attention while still being clear and easy to read. Here’s how layout and typography come together to create that perfect cover:
When layout and typography come together just right, they’ll create a cover that not only looks good but also captures the essence of your book, drawing readers in.
Designing a perfect-bound book cover is part art, part science. Here are some key principles to keep in mind to make your cover stand out:
When these principles come together, you’ll have a cover that grabs attention and perfectly represents your book’s content!
The paper and cover stock you select can make or break your perfect-bound book. Here’s what to keep in mind:
Choosing the right paper and cover material is key to creating a book that’s not only visually stunning but also pleasant to hold!
Ready to turn your book idea into a stunning reality? At Ex Why Zed, we specialize in premium book printing, offering customized solutions to perfectly fit your needs. From eye-catching hardbacks to professional softcovers and unique coffee table books, we’ve got you covered.
Choose from eco-friendly options, premium finishes, and critical attention to detail to ensure your book makes a lasting impression on your readers. We’re here to help you create a standout piece that reflects your vision perfectly!
Email us at hello@exwhyzed.com to get in touch!
Perfect Binding is a reliable, cost-effective method that gives books a professional and polished look. While it has some limitations, the perfect binding method's durability, versatility, and affordability make it a top choice for publishers, businesses, and self-published authors. By selecting the right materials and adhesive, you can ensure a high-quality final product. If you're considering Perfect Binding for your next project, working with an experienced printer like ExWhyZed can help you achieve the best results.
Perfect binding is widely used for a variety of publications. These include softcover books such as novels and biographies, corporate reports, manuals, catalogs, and thicker product brochures. Its professional appearance and cost-effectiveness make it a popular choice in the publishing industry.
The durability of perfect binding can significantly vary based on factors like the quality of the adhesive used and the handling of the book. However, with the use of strong adhesives like PVA or PUR binding glue, perfectly bound books can be quite durable and long-lasting.
Typically, perfect bound books do not lay flat when opened. This is due to the strong adhesive used at the spine which keeps the pages securely bound. Hence, perfect binding might not be the most suitable choice for books that need to lay completely flat, such as cookbooks or art books.
Have you ever run your fingers across the embossed title of a beautiful hardcover book and felt that unmistakable thrill? That moment when a story transcends digital pixels to become something you can hold, cherish, and pass down through generations? At Ex Why Zed, we don't just print books—we transform creative visions into tangible treasures that readers can fall in love with page after page.
The publishing landscape has been democratised, placing unprecedented creative control in your hands. No more compromising your vision to fit a publisher's mold. Our eye-opening exploration of the pros and cons of self-publishing reveals how this path grants you not just creative sovereignty, but direct connection with your audience. We don't shy away from the challenges either—from marketing hurdles to distribution logistics—equipping you with clear strategies to overcome each one so your story reaches precisely who it needs to.
In a world of fleeting digital content, printed books offer something increasingly precious: permanence. Our deep dive into storytelling through print explores how the weight of paper, the texture of a cover, and even the sound of turning pages creates an immersive experience digital formats simply cannot replicate. Discover how thoughtful design choices and quality materials transform reading from a mere activity into a multi-sensory journey that readers won't just remember—they'll revisit again and again.
What once seemed like an intimidating technical maze becomes an empowering creative adventure with the right guide. Our meticulously crafted step-by-step guide to printing your book eliminates confusion and builds confidence at every stage. From preparing your manuscript for professional printing to selecting finishing touches that make your book unmistakably yours, you'll move through each phase with clarity and purpose—no publishing degree required.
Dive into our curated collection of real-world print projects—each analysed to reveal the techniques, materials, and decisions that made them exceptional. Whether you prefer watching videos or reading articles, this resource hub empowers your printing journey with practical insights from diverse specialist niches, helping you envision and achieve your own remarkable printed piece.
Dive into Self Published book options or grab some popcorn and watch the Self Published Book showcase video instead on our YouTube channel.
The dimensions, format, and physical characteristics of your book are not mere technical decisions—they're powerful storytelling tools. Our accessible breakdowns in book sizes made easy and book format: a beginner's guide translate industry jargon into clear choices that enhance your narrative. Whether you're creating a pocket-sized poetry collection or a coffee table art book, you'll understand exactly how your book's physical form can amplify its emotional impact.
Creating professional booklets requires a specific expertise in page arrangement that can make or break the reader's experience. Our visual tutorial on how to arrange pages for booklet printing transforms this technical challenge into an intuitive process. With clear examples and practical tips, you'll master the structural elements that ensure your booklet flows naturally, impressing readers with its professional polish.
The sleek spine of a perfectly bound book signals quality before a single word is read. Our streamlined guide to mastering perfect bound artwork in 5 minutes distills years of professional knowledge into actionable steps anyone can follow. Learn the precise file setup and design considerations that result in books that not only look professional on a shelf but maintain their integrity through years of reading and sharing.
Your carefully crafted PDF contains a world waiting to be experienced in three dimensions. Our practical article on how to print a PDF as a book ensures nothing is lost in translation during this critical transformation. Follow our guidance to preserve every nuance of your digital creation as it becomes a physical reality that readers can experience with all their senses.
Behind every successful self-published author stands an arsenal of carefully selected tools that amplify their creative capabilities. Our curated collection of top self-publishing tools for success introduces you to platforms and resources that handle everything from professional editing to global distribution. These tools don't just streamline your workflow—they elevate your entire publishing journey, allowing your creative genius to shine without technical frustrations.
Understanding the financial landscape of book printing empowers you to make choices that honor both your vision and your budget. Our transparent analyses of how much it costs to print a book and how much a custom hardcover book costs provide the clarity needed for confident decision-making. We break down every expense category, reveal potential savings opportunities, and help you invest wisely in elements that truly enhance your book's value to readers.
The journey from manuscript to masterpiece is one of the most rewarding creative adventures you'll ever undertake. At Ex Why Zed, we walk beside you not just as service providers, but as fellow book lovers who understand the profound significance of what you're creating.
Every page we print carries not just ink, but ideas, emotions, and experiences that will touch lives in ways neither of us can fully imagine. That's why we approach each project with reverence for your vision and commitment to exceptional craftsmanship.
Your book isn't just another product rolling off our presses—it's the culmination of your creative journey, and the beginning of countless reading journeys to come. Let's create something extraordinary together that will find its way into hands, hearts, and bookshelves for generations.
Ready to transform your manuscript into a masterpiece? Explore our resources, reach out with questions, or take that exhilarating first step toward holding your book in your hands. Your readers are waiting.
Ever wondered what keeps the pages of your favourite zine beautifully intact? It's the magic of binding, a vital aspect that often goes unnoticed. A well-bound zine not only looks visually appealing but also offers an enriched reading experience. Learn more about Zine Printing.
It's more than just gluing or stitching together the pages; it's about maintaining the aesthetic integrity of your zine. A neat and strong binding ensures that your zine withstands the test of time and frequent handling. Now, doesn't that sound important?
Just as there are many zines, there are multiple ways to bind them. From saddle stitching to wire binding, spiral binding to perfect binding – there's a whole world of techniques out there! But hey, ever heard of perfect binding? Well, it's something quite special!
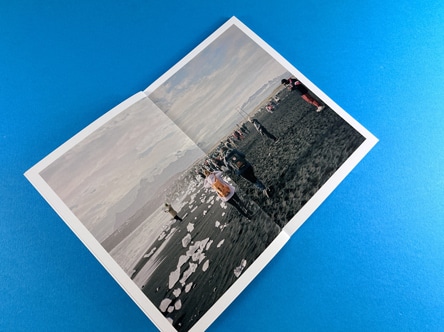
Perfect binding is like the hidden gem in the world of zine binding techniques. It's packed with advantages that give it an edge over the others. Intrigued yet? Let's dive in!
Contextual Impact on Zine Aesthetics.
You know, perfect binding is like the sleek, black suit of zine binding. It lends your zine a high-end, sophisticated vibe that other binding methods might find hard to match. If you're looking to create a zine that's professional or just want it to be super polished, perfect binding could be your perfect match.
Comparison with Wire Stitching.
Perfect binding is like the marathon runner of zine bindings. Where wire stitching breathes heavy at 40 pages, perfect binding keeps going, all the way up to 300-400 pages! If you're dreaming of a thick zine or a bookazine, perfect binding can make it come true.
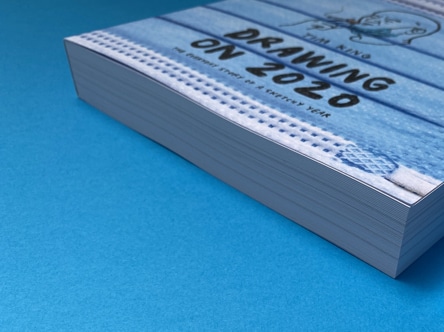
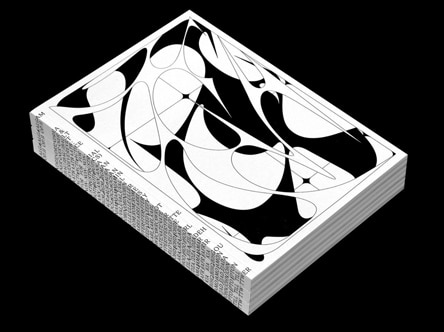
Tackling Bounce and Curling: Perfect Binding vs. Wire Stitching.
There's nothing more annoying than when the pages of your zine start curling, right? Luckily, perfect binding swoops in like a superhero here! It ensures a neat bind, reduces bounce and curling, making the read more enjoyable and hassle-free. It's like enjoying a sunny day in the park without the pesky flies.
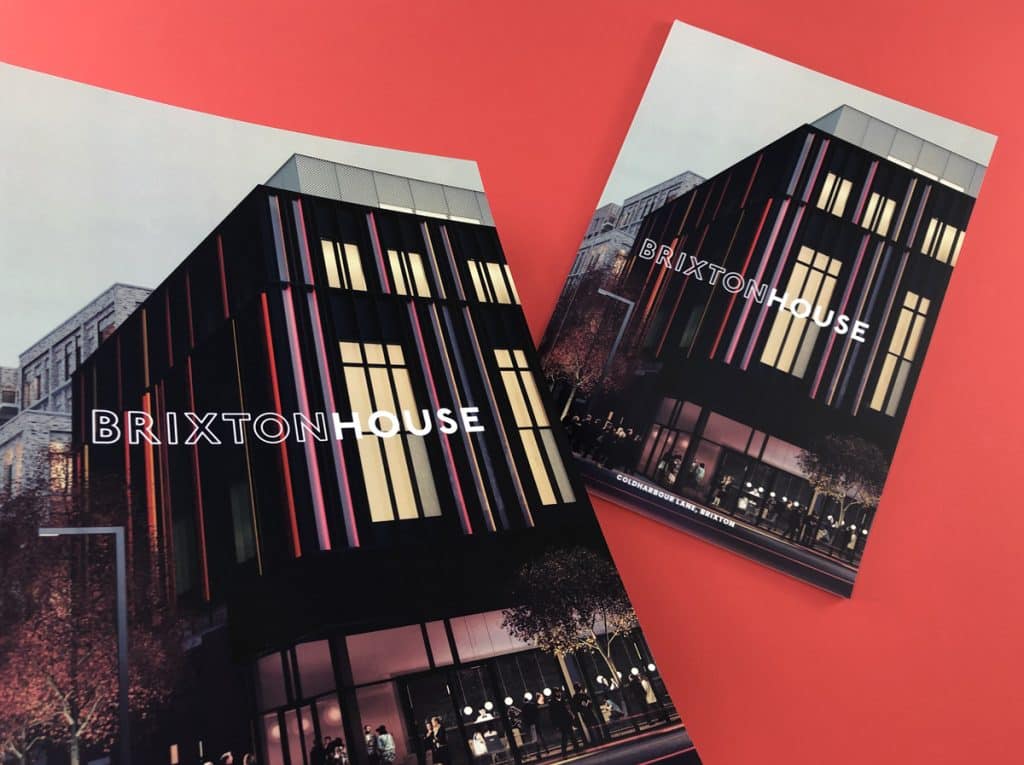
This example here looks super cool with the huge width of the spine acting as a vehicle to wrap text around.
Perfect binding seems to be ticking all the right boxes, doesn't it? From a professional appearance to accommodating more pages and improving reader's experience, it's all here!
Perfect binding is not just about looks, but it’s also about practicality. This technique uses less space, which means more information can be packed into your zine. You know what they say – the more, the merrier!
Whether you're creating a comic zine, a literary journal, or a fanzine, perfect binding is your go-to technique. It's like the all-rounder of your cricket team, always ready to play its part!
At the end of the day, the binding choice depends on your zine's content, purpose, and your personal preference. But if you're looking for a technique that offers a sleek appearance, accommodates more pages, and enhances the reader's experience, perfect binding is worth considering. Remember, the right binding can make your zine perfectly delightful!
What is perfect binding?
Perfect binding is a technique that involves gluing the pages together at the spine to create a flat edge, often seen in paperback books.
What is the main advantage of perfect binding?
Perfect binding gives a zine a professional look, allows for a higher page count, and provides a neat bind that enhances the reader's experience.
Is perfect binding suitable for all zines?
While perfect binding has many advantages, its suitability depends on the zine's purpose, content, and the creator's preferences.
How does perfect binding compare to wire stitching?
Perfect binding can accommodate more pages and offers a cleaner bind with less bounce and curling compared to wire stitching.
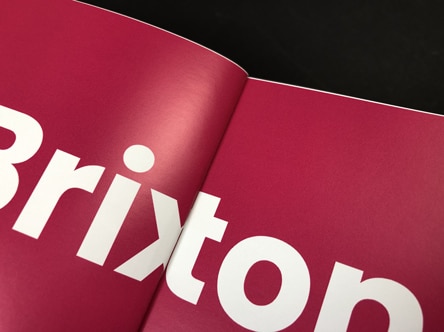
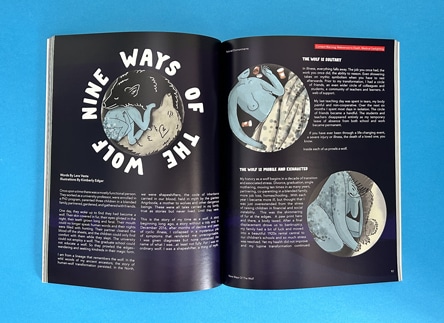
With perfect binding, you do lose 2-3mm on the spine side of the pages unless you force the pages down. On the example here you can see the spine gutter has 'swallowed' some text and made the word 'Brixton' hard to read.
Does perfect binding affect the zine's longevity?
Yes, a perfectly bound zine can withstand frequent handling and lasts longer than many other binding methods. The PUR glue we use is super strong.
Discover more about our projects here: ExWhyZed Portfolio
Our perfect binding set-up guide can be found here: ExWhyZed Perfect Binding Guide
When it comes to zine production, the binding method you choose can significantly impact the final product's look and feel. One popular method for binding zines, particularly those with a higher page count, is perfect binding. This method offers a neat, professional finish that can elevate your zine's aesthetic which can command a higher cover price and allow you scope for more content within. In this post, we'll delve into the world of perfect bound zines, exploring the design considerations, binding process, and technical tips you need to know.
Perfect binding is a method commonly used in Bookazine printing and for zines with 36 pages or more. This method involves trimming the inside pages into a text block, roughening up the left-hand edges, applying glue, and then wrapping a continuous cover around the text block. The result is a neat, professional-looking zine with a flat spine.
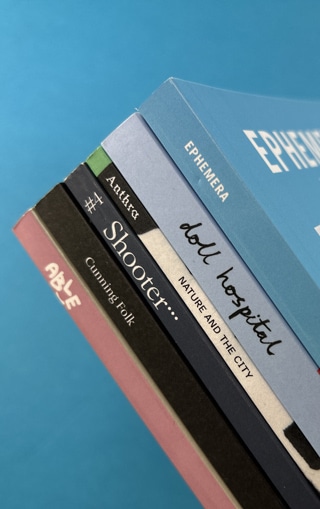
Perfect binding offers several advantages that make it an appealing choice for zine creators. You've all seen Little White Lies, Shooter and Moof, they are all perfect bound. Firstly, it provides a more high-end, professional look compared to other binding methods. This can be particularly beneficial if you're creating a zine for a professional context or if you're aiming for a more polished aesthetic.
Secondly, perfect binding allows for more illustrations, photography and poetry self-publishing and creative writing to be packed in. While wire stitching is suitable for zines with up to 40 pages, perfect binding can accommodate monster zines with up to 300-400 pages. This makes it an excellent choice for more substantial zines or Bookazines.
Finally, perfect binding creates a neat bind, with less bounce and curling on the inside pages compared to wire stitching. This can enhance the reader's experience, making your zine easier and more enjoyable to read. If your spine is 4mm or thicker there's even room to add your title, issue number and attention grabbing call to action.
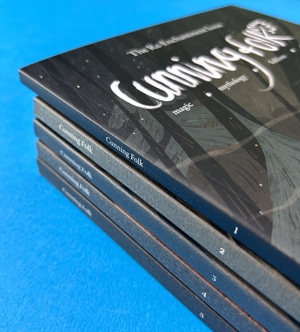
When designing a perfect bound zine, there are several key considerations to keep in mind. One of the most important is the page count. Perfect binding is best suited to zines with a minimum of 36 pages. This ensures that there is enough thickness in the text pages for the glue to hold effectively. Attempting to perfect bind a zine with fewer than 36 pages can result in the pages pulling out, as there is not enough glue to hold them in place.
Another crucial consideration is the cover weight. Because of the amount of glue used in perfect binding, the cover needs to be resilient. We recommend a minimum of 200gsm for the cover. Anything thinner, and the glue may seep through, compromising the binding's effectiveness.
When you come to create your perfect bound zine cover file, check out our dedicated page with super helpful video and illustrated guides plus downloadable InDesign templates to save you some head-scratching.
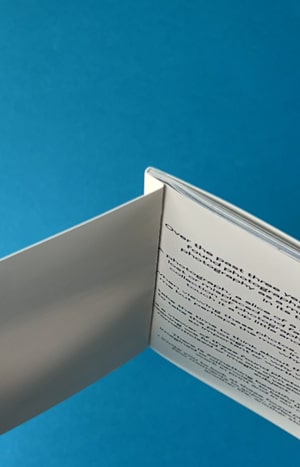
Finally, it's important to allow for a 6-8mm hinge on the front and back cover. This ensures that the cover opens neatly and falls flat again. You'll also need to allow for 6-8mm being lost on the inside front cover and the inside back cover, as well as the first 6-8mm on the spine side of your first and last text page. This area will be obscured by the glue, so it's important to keep any important content at least 10-12mm away from this side of the page.
You can actually see on our example here that the text starts too close to the 6-8mm area and it is very nearly hidden.
Text pages onto 120gsm Uncoated
36pp to 44pp Text = 3mm spine
(ie: if you have 40 pages then you need a 3mm spine)
48pp to 60pp Text = 4mm spine
64pp to 72pp Text = 5mm spine
76pp to 88pp Text = 6mm spine
92pp to 100pp Text = 7mm spine
104pp to 116pp Text = 8mm spine
120pp to 132pp Text = 9mm spine
200pp Text = 14mm spine
Text pages onto 130gsm Silk
36pp to 40pp Text = 2mm spine
44pp to 56pp Text = 3mm spine
60pp to 76pp Text = 4mm spine
80pp to 92pp Text = 5mm spine
96pp to 112pp Text = 6mm spine
116pp to 128pp Text = 7mm spine
200pp Text = 11mm spine
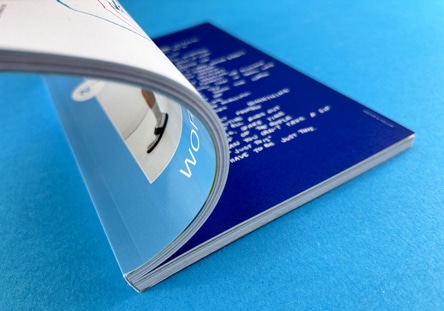
When you come to set up the inside pages, lets keep the key information at least 5mm from the trim edges of the page. On the spine side of the page, 2-3mm tends to be slightly obscured unless the reader really force the pages flat. This isn't a user friendly way to read a book so best to start content on the spine side of the pages at least 8-10mm in. Our image here shows the spine gutter area and you can see the central section is tough to fully read.
This is an example of a superb page layout for a perfect bound book. The text is neatly organised into columns which sit well within the constraints of the page's parameters. The reader does not have to work hard to read the article and it is punctuated with awesome graphics and subtle page numbers in the bottom, outer corners.
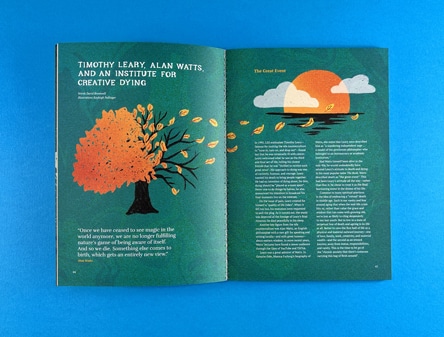
Perfect binding offers a world of possibilities for zine creators. This binding method allows for a wide range of designs and layouts, providing a canvas for your creativity and imagination. Whether you're creating a personal zine or a professional publication, perfect binding can help bring your vision to life.
For more information on perfect binding and other binding options, check out our Perfect Binding Setup Guide and our Binding Options page on our website. These resources provide detailed instructions and illustrated guides to help you prepare your zine for perfect binding.
For a visual guide to perfect bound zines, check out our YouTube videos:
The best binding for a zine depends on several factors, including the page count, the aesthetic you're aiming for, and your budget. Perfect binding is a great option for zines with a higher page count and a more professional aesthetic.
Perfect bound binding is a method that involves trimming the inside pages into a text block, roughening up the left-hand edges, applying glue, and then wrapping a continuous cover around the text block. The result is a neat, professional-looking zine with a flat spine.
You will upload your print ready pdfs to Ex Why Zed. One for the cover spreads and one for the inside pages. We will then give your artwork a preflight check and report back any issues to be ironed out. We strive for perfection in the artwork before we eve consider printing.
When it comes to binding zines, perfect binding emerges as the superior choice. This method bestows your publication with a polished, professional appearance that sets it apart from the rest. It not only accommodates a larger number of pages but also imparts a sturdy bind that stands up to the test of time and use. In contrast to other binding techniques, perfect binding presents a more refined, sophisticated aesthetic, elevating your zine to a higher level of professionalism.
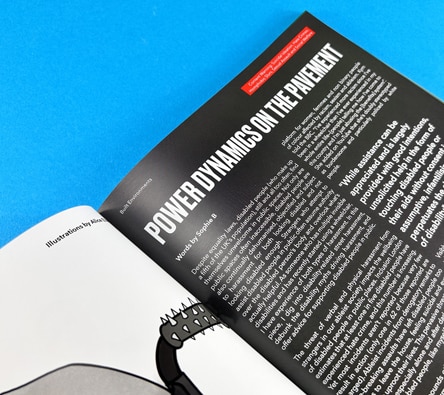
Perfect binding is characterised by its neat, flat spine, its resilience and its professional, high-end appearance. This method is also recognised for its capacity to hold a greater number of pages than alternative binding techniques.
Features of perfect binding include a flat spine, a continuous cover that wraps around the text block, and a 6-8mm hinge on the front and back cover. This binding method also requires a minimum of 40 pages and a cover weight of at least 170gsm.
The two main types of binding for a zine are wire stitching and perfect binding. Wire stitching, also known as stapling, is suitable for zines with up to 40 pages. Perfect binding, on the other hand, is best for zines with a higher page count.
Perfect binding offers a world of possibilities for zine creators, providing a canvas for your creativity and imagination. Whether you're creating a personal zine or a professional publication, perfect binding can help bring your vision to life. With its neat, professional finish and ability to accommodate a higher page count, perfect binding is an excellent choice for your next zine project.
For more information on perfect binding and other zine printing options, don't hesitate to contact us at Ex Why Zed. We're always here to help you bring your creative projects to life.