Saddle stitch binding is a cost-effective, efficient choice for small print runs.
The binding method uses folded sheets secured by wire staples along the central crease.
It works best for documents with fewer than 64 pages, such as brochures and comic books.
Saddle stitch binding offers a clean, professional look without the need for adhesives.
The process ensures quick turnaround times, making it ideal for urgent projects.
This method allows printed materials to lie flat, enhancing readability and usability.
Saddle stitch binding is perfect for budget-conscious creators needing fast, professional results.
Ex Why Zed offers expert guidance, quick turnaround, and eco-friendly materials for saddle stitch binding.
When it comes to printing projects, one of the biggest challenges is choosing the right binding method. You want your printed materials, whether it's a brochure, magazine, or event programme, to look polished and professional, but at a price that fits within your budget. The wrong binding choice can compromise the overall quality, or worse, exceed your project's financial limits.
Saddle stitch binding is often overlooked, yet it is one of the most cost-effective and functional binding methods. It's perfect for smaller page-count documents, providing a sleek finish without the high costs of other binding techniques. But understanding when saddle stitching is appropriate and how to get the best out of it can make all the difference in the final result.
This blog will break down everything you need to know about saddle stitch binding, from its benefits to the best use cases, helping you make the right choice for your project. Let's dive into why saddle stitch binding could be the smart solution you've been looking for!
What is Saddle Stitch Binding?
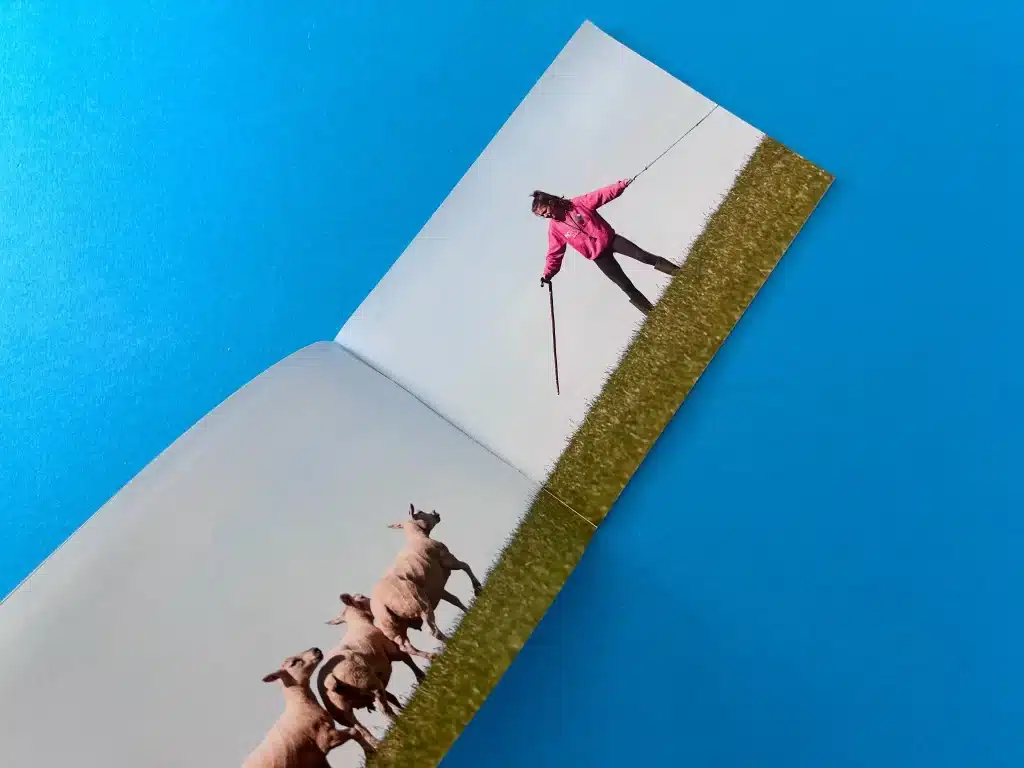
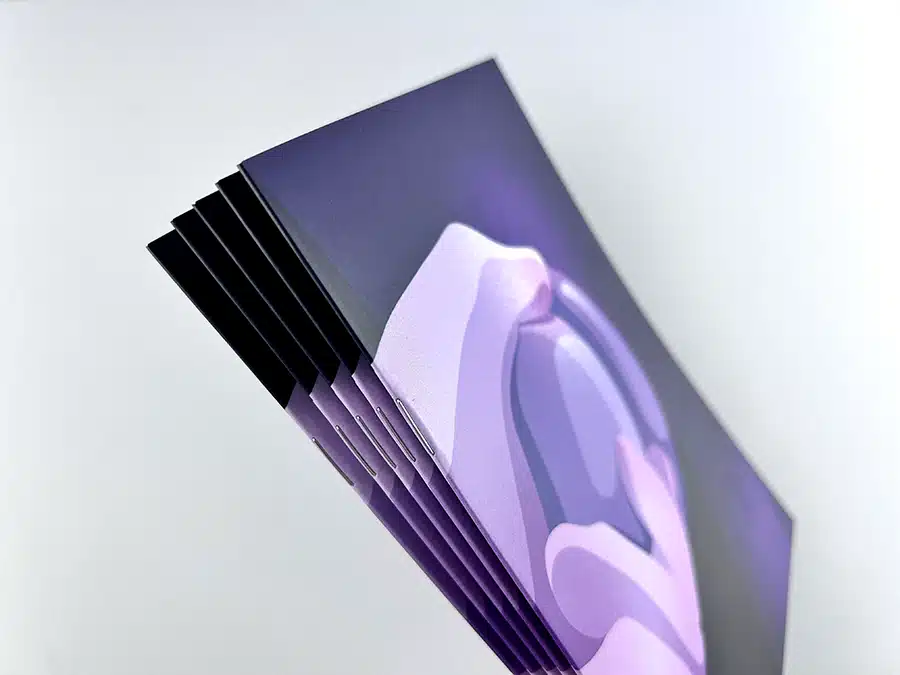
Saddle stitch binding is a simple yet effective method used to bind booklets, brochures, and other printed materials. It involves folding sheets of paper in half and stacking them inside one another, forming a booklet. The sheets are then stapled along the centrefold, creating a secure and neat spine.
The name "saddle stitch" comes from the way the folded sheets are placed over a saddle-like fixture during the binding process. Wire staples are then driven through the fold and clinched, ensuring the pages stay firmly in place. This method provides a clean, flat spine and allows the book to open fully, which is ideal for projects that require easy readability.
What is the Difference Between Saddle Stitch and Perfect Binding?
When deciding between saddle stitch and perfect binding, it's important to understand the distinct characteristics of each method. Both offer professional finishes, but they are better suited for different types of projects. The choice often depends on the document's page count, durability needs, and desired aesthetic.
To help clarify the differences, here's a comparison table:
Feature
Saddle Stitch Binding
Perfect Binding
Binding Process
Pages are folded and stapled along the centrefold.
Pages are stacked, glued along the spine, and attached to a flexible cover.
Best For
Small to medium-sized booklets with fewer pages.
Larger books, manuals, or catalogues with more pages.
Page Count
Suitable for 64 pages or fewer.
Ideal for documents with 40-60 pages or more.
Durability
Lightweight, but may not last as long with frequent use.
Offers stronger durability for long-term storage and handling.
Appearance
Simple, clean finish, but lacks a spine for printing.
Sleek, professional finish with a printable spine.
Cost
More cost-effective, especially for smaller runs.
Higher cost due to adhesive and additional steps.
What are the Advantages of Saddle Stitch Binding?
Saddle stitch binding is a simple, efficient, and affordable way to bind documents. Whether for business or personal use, this method offers a range of benefits that can suit many projects. Let's dive into the advantages of choosing saddle stitch binding.
Here are the main advantages:
Cost-Effective: Saddle stitch binding uses fewer materials and less labour, making it one of the most budget-friendly options available. This is especially advantageous for smaller print runs, where you can achieve professional results at a lower cost.
Quick Turnaround: The process is simple, which means projects are completed quickly. If you're working with a tight deadline, saddle stitch book binding is an excellent choice, offering faster production times compared to other methods.
Lightweight: Books and brochures bound with saddle stitch are lightweight, making them easy to handle, ship, and distribute. Whether you're printing event programmes or company brochures, this method ensures your printed materials are portable and user-friendly.
Professional Finish: Despite its simplicity, saddle stitch binding provides a clean and polished look, ideal for brochures, magazines, and small catalogues.
Flat Lay Opening: Saddle stitch binding ensures that your booklets lay nearly flat when opened, making them perfect for workbooks, manuals, or guides. This functionality is ideal for publications that require easy handling and readability, especially for instructional content.
Durability for Smaller Runs: While it's great for small to medium-sized runs, saddle stitch binding also provides lasting durability. With Ex Why Zed, you can trust that your short-run projects will withstand daily use without compromising on quality.
Ready to get started? Contact us today for a personalised quote and quick, professional saddle stitch binding for your next project!
What is the Maximum Page Limit for Saddle Stitch Binding?
When it comes to saddle stitch binding, the number of pages plays a crucial role in determining whether this method is suitable for your project. Saddle stitch is perfect for thinner booklets with fewer pages, typically ranging from 8 to 64 pages, depending on paper thickness.
However, as the page count increases past the saddle stitch binding maximum pages, the booklet may start to show signs of "creep," where the inner pages extend further out than the outer pages. This happens due to the folding process, which causes misalignment when too many pages are added.
What are the Essential Materials and Tools for Saddle Stitch Binding?
To create a successful saddle stitch binding, having the right materials and tools is crucial. Whether you're a beginner or experienced, choosing the right supplies ensures a smooth process and a professional final product. Let's take a look at the essentials.
Here's what you'll need:
Printed Sheets of Paper: The primary material required for saddle stitch binding is your printed sheets. You'll need to arrange and fold these sheets precisely to create your booklet. Always ensure you choose high-quality paper for the best results, such as the options available at Ex Why Zed.
Staples or Thread: For the binding itself, wire staples are the most common choice, but you can also use thread for a hand-bound finish. Wire staples are faster and more efficient, ideal for high-volume production, whereas sewing provides a handmade, artisanal touch.
Long-Arm Stapler or Stapling Machine: A long-arm stapler is essential for stapling the pages along the centre fold. Alternatively, for larger volumes, a stapling machine or booklet maker can save time and effort, delivering a consistent finish.
Bone Folder or Creasing Tool: A bone folder or creasing tool helps to fold the paper neatly and accurately, ensuring crisp, clean edges. This step is essential for creating a neat and professional-looking booklet.
Awl or Hole Punch: If you're using the sewing method instead of stapling, a small hole punch or awl will help create precise holes along the spine of the book. This tool is essential for hand-binding projects, ensuring the pages align properly.
Cover Material (Optional): If you're adding a cover to your project, select a durable material that complements your design. Ex Why Zed offers a variety of paper stocks, from standard to premium options, to give your booklets an extra touch of class.
How to Do Saddle Stitch Binding? A Step-by-Step Guide
Saddle stitch binding is a simple, cost-effective way to bind small to medium-sized booklets, magazines, and brochures. It's perfect for projects that require a quick turnaround and minimal equipment. Here's a step-by-step guide to help you get started.
Step 1: Prepare Your Pages and Cover
Arrange your pages in the correct order, folding each sheet in half to create a neat crease. If you're using a cover, fold it along with the interior pages to maintain alignment.
Step 2: Collate and Arrange
Once folded, stack your pages in the correct sequence, ensuring everything is aligned. Place the cover on top of the stack for a clean finish.
Step 3: Mark for Stapling or Sewing
Mark the spots where you'll staple or sew, ensuring they are evenly spaced along the spine. Use a ruler for accuracy and consistency.
Step 4: Staple or Sew the Pages
Use a long-arm stapler to staple through the centrefold or, for hand-binding, sew through the marked holes with strong thread. Make sure the binding is secure.
Step 5: Trim Excess Edges
Trim the edges of the booklet to ensure they are neat and even using a paper cutter or guillotine. This step is essential for a professional finish.
Step 6: Final Checks and Presentation
Inspect your finished booklet for any loose staples or uneven stitching, ensuring everything is securely bound. Your booklet is now ready for use or distribution!
For a professional, hassle-free finish, consider using Ex Why Zed's expert binding services. We'll ensure your project is completed with precision and speed. Contact us today to get started!
How Do You Get the Most Out of the Saddle Stitch Binding Method?
To get the best results from saddle stitch binding, planning and attention to detail are key. It's essential to think about page layout, paper thickness, and the overall finish. Here are some tips to help you maximise the effectiveness of the saddle stitch method:
Arrange Pages in Correct Order: Since saddle stitch binding uses folded sheets, ensuring the pages are in the correct sequence before folding is crucial to avoid confusion during assembly.
Use the Right Paper Weight: Choose a paper weight that fits the purpose of your booklet. Lighter weights (80gsm-120gsm) are best for smaller projects, while heavier weights (150gsm) work well for sturdier, more substantial booklets.
Ensure Precise Folding: A sharp, neat fold is key to a clean binding. Using a bone folder helps achieve a professional finish, ensuring that the pages align perfectly when folded.
Opt for Quality Staples: Strong, high-quality staples are essential for durability. Choose staples that can handle the thickness of your booklet to avoid breakage or loosening over time.
Test Before Final Print: Printing a test copy before committing to your full print run allows you to check the quality, design, and layout, ensuring the final product meets your expectations.
When you choose Ex Why Zed for your saddle stitch binding printing projects, you get expert support and premium materials. Order a test copy today to fine-tune every detail before committing to your full print run.
What Are the Common Applications of Saddle Stitch Binding?
Saddle stitch binding is a versatile and popular booklet binding method, particularly suited for smaller publications. Its affordability and simple production process make it a go-to choice for various applications. Here's where saddle stitch binding is commonly used:
Brochures and Pamphlets: Ideal for marketing materials, saddle stitch binding keeps brochures compact and easy to distribute while allowing them to lay flat for easy reading.
Comic Books and Magazines: Perfect for publications that need to open flat, making it ideal for comic books and smaller magazines where a professional yet lightweight finish is desired.
Event Programs: Whether for weddings, conferences, or performances, saddle stitch binding provides a cost-effective solution for programs that need to be produced quickly and distributed easily.
Newsletters and Catalogues: This binding method is widely used for short-run newsletters and product catalogues that are easy to read and handle, often used in corporate and retail settings.
Manuals and Workbooks: Saddle stitch binding is an excellent choice for creating easy-to-use workbooks and instructional manuals, providing a practical solution for educational materials.
Need saddle stitch binding for your next project? Order with Ex Why Zed for fast, professional results at competitive prices.
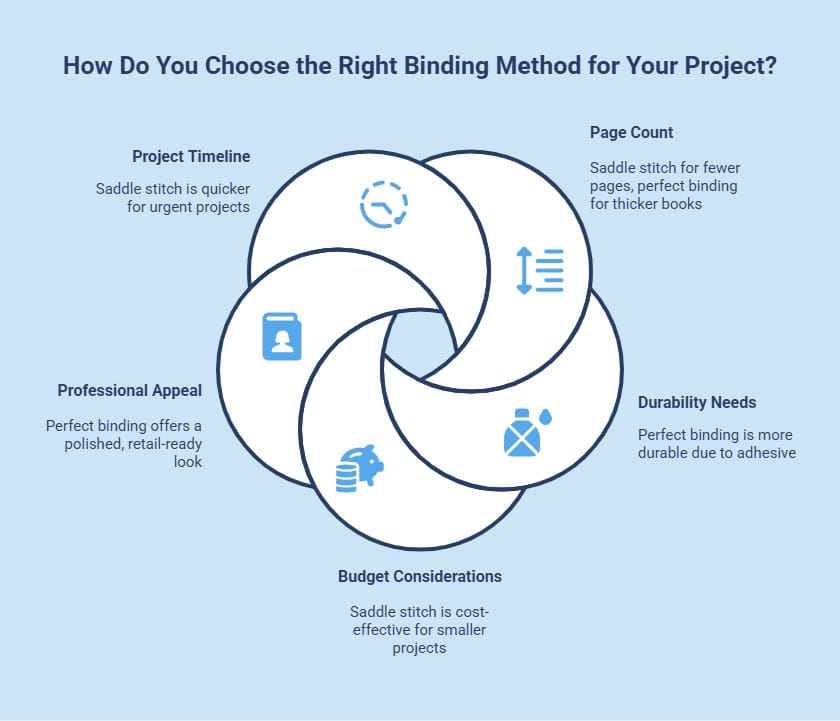
How Do You Choose the Right Binding Method for Your Project?
Selecting the right binding method is essential to ensure the final product aligns with your project's needs. The choice between saddle stitch, perfect binding, or other methods depends on various factors, such as page count, desired durability, and aesthetic appeal.
Here are key considerations to guide your decision:
Page Count: Saddle stitch binding is ideal for projects with 64 pages or fewer, while perfect binding is better suited for thicker books. For smaller, lighter projects, saddle stitching is a cost-effective solution.
Durability Needs: Perfect binding is typically more durable than saddle stitching due to the adhesive used to bind the pages together. If your project requires a long-lasting finish, perfect binding might be the better option.
Budget Considerations: If you're working within a budget, saddle stitch binding offers a low-cost alternative without compromising on quality. It's perfect for shorter runs and smaller projects like brochures or event programmes.
Professional Appeal: For books or catalogues that require a more polished, retail-ready look, perfect binding provides a sleek, professional finish with a printable spine. Saddle stitch is best for projects where functionality and affordability take precedence.
Project Timeline: Saddle stitch binding offers a quicker turnaround time, making it ideal for urgent projects. If you're on a tight deadline, the simplicity of the saddle stitch method can save time and ensure timely delivery.
For expert advice on choosing the best binding method for your project, Ex Why Zed can help you make the right choice based on your specific needs and requirements. Get in touch today!
Why Choose Ex Why Zed for Saddle Stitch Binding Solutions?
Ex Why Zed is your trusted partner for high-quality saddle stitch binding in the UK. With years of experience, we specialise in producing professional and durable booklets, brochures, and more, tailored to your exact needs.
We pride ourselves on our quick turnaround, with most orders ready in just 3 to 4 working days. Whether it's a small batch or a large order, we ensure timely and efficient delivery without compromising quality.
Customer satisfaction is our priority, and we offer a range of customisation options, from finishes to eco-friendly materials. Ready to bring your project to life? Contact Ex Why Zed today for a personalised quote!
Conclusion
Saddle stitch binding offers a perfect balance of affordability and professionalism for smaller print projects. Whether you're looking to produce brochures, event programmes, or comic books, this method ensures quick turnaround times and a clean, functional finish. Its simple yet effective process makes it the ideal choice for those on a budget without compromising quality.
Ready to bring your next project to life with saddle stitch binding? Take the first step towards creating your custom booklets by exploring your options today.
Frequently Asked Questions
Can saddle stitch binding be done at home by beginners?
Yes, saddle stitch binding is beginner-friendly. With minimal tools such as a long-arm stapler or needle and thread, you can create professional-looking booklets at home. Ex Why Zed also offers expert services for a polished finish.
Are there different methods to create saddle stitch binding?
Saddle stitch binding can be done with wire staples or hand-sewn thread. While staples provide a quick and efficient finish, sewing gives a more artisanal, handmade look. Both methods deliver a clean, functional result.
When should I choose saddle stitch binding over other methods?
Saddle stitch binding is ideal for projects under 64 pages. It's the most cost-effective binding method, making it a great choice for lightweight booklets like brochures, workbooks, or event programmes that need quick, budget-friendly production.
What types of book projects use Saddle Stitch Binding?
Saddle stitch binding is versatile and commonly used for smaller projects such as brochures, comic books, catalogues, event programmes, and newsletters. It offers a professional finish without the cost of more complex methods.
How to saddle stitch bind a book?
To saddle stitch bind a book, first fold your pages and align them. Then, staple along the crease using a long-arm stapler or sew with needle and thread. Trim excess edges for a neat finish, ensuring a clean, professional look.
What are the cons of saddle stitch binding?
Saddle stitch binding has page limitations, typically suitable for documents with fewer than 64 pages. It's not ideal for thicker publications, as it can cause "creep," making the booklet less neat and potentially weakening the spine.
Key Highlights
All you need is paper, scissors, and basic binding tools to create your first zine
Making zines at home costs under $10 and gives you complete creative control
From mini zines to photo zines, explore different types that suit your vision
Use free platforms like Canva or Google tools to design professional layouts
Zines are perfect for young adults and creators seeking authentic self-expression
Learn packaging and sharing strategies for zine fest events and online communities
Are you passionate about self-expression but frustrated with traditional publishing barriers? Creating your own zine is a great way to share your voice, connect with like-minded individuals, and dive into the vibrant world of DIY publishing.
Whether you're interested in making a mini slit and fold zine, a photo zine, or exploring different types of zines, this comprehensive guide will walk you through every step of the process, from that first folded piece of paper to distributing at your local zine fest.
Ready to transform your ideas into a tangible creation? Let's dive into the wonderful world of zine-making and discover how this accessible art form can become your perfect creative outlet.
What Is A Zine And Why Should You Create One?
So what is a zine? A zine is a small-circulation, self-published work that covers any topic you're passionate about. Originally emerging from fanzines in the 1930s, zines have evolved into a powerful medium for personal expression, activism, and community building. They're particularly popular among young adults seeking authentic ways to share their perspectives outside mainstream media.
Zines can be anything from poetry collections and political manifestos to art books and personal journals. The beauty lies in their accessibility; anyone with a sheet of paper and a pair of scissors can create one. This DIY ethos makes zines the perfect medium for first-time publishers and experienced creators alike.
What Types Of Zines Can You Create?
Zines come in many forms, and each type speaks to a different audience. Think about what you’re passionate about, who you want to reach, and how you’d like to distribute your work. Here are some of the most popular types:
1. Personal Zines
Often called “perzines,” these are diary-style zines where creators share personal stories, reflections, or experiences. They can cover anything from mental health journeys to memoir-style writing. Perzines build intimacy and connection with readers, making them perfect for community spaces and one-on-one trades.
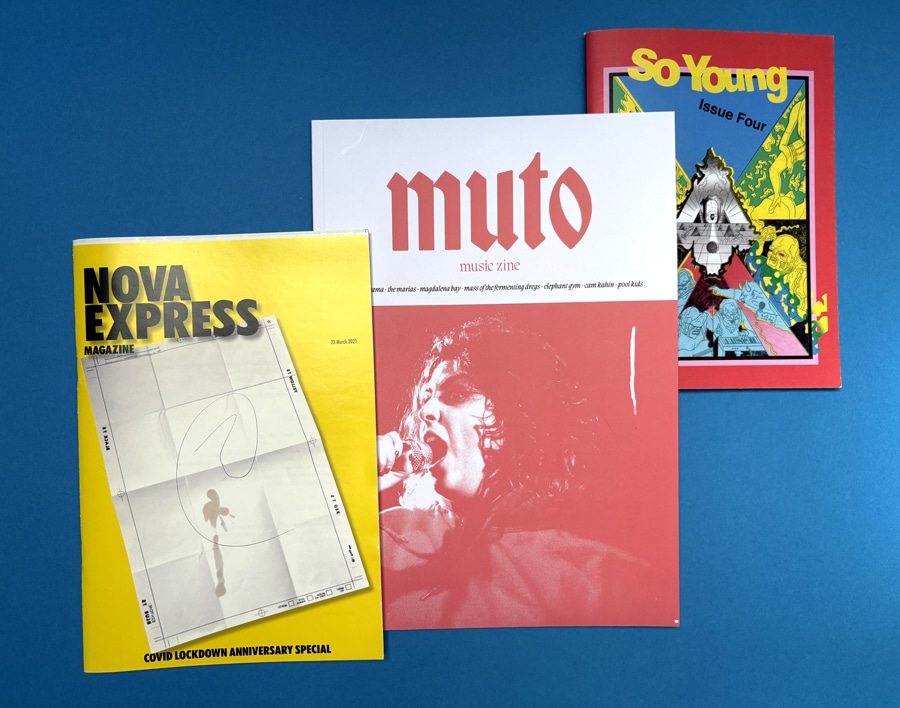
2. Art Zines
Art zines put visual creativity front and centre. They may showcase illustrations, photography, graphic design, or even experimental comics. Many artists use them as affordable, tangible portfolios. They’re great to sell at art fairs, zine fests, or online shops where visuals shine.
3. Political Zines
Rooted in activism, political zines often explore social justice issues, grassroots organising, or community movements. They’re designed to inform, inspire, and mobilise readers. These zines are typically distributed in activist spaces, protests, or community centres where their message can have the most impact.
4. Music Zines
Music zines document the energy of local or underground music scenes. They might include band interviews, gig reviews, or scene reports. Popular since the punk movement, they remain a key way to preserve subcultural history. Distribution often happens at concerts, record stores, or through mailing lists.
5. Literary Zines
Perfect for writers, literary zines focus on poetry, short fiction, or creative essays. They’re often collaborative projects, featuring work from multiple contributors. These zines appeal to readers who enjoy indie publishing and can be distributed at book fairs, writing workshops, or online platforms for readers.
6. How-To Zines
Educational and practical, how-to zines cover tutorials, guides, and skill-sharing. Topics can range from cooking and gardening to DIY crafts or self-care practices. They’re valued for their accessibility and community-minded approach. How-to zines are often exchanged at skill-share events, workshops, or online learning spaces.
What Materials Do You Need to Get Started?
The beauty of zine-making is its simplicity; you don’t need a big budget or fancy tools. With just a few basics (and some imagination), you can create something amazing.
Your Starter Kit
Think of these as the essentials to kick off your first zine:
Paper: Regular printer paper works perfectly for beginners.
Tools: Scissors, a ruler, and a stapler are all you need to bind your pages.
Writing Materials: Pens, pencils, or markers for doodling and writing.
Extras (Optional): Stickers, glue sticks, or colourful paper if you want to add flair.
Going Digital
Prefer a polished or modern look? Digital tools make zine-making even easier:
Free Tools: Google Docs or Canva; simple, intuitive, and perfect for beginners.
Advanced Software: Adobe Illustrator or InDesign if you’re ready to explore pro-level design.
Online Resources: Creative Commons images and fun fonts to experiment with.
Remember, the magic of a zine is in your content and creativity, not in expensive supplies. Start simple, focus on your message, and let your ideas shine.
How to Print Multiple Pages on One Sheet: Setting Up for Booklet Printing?
To create a booklet, you’ll need to print multiple pages on one sheet:
Use the Booklet Option: Most printers have a booklet feature that arranges pages for folding and allows you to print on both sides of the paper. Select this option in your printer settings.
Print in Spreads: Design your zine in spreads (two pages side by side). This will ensure proper alignment when folded.
Page Order: Ensure your software arranges the pages correctly. For example, in a 4-page zine, the first and last pages should be on opposite sides of the sheet.
Double-Sided Printing: Aligning Pages Correctly
Aligning pages is crucial for double-sided printing:
Check Printer Settings: Enable double-sided printing in your printer settings for automatic alignment.
Manual Double-Siding: If your printer doesn’t support automatic double-sided printing, flip the paper manually, ensuring correct alignment.
Test Print: Print on scrap paper first to check alignment before printing the entire zine.
Managing Print Quality: Adjusting Settings for Optimal Results
Get the best print quality without wasting ink or paper:
Adjust Print Quality Settings: Use standard or draft quality for text-heavy zines to save ink.
Print in Black and White: If your zine is mostly text, print in black and white to reduce ink usage.
Choose the Right Paper Type: Select the correct paper type (e.g., plain or glossy) in your printer settings for the best finish.
Preview Before Printing: Always preview pages to ensure correct alignment and layout before printing.
Once printed, your zine will be ready to bind and share. If you're considering where to print a zine in bulk, Ex Why Zed offers affordable, high-quality options that can bring your zine to life with professional results.
Cutting and Folding: Getting the Physical Shape Right
Once your zine is printed, it’s time to cut and fold the pages. Follow these steps to ensure a professional finish:
1. How to Cut: Best Tools for Precision
For clean, precise cuts, a paper trimmer is your best bet, especially when cutting multiple sheets or aiming for straight, even edges. If you don’t have one, sharp scissors can do the job, though the results may be less polished. For detailed designs or intricate cuts, a craft knife paired with a straight-edge ruler offers greater control and accuracy.
2. Folding Your Zine: Creating Neat, Consistent Folds
For sharp, clean folds, a bone folder helps create crisp creases without damaging the paper. If you’re folding by hand, take your time to align edges carefully and press down evenly for a smooth finish. Always double-check alignment before folding—crooked pages can throw off your entire zine. With proper folding, your zine will look polished and ready for binding.
Check out more interesting, fun, and unique zine ideas for inspiration.
How To Make A Photo Zine?
Making a photo zine is an exciting way to showcase your photography, tell stories, and share your vision. The process can be quick or take months; it all depends on how detailed you want it to be. To guide you, here’s a roadmap many creators find helpful:
Step 1. Define Your Concept and Style
Start by asking yourself what your zine is really about. Is it a travel diary, a portrait series, or a visual essay on city life? Decide on tone, themes, and frequency (a one-off zine or ongoing issues).
Sketch out the format: page count, sections, and overall vibe. Having this vision upfront makes the rest of the process smoother.
Step 2. Build a Rough Template
Think of this as your blueprint. Decide how photos and text will sit together. Do you want full-bleed images, collages, or minimalist white space? Experiment with different palettes, fonts, and caption styles.
Draft a couple of mock layouts so you can see what works best before committing.
Step 3. Design the Pages
Now it’s time to arrange your content. Place your strongest images first and last, then fill the middle with supporting visuals.
Think about rhythm and flow, alternate close-ups with wide shots, or pair contrasting images for impact. Add headlines and subheadings if needed to guide the reader.
Step 4. Add Text and Refine
Even photo-heavy zines benefit from context. Captions, quotes, or short essays can deepen the story. Keep editing until every spread feels intentional.
Print a draft copy and check for flow, typos, or missing credits. Small adjustments here can elevate your zine from good to professional.
Step 5. Print With Care
Choose your printing method. Home printers and photocopiers give a gritty DIY look, while professional printing services highlight details and colours beautifully.
Pick your paper, matte for subtle tones, glossy for vivid colours, or recycled stock for an indie feel. Always order a single test copy before finalising.
Step 6. Share It With the World
Distribution is half the fun. Share copies at zine fairs, coffee shops, galleries, or through local bookstores. Post previews on Instagram or sell digital versions online.
Libraries, collectors, and even museums are always interested in unique zines, so don’t underestimate the reach of your work.
How Do You Distribute Your Zine?
Once your zine is ready, the next step is getting it into the hands of readers. You can share it locally in your community or reach a wider audience online. Here are some great options:
Zine fests: Join local zine festivals and fairs to showcase your work, trade with other creators, and meet readers who love independent publishing. These events are perfect for building community.
Coffee shops: Many cafés welcome local art and writing. Ask if you can leave a small stack of zines near the counter; customers often love discovering something creative with their coffee.
Bookstores: Independent bookstores frequently support local zine makers by selling them on consignment. It’s a great way to get shelf space alongside other small-press titles.
Community centres: Libraries, youth centres, and cultural hubs often encourage local creators to share their work. Dropping off copies can help you reach readers who are already engaged in the community.
Social media: Post snippets of your zine, behind-the-scenes images, or page previews. Platforms like Instagram and TikTok are especially powerful for sparking curiosity and driving sales.
Digital platforms: Sell or share PDFs of your zine on sites like Gumroad, Etsy, or Ko-fi. This way, you can reach an audience beyond your local area.
Zine communities: Connect with other makers on forums, Discord groups, or Reddit. Swapping zines and cross-promoting can help you grow your readership organically.
Personal website: A simple website or blog gives you a central space to sell, archive, and promote your zines. It also helps you look professional and build your brand.
Why Choose Ex Why Zed for Your Zine?
At Ex Why Zed, we don’t just print zines; we help bring your ideas to life. Whether you’re sharing your first project or your fiftieth, our specialist team knows exactly what creators need to make an impact.
From instant quotes for small runs to custom pricing for larger orders, we make printing accessible at every level. Choose from a wide range of premium materials, glossy, matte, or eco-friendly recycled papers (with free samples so you can feel the difference).
For a professional finish, take your pick of saddle-stitching or perfect binding and enjoy quick turnaround times that get your zine in readers’ hands faster. And with our expert support, you’ll always have friendly guidance at every step.
Zine creators across the UK trust Ex Why Zed for quality, speed, and service, and now it’s your turn.
Contact us today and get an instant quote to start printing your new zine.
Conclusion
Creating your first zine is an incredibly rewarding experience that opens doors to a supportive, creative community. Whether you're making a simple folded piece of paper with hand-drawn art or designing a sophisticated photo zine using digital tools, the most important step is starting.
Remember, there's no "perfect" way to make a zine; the medium celebrates authenticity, creativity, and personal expression above all else. Your unique perspective and voice are exactly what the zine community needs.
Frequently Asked Questions
What are the common zine sizes and formats people use?
Most zines are made in half-letter (5.5” x 8.5”), quarter-size, or mini folded formats. People often fold standard A4 or letter paper into booklets. Some use stapled, saddle-stitched, or hand-sewn bindings for a DIY touch.
What are some creative ideas for making a zine for kids?
Kids’ zines can include comic strips, colouring pages, puzzles, short stories, or fun fact sheets. Adding stickers, cut-and-paste activities, or doodle spaces makes them interactive. Bright illustrations, simple text, and playful themes keep children engaged and excited to read.
How to make a big zine?
To make a big zine, use multiple folded sheets bound together with staples or stitching. Choose larger paper sizes like A3 or tabloid for impact. Add more pages with sections like stories, art, or features while keeping the layout readable.
How to make a good zine?
A good zine combines clear storytelling, eye-catching visuals, and a personal voice. Use varied fonts, hand-drawn elements, or collages for creativity. Keep content authentic and relatable. Balance text and images, and ensure the layout feels engaging yet easy to follow.
Can you make a zine on Canva?
Yes! Canva is beginner-friendly and perfect for zine creation. Use custom dimensions, explore free templates, and design with drag-and-drop tools. Once done, export as a PDF and print at home or through an online service.
How to make a paper zine?
To make a paper zine, fold A4 sheets into booklets, add handwritten or printed content, and staple the spine. Many UK creators use recycled paper and local print shops for a low-cost, eco-friendly touch.
How much does it cost to make a zine?
In the UK, a simple DIY zine might cost £1–£3 per copy for paper, ink, and staples. Professionally printed zines range from £3 to £12 each, depending on size, colour pages, and binding style.
Are there any tips for printing and duplicating zines at home?
Yes! In the UK, many zine makers use regular A4 printers and photocopiers for affordability. Print double-sided to save paper, adjust margins to avoid cut-offs, and use recycled paper for a budget-friendly, eco-conscious finish.
Choosing the right magazine size can make or break your publication’s appeal. The dimensions you select influence not only the visual impact but also the functionality, cost, and overall reader experience. Thus, the size of your magazine is a key part of its identity—it influences how your content is presented and perceived.
Your chosen dimensions, whether compact or large, play a key role in engaging your audience and shaping the reading experience. Different sizes have distinct advantages, shaping your publication's design and experience.
In this blog, we’ll examine the standard magazine dimensions, offering insights into what works best for various types of content. We’ll also explore how choosing the right size can elevate your magazine and make it stand out on the shelf.
What Are the Common Magazine Sizes and Formats?
Magazine sizes vary based on geography, audience preferences, and content type. Smaller formats are more portable, while larger ones provide ample space for detailed visuals and text. There are common US dimensions, European dimensions, and custom dimension options available in the market.
Common US Magazine Dimensions
The typical magazine size in the United States is a letter size, measuring 8.5 by 11 inches. However, other common US magazine dimensions are also gaining popularity due to their unique advantages. Check out the table below to see the most common US Magazine dimensions:
Portrait
Landscape
Square
3.5" x 8.5"
6" x 4"
5.5" x 5.5"
4" x 6"
8.5" x 5.5"
8.5" x 8.5"
4.25" x 11"
11" x 8.5"
5.5" x 8.5"
6" x 9"
8.5" x 11"
European Size Standards for Magazines
Like in the US, European publishers use a range of sizes too. A crucial factor to appreciate here is the consistent proportion followed among the A series formats, where cutting an A4 sheet in half gives two A5 sheets, each maintaining the same aspect ratio. Let's examine the most commonly used dimensions in European magazines:
European Magazine Format
Dimensions (in mm)
DIN A4
210mm x 297mm
DIN A5
148mm x 210mm
DIN A6
105mm x 148mm
Special Sizes and Custom Dimensions
Apart from the standard sizes, magazines are available in special sizes and custom dimensions. These magazine templates are popular for niche publications or those dealing with artistic subjects that push the boundaries of creativity. Square formats are particularly prevalent among such unique content.
The options vary greatly, from pocket-friendly digests to larger broadsheets. Looking to match the size of your favorite magazine? Ex Why Zed has got you covered. Whether it's the refined proportions of Vogue UK, the soft minimalism of Kinfolk, or the compact creativity of Monocle, we can print it—all from just one copy.
Seen something square like Creative Review? Sure, we can do that too—but heads up: that size runs on our larger presses and can get a bit pricey if you're ordering under 700 copies. Want the same vibe without the sting? Scale it down to 210x210mm and keep it cost-effective.
Planning a bigger run? Let’s talk smart choices. The 280x220mm format (like Grand Designs or Elle Decoration) hits the sweet spot—big on visual impact, easy on production. Whatever you’re inspired by, we’ll help you create something just as iconic.
What Are Some Custom Magazine Print Size Options?
1. Digest size: 5.5 by 8.25 inches
The digest size, 5.5 by 8.25 inches, is popular for compact magazines, newsletters, and shorter publications. Its small footprint makes it cost-effective and easy to handle, perfect for readers on the go. With less binding material required, it’s an economical and convenient option for publishers and consumers.
2. Half letter size: 8.5 by 5.5 inches
The half-letter size, measuring 8.5 by 5.5 inches, is ideal for niche publications. Offering a balance between space and portability, it’s perfect for readers interested in specific topics. This format is incredibly convenient for collectors, as it’s easy to store while providing ample content space.
3. Letter size: 8.5 by 11 inches
The letter size (8.5 by 11 inches) is the standard magazine printing size in the U.S., favored by many publishers for its ample space for content and visuals. While it offers generous dimensions, this size can be more expensive due to higher material and postage costs.
4. A4 size: 8.3 by 11.7 inches
The A4 size, 8.3 by 11.7 inches, is widely used, especially in Europe. It strikes an ideal balance between space and portability, offering plenty of room for content while fitting comfortably into most bags. This size is perfect for general interest magazines, appealing to a broad audience.
5. Square sizes: 5.5 by 5.5 inches or 8.5 by 8.5 inches
Square magazines, often seen in lifestyle and fashion publications, offer a unique visual appeal. Commonly 5.5 by 5.5 or 8.5 by 8.5 inches, their distinct shape makes them stand out on shelves, providing readers with a fresh experience. However, their unconventional format typically comes with higher production costs compared to traditional rectangular magazines.
6. Broadsheet size: 22.5 by 35 inches
The broadsheet size (22.5 by 35 inches) is the largest standard magazine format, often favored for artistic and specialty publications. However, it presents challenges in terms of production costs and reader convenience; its unique, large-scale format appeals to audiences who value a distinctive and immersive reading experience.
7. Tabloid size: 11 by 17 inches
The tabloid size (11 by 17 inches), offering double the space of a standard letter-sized magazine, is popular among publishers in entertainment and celebrity genres. Its larger canvas allows for more content and striking visuals. However, the downside is its bulk, making it less convenient to hold while reading. Read more about this size in our Newspaper size articles.
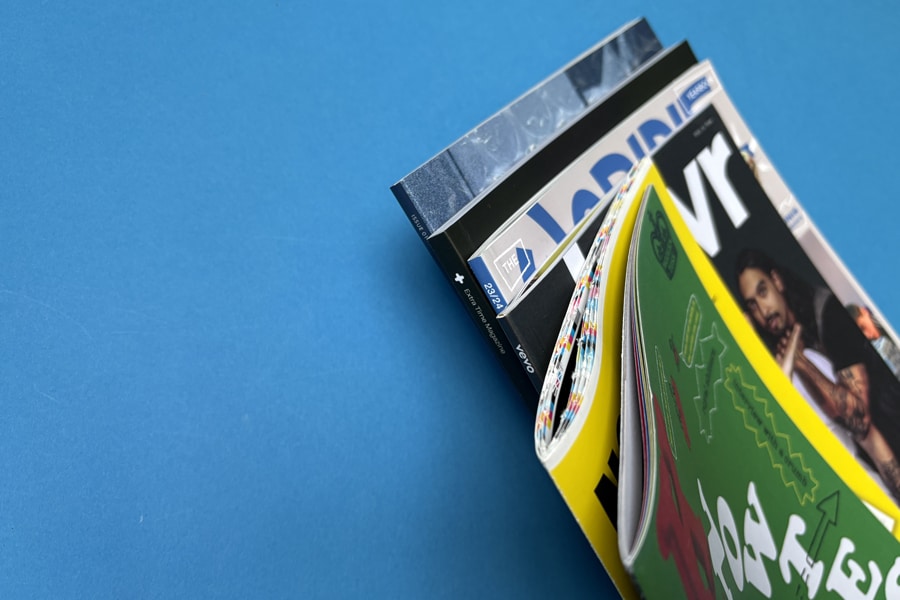
What Are Some Magazine Binding Options?
Choosing the right binding option becomes crucial for a professional finish to your publication. From saddle-stitching and perfect binding to wire-o options, there's plenty to choose from depending on your budget, page count, and style preference.
Here are key differences between the three:
Saddle Stitching: A cost-effective and quick binding method that is ideal for small magazines or brochures. It uses two staples to bind the pages along the spine, providing a compact and durable finish.
Wire-O Binding: Offers a professional appearance with a clean and organized look. This binding type is known for its durability and allows pages to lie flat and rotate 360 degrees, making it ideal for reference materials and manuals.
Perfect Binding: Provides an upscale, book-like feel with a strong glue-based binding. Perfect for larger publications like magazines or catalogs, it offers a polished, high-end appearance with a durable finish.
Once you've chosen the right binding—whether it’s the sleek, premium feel of perfect binding or the classic simplicity of saddle stitching—the rest should be smooth sailing. With Ex Why Zed's Magazine Services, we make the process hassle-free. Just upload your PDF, and our team will handle the technicalities, from free file checks to lightning-fast delivery. Need a quick turnaround? We can have stapled magazines delivered to you in just 3 days.
Plus, with instant pricing, free paper samples, and hands-on support from real people, you’re not just getting a print service—you’re getting a partner who makes your magazine look and feel its best.
How Thick Should Your Magazine Be?
The thickness or length of a magazine can vary broadly from an eighth of an inch to as much as three centimeters. This primarily depends on the page count, which varies greatly among different publishers and issues. It is worth noting that a magazine's dimensions significantly impact its readability, portability, and production costs.
Print Your Magazine in the Perfect Size with Ex Why Zed
Your magazine deserves to stand out—and Ex Why Zed makes that happen with a full spectrum of format options. Whether you’re going for a sleek portrait design, a bold landscape layout, or a modern square finish, we offer the flexibility to match your creative vision.
Every magazine is printed with sharp detail, vibrant colors, and professional binding. With us, you’re not just picking a size—you’re choosing how your story is told. Contact us now and make your magazine worth publishing!
Conclusion
Magazines are a powerful medium for sharing information, sparking creativity, and engaging readers. While often overlooked, a magazine's size and format are crucial elements that influence how readers experience its content. Magazine companies offer a variety of sizes, from compact digests to expansive broadsheets, tailored to specific content and audience needs.
Selecting the right size and format also allows publishers to craft a visually compelling product that resonates with readers. While understanding standard sizes is a great starting point, modern printing technology offers endless customization possibilities to achieve a professional look. We hope this blog helps you navigate your magazine’s journey, whether refining your format or exploring new dimensions.
Frequently Asked Questions
What Is the Average Size of a Magazine Cover?
Typically, a standard magazine cover in the US measures 8.5 inches by 11 inches. But for publications like Vogue, it usually measures 9.5 inches by 12 inches.
How to Choose the Best Magazine Size for Your Project?
The optimal size choice should ideally depend on the type of content, the target audience, production costs, and the physical convenience for readers to carry and read.
What are the most common print magazine sizes?
The most common print magazine sizes generally include 8.5×11 inches and 5.5×8.5 inches. The European standard measures often use formats like A4, A5, and A6.
How Do You Measure the Size of a Magazine?
A magazine's size is measured by its width and height in inches or millimeters. These measurements are typically established in the initial stages of design and layout.
In today's digital era, traditional marketing tools like booklets often get overlooked. However, businesses still continue to harness the power of booklets for their touchpoint advertising campaigns. A well-designed booklet not only carries detailed information about the company but also helps in building brand image. This blog post will delve deep into understanding what is a booklet, how many pages it should ideally have, the factors that determine its page count, its design and layout, and some stellar examples of successful booklets. We promise you, by the end of this read, you'll be filled with an exhaustive understanding of all things booklet-related!
What is a Booklet?
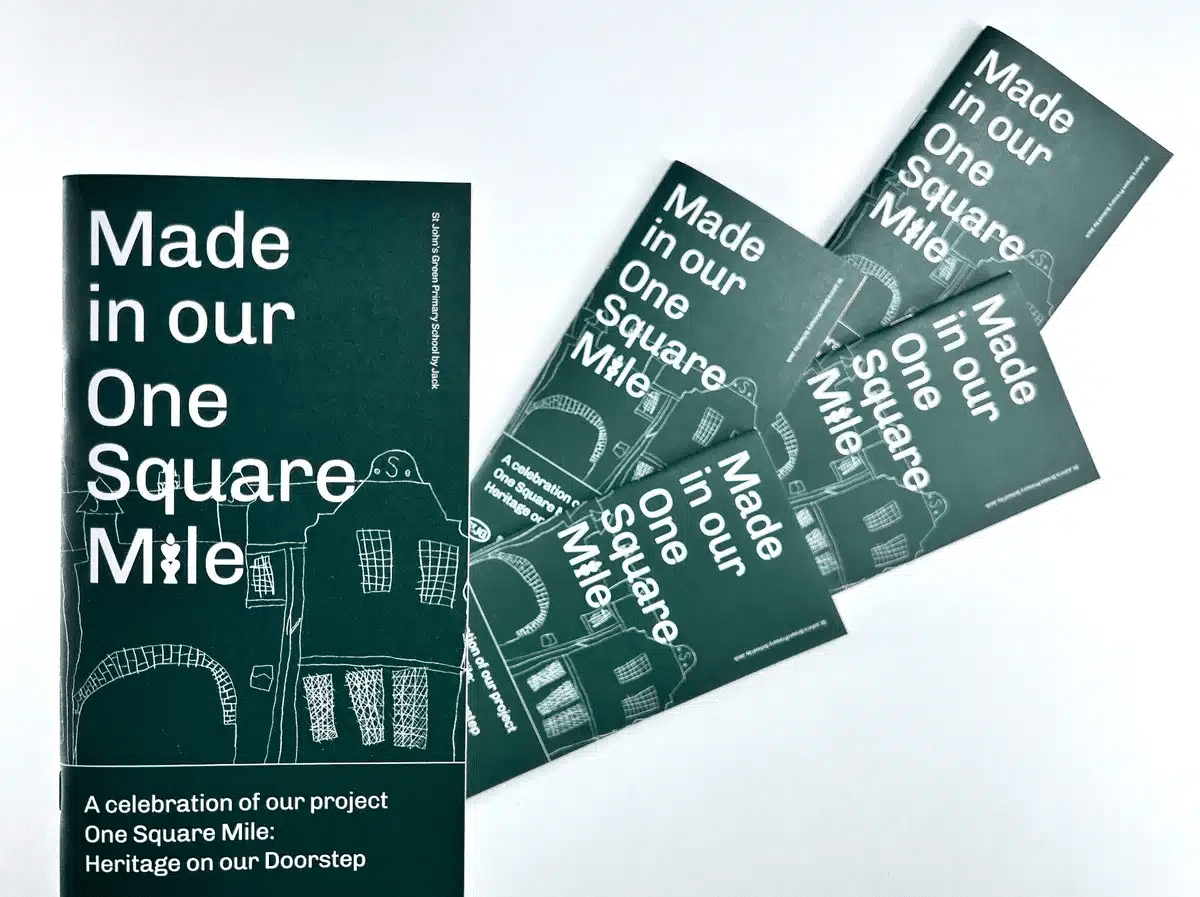
A booklet can be defined as a small book, often stapled at the center, with fewer pages as compared to a standard book. Its small size and lightweight nature make it incredibly portable and easy to distribute. In marketing terms, booklets are synonymous with brochures or mini-catalogues. They can be used for showcasing company overviews, creating event programs like weddings, conferences, or graduations, and even serving as a recipe book or a training manual.
The main goal of a booklet is to provide information to its reader. Whether it is promotional material like a brochure, informative content like a book, or instructions in a manual, booklets cater to the needs of delivering concise and purpose-specific content. Its extensive use in various industries testifies to its versatility and ease of access. For instance, fitness brands share workout routines through fitness booklets, fashion brands share their latest collection via fashion booklets, and real estate businesses use booklets to showcase their property offerings. Determining the right page count for your booklet all boils down to its goal or purpose. Whether it's a company's profile, an event program or a catalog, the quantity of content that needs to be distributed organizes how many pages you would ideally need.
Minimum and maximum page counts for a booklet
Booklets have a minimum number of pages to be considered as such. Stapled, loop-stitched, wire-o binding requires at least eight pages while perfect bound booklets demand a minimum of 52 pages. Any less, and you might just be looking at a folded leaflet rather than a booklet. While one must adhere to the minimum amount of pages requirement, care should be taken of the maximum page limit as well. Each binding method can accommodate a number of sheets of paper. For instance, stapled, wire-o, and loop-stitched booklets can go up to 64 pages while perfect bound booklets can have up to 200 pages. Exceeding the maximum limit might affect the overall look and feel of your booklet, making it bulky and difficult to handle.
Winning Booklet Examples
To help you make informed print choices when you embark on your exciting booklet printing journey, we have curated, analysed and dissected a series of recent booklet printing examples to show you what can be achieved.
Factors Affecting Booklet Page Count
When planning and designing a booklet, one of the most important considerations is the total number of pages it will include. Several key factors influence the final page count, each playing a vital role in the structure and usability of your booklet.
Purpose of the Booklet
The objective behind creating the booklet is often the first and most defining factor. A brief promotional booklet for a product launch may only require a few pages highlighting key features and benefits. In contrast, instruction manuals, employee handbooks, or training manuals will naturally demand a much more detailed approach, increasing the total number of pages. The more complex the goal, the higher the likelihood of needing additional space to communicate effectively.
Content Volume and Layout
The amount of content you need to include directly impacts the page count. If your message is text-heavy or includes detailed technical data, you'll likely need more pages to avoid cluttering. On the other hand, a visually-led design with minimal text and word count may require fewer pages but more spacing and creative layouts to keep it engaging. The balance between images, infographics, charts, and written content also determines how the information is spaced and presented.
Binding Method
The chosen binding method imposes physical limitations on how many pages your booklet can include. For instance:
Saddle-stitched booklets (stapled along the fold) typically require page counts in multiples of four and often have a minimum of 8 pages.
Perfect binding and Hard Back are better suited for thicker booklets, with a general minimum of 32 pages to ensure structural integrity.
Wire-o or coil binding can accommodate a wide range of page counts but may not be suitable for more formal publications.
Understanding these constraints helps you plan your content to fit within practical production boundaries.
The preferences, expectations, and reading habits of your audience should guide the booklet’s length. For example, a B2B investor-facing booklet may go into greater depth with more pages to build credibility and trust. Conversely, a direct-mail booklet aimed at busy consumers should be concise and visually driven to quickly capture interest. If your audience values quick insights, overly long or dense content might lead to disengagement.
Design and Typography Choices
Font size, spacing, margin widths, and layout style also influence how much content fits on each page. Choosing a more spacious design with large visuals and generous white space naturally increases the number of pages needed. Alternatively, a compact, text-oriented design might help reduce page count, but it risks becoming overwhelming if not executed thoughtfully.
Importance of Selecting the Right Page Count for Your Booklet
Selecting the appropriate page count for your booklet is not just a logistical decision—it’s a strategic one that can influence everything from production costs to user engagement and overall effectiveness. Whether you're designing a promotional brochure, training manual, event guide, or product catalog, getting the page count right ensures your content is presented clearly, professionally, and persuasively.
Balances Content with Readability
The right page count helps strike a balance between delivering all necessary information and maintaining reader engagement. If a booklet is too short, you risk leaving out essential details or cramming too much onto each page, which can overwhelm or confuse your audience. On the flip side, an unnecessarily long booklet might dilute your core message, cause readers to lose interest, or even make the material appear more complicated than it really is. A well-chosen page count supports a clean layout, proper spacing, and a logical flow of content that enhances comprehension.
Impacts First Impressions and Brand Perception
Your booklet often acts as a physical representation of your brand. A well-designed, properly paginated booklet signals professionalism, care, and attention to detail. If the booklet feels too thin or sparse, it may come off as incomplete or rushed. If it’s bulky and overwhelming, it might discourage readers from exploring it fully. Page count plays a role in shaping how your audience perceives your brand—concise and to-the-point for modern, innovative companies; detailed and comprehensive for industries that value depth and trust-building, like finance or healthcare.
Aligns with Production and Budget Constraints
From a production standpoint, page count directly affects printing costs, binding methods, paper selection, and postage fees (especially for mailed booklets). Choosing the optimal number of pages helps you stay within budget while still delivering a high-quality product. For instance, staying within certain page thresholds might allow you to use saddle stitching instead of perfect binding, or help you avoid higher mailing costs due to increased weight. Being intentional about page count helps you maximize impact without overspending.
Ensures Compatibility with Binding and Format
Each binding method has specific requirements and limitations regarding the number of pages it can accommodate. Choosing a page count that aligns with your desired binding style ensures durability, ease of use, and an overall professional finish. For example, saddle-stitched booklets require multiples of four and are ideal for smaller publications, whereas perfect binding is suited for longer-form content like manuals and catalogs. Selecting the right page count ensures the finished booklet functions well and feels appropriate in hand.
Supports User Experience and Navigation
A well-structured booklet with the right number of pages enhances the reader's journey through your content. It allows for thoughtful sectioning, the inclusion of helpful design elements like tables of contents, chapter dividers, callouts, and imagery that break up text. These elements are easier to incorporate when there is sufficient space, and they can greatly improve how your audience absorbs and interacts with the information. Whether your goal is to inform, persuade, or instruct, a clear and comfortable reading experience is key to achieving it.
Helps Define Scope and Focus
Planning the page count early in the design process forces you to clarify your booklet’s scope. How in-depth should each section be? What’s essential, and what can be trimmed? This discipline helps you create a more focused, purposeful booklet where every page adds value. It also prevents content creep—where you add too much just because there’s space—keeping the message on track and relevant to the audience.
Why Print Your Booklet at Ex Why Zed?
If you’re looking to print a booklet that stands out — whether it’s a zine, art book, artist catalog, or self-published project — Ex Why Zed has the tools, experience, and creativity to help make it happen. Here’s what sets us apart:
➡️ Specialist Booklet Printing: Booklets are what we do best. Whether you're printing a one-off zine or a full artist catalog, we bring over a decade of experience to every job. We understand the details that matter, and we’re here to help you get it right. ➡️ Portrait booklets up to A3 (420mm high x 297mm wide), yes A3! ➡️ Landscape formats up to A4 (210mm high x 297mm wide) ➡️Square booklets up to 297mm x 297mm Whatever the orientation, we’ll help you create something beautiful and functional.
➡️ Flexible Sizes to Suit Your Vision: We offer a range of booklet sizes to match your creative goals. ➡️Clear, Friendly Process: We’re here to make booklet printing easy. Our process is straightforward, and we’re always happy to answer your questions — whether you need advice on artwork setup or aren’t quite sure which paper to choose.
Made for Creatives Like You: We’ve worked with thousands of designers, illustrators, students, and publishers. We know what it takes to turn your ideas into a beautifully printed piece — whether it's your first project or your fiftieth.
Ready to bring your booklet to life? We’re here when you are. Request a quote now.
Wrap Up
Booklets might appear simple, yet their significance in marketing strategies continues to be high. Optimum use of booklet pages balancing text, images and making the most out of formatting tools can dramatically increase the effectiveness of your booklet. While there are no strict rules about how many pages a booklet should have, certain parameters like purpose, target audience, and choice of binding method help to define what might work best for you.
Frequently Asked Questions
What is the ideal number of pages for a marketing booklet?
The ideal number of pages for a marketing booklet is not set in stone, and it can greatly vary based on its purpose and content. However, a ballpark figure would be anywhere between 8 to 30 pages.
Can I print a booklet with an odd number of pages?
Booklets must have a total page count that’s a multiple of 4 (e.g., 8, 12, 16). If your content results in an odd number, you’ll need to add blank pages or filler content to meet the formatting requirement.
How do I create a booklet layout using popular software programs like Word, InDesign, or Canva?
These software programs provide a host of layout and design options to create a booklet. You can select from predefined templates or create a custom layout. Make sure to choose appropriate margins, alignments, font sizes, and colors to enhance readability and aesthetic appeal.