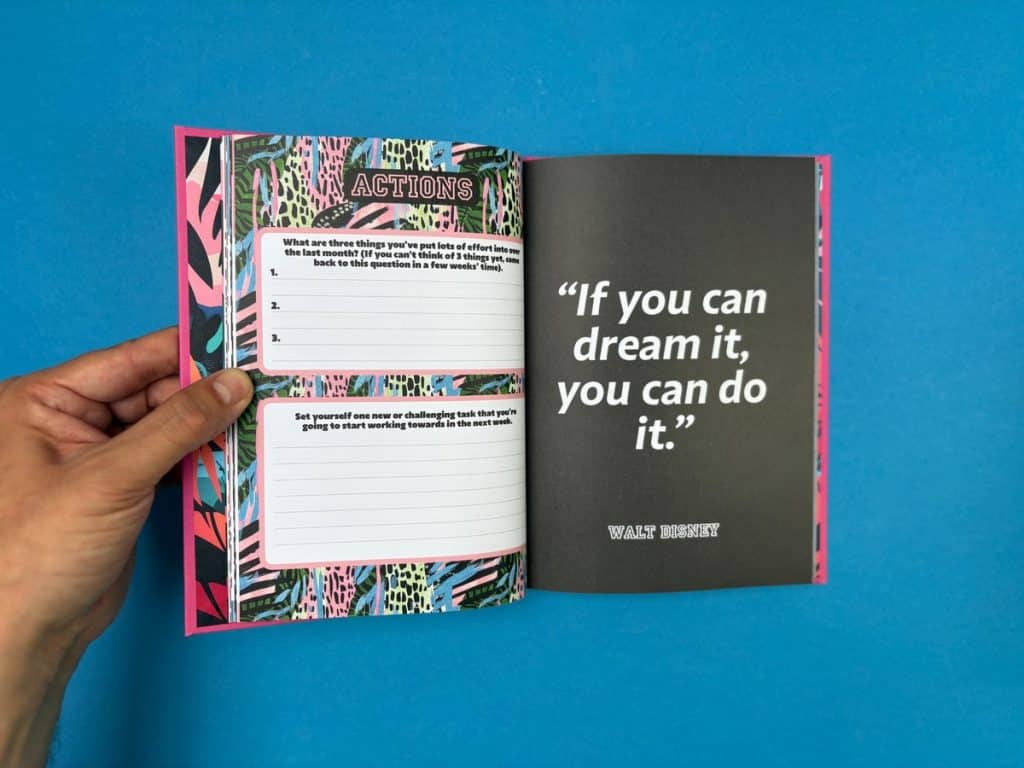
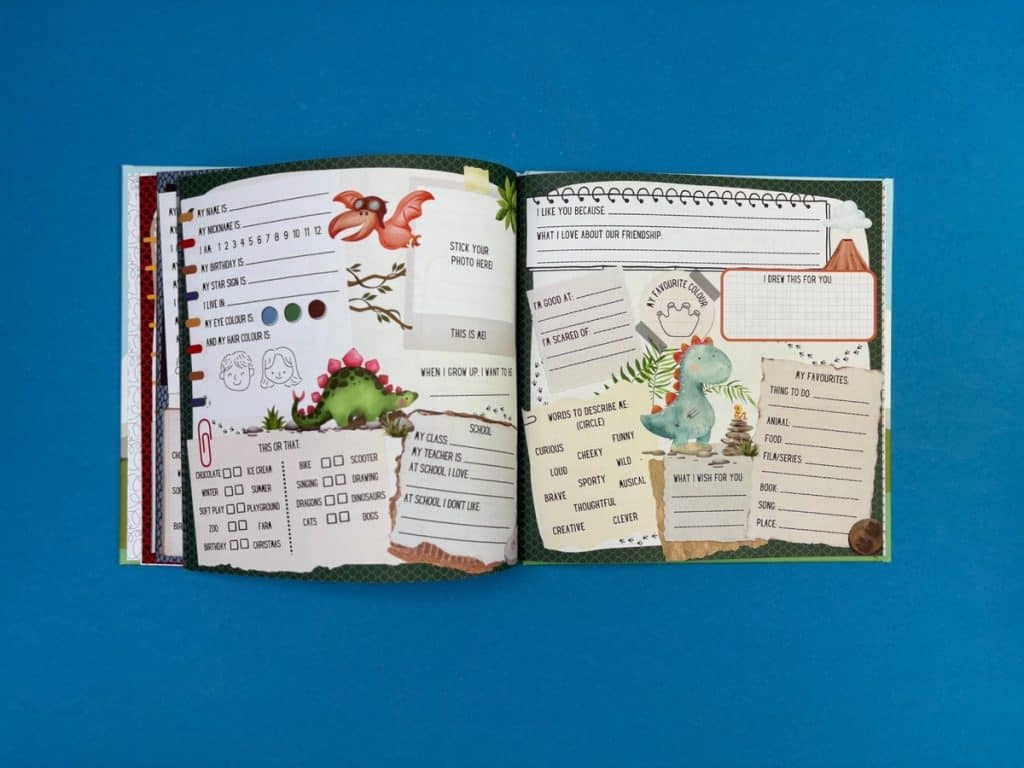
Hardback book printing combines premium materials, sturdy binding, and precise finishes to create long-lasting, professional-quality books.
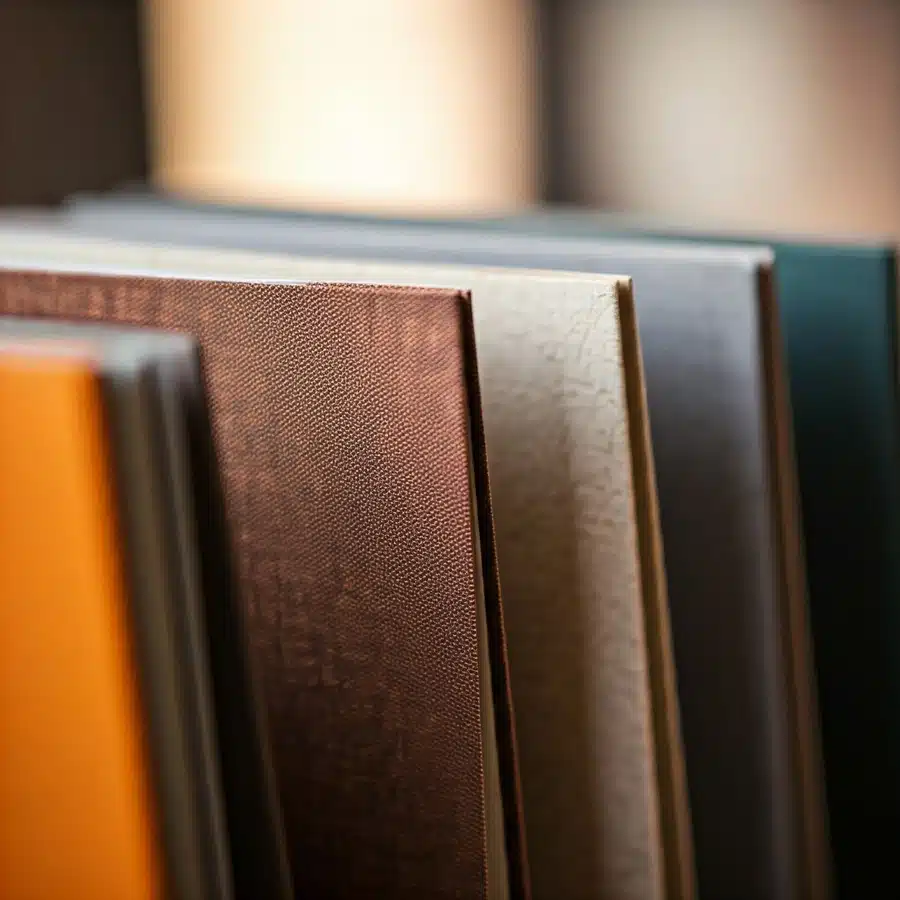
The right cover choice, printed, cloth, or sustainable material, sets the tone for your design and durability.
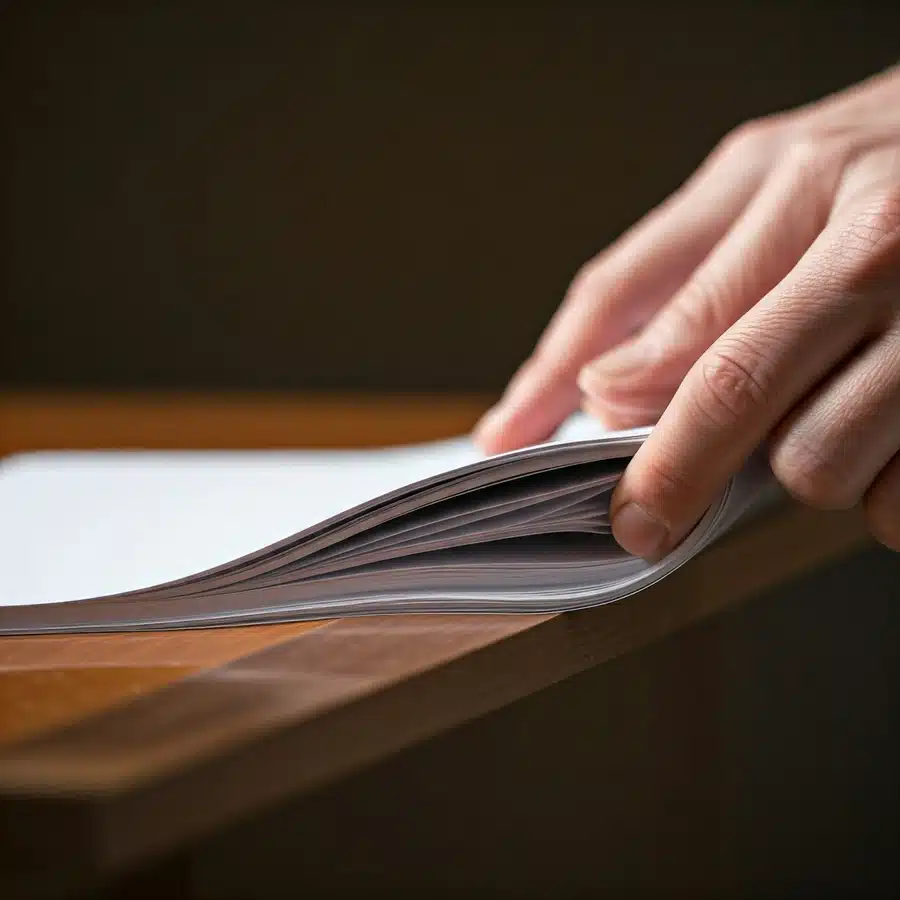
Interior paper types such as uncoated, silk, and gloss influence readability, texture, and overall presentation.
Print quality options, including black and white, greyscale, and full colour, allow you to tailor results to your content style.
Proper artwork setup and print-ready files ensure flawless alignment, colour accuracy, and finish.
Factors like page count, printing method, and materials affect overall cost and turnaround time.
One-off and short-run hardback printing offer flexibility, personalisation, and professional results for any project size.
With expert guidance and attention to detail, it’s easy to produce a hardback book that looks as impressive as it feels.
Ever picked up a beautifully bound hardback book and wondered why it feels so special? The weight, texture, and finish instantly signal quality. For authors, designers, and publishers, achieving that same professional look can feel overwhelming with so many printing terms, paper types, and layout rules to navigate.
The real challenge isn’t just printing a book; it’s creating one that looks and feels exceptional. Every choice, from the cover design to the paper finish, shapes the final result. Without the right guidance, colours may print off, spines can misalign, or pages might not have the premium feel you imagined.
This guide will simplify every stage of hardback book printing. You’ll learn how to choose materials, prepare your artwork, set up print-ready files, and select finishes that make your book stand out. By the end, you’ll know exactly how to turn your vision into a beautifully bound hardback worth showing off.
What Is Hardback Book Printing?
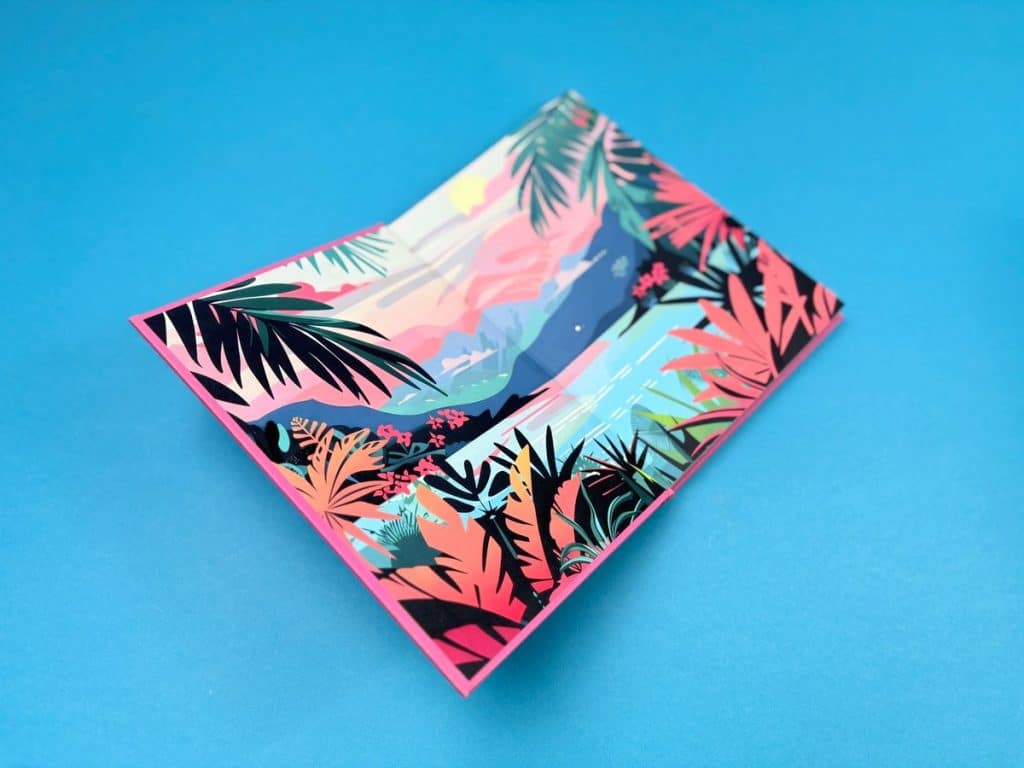
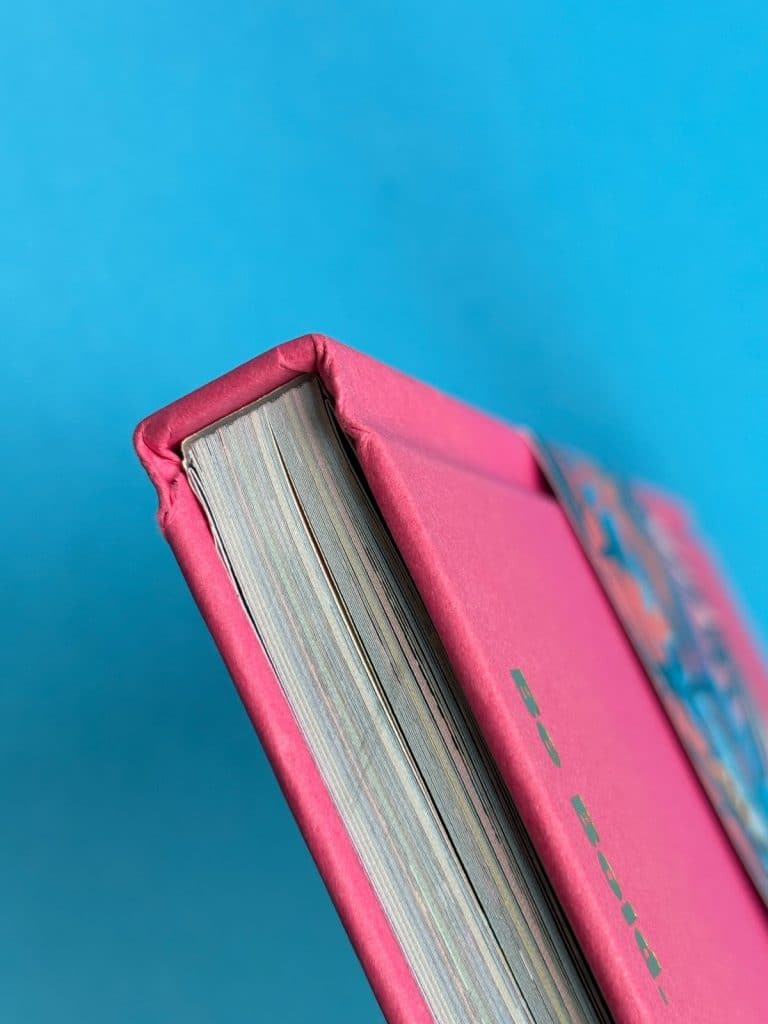
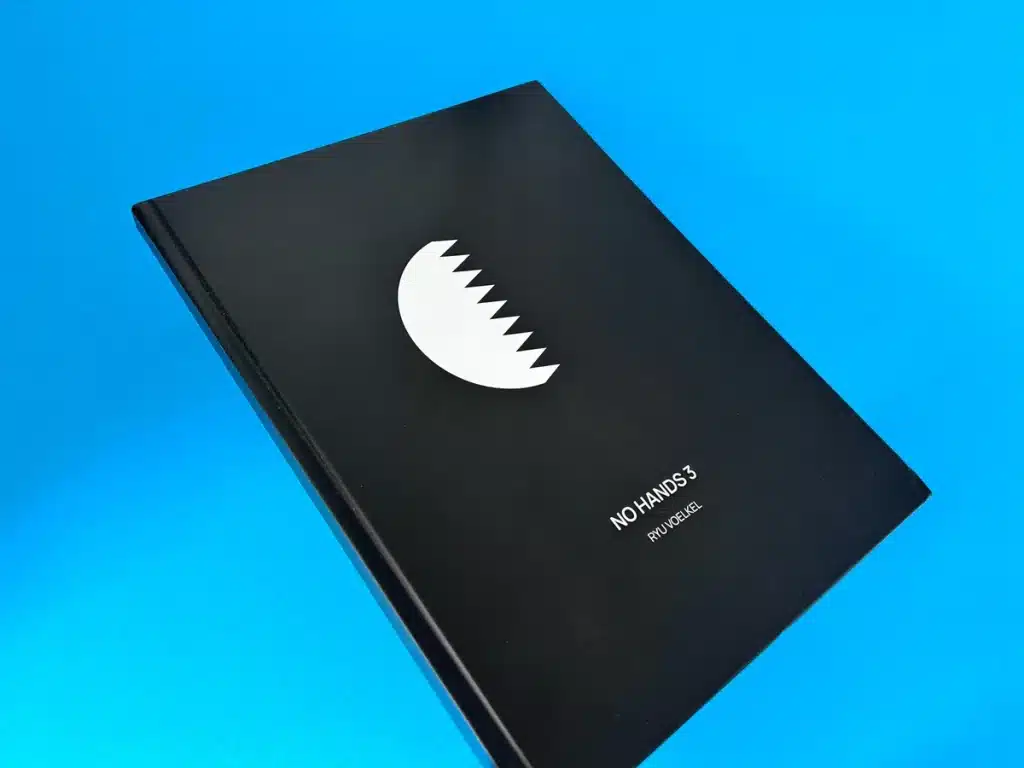
Hardback book printing, also known as casebound printing, is the process of creating books with sturdy, durable covers. These rigid covers protect the pages and give the book a premium, long-lasting finish. Unlike paperbacks, hardbacks are built into a sturdy case made of thick board wrapped in printed paper or cloth for a strong, elegant finish.
This printing style is ideal for projects that deserve a high-end look and feel, such as art collections, photo books, corporate presentations, and graphic novels. With the option to add finishes like foiling, dust jackets, or textured cloth, hardback books stand out for their strength, visual appeal, and timeless design.
What Are The Benefits Of One-Off Hardback Book Printing?
One-off hardback book printing is a great option for authors, artists, and designers who want premium quality without committing to large quantities. Whether you’re producing a prototype, a gift, or a personal project, it combines flexibility with a high-end finish. Here’s why it’s worth considering:
Durability: Hardback books are built to last. Their rigid covers and strong binding protect pages from wear and tear, ensuring your book stands the test of time.
Professional Appearance: A hardback cover instantly gives your book a refined, bookstore-quality look, perfect for portfolios, presentations, or first editions.
Higher Value: Although production costs are higher, hardbacks can be sold at a premium price, often delivering better returns per copy.
Collector Appeal: Hardcovers are prized by collectors and readers alike, often seen as timeless keepsakes or display pieces.
Customisation: One-off printing allows complete creative control over materials, finishes, size, and layout, giving your project a truly personal touch.
Whether you’re printing a single copy or testing a new design, one-off hardback book printing lets you create a professional, durable, and fully customised edition that reflects your vision perfectly before scaling up to larger runs.
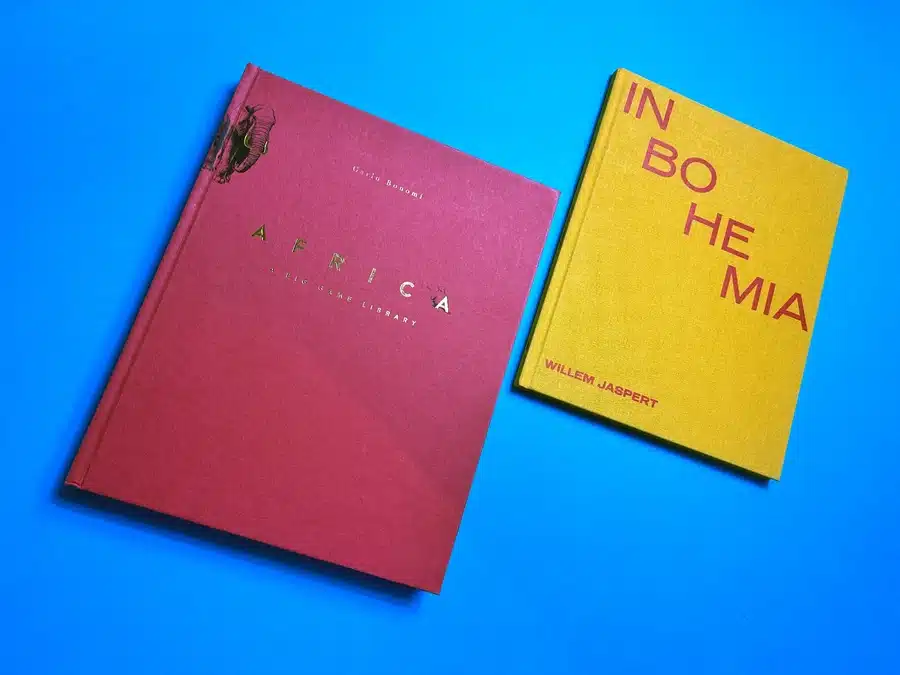
How To Choose The Right Cover And Material For Your Hardback Book
When creating a hardback book, the cover and its material define your book’s first impression; how it looks, feels, and lasts. The right combination can elevate a simple print project into a timeless keepsake.
1. Printed Covers
A printed hardback cover gives you complete design freedom. Your artwork or photography is printed in full colour on coated paper such as silk or gloss, laminated for protection, and wrapped around a rigid case.
Best for: art books, brand catalogues, and illustrated works.
Finishing choices include:
Matt or gloss lamination
Spot UV for selective shine
Dust jackets for a professional touch
Printed covers are also ideal when you want to print hardback book from PDF files directly, streamlining the setup process.
2. Cloth And Linen Covers
A cloth or linen cover brings warmth and texture, perfect for designs that value craftsmanship over gloss. These materials come in a variety of colours and weaves, giving your book a classic, elegant appeal.
Cloth and linen covers pair beautifully with hardback book with box print options for added luxury and protection.
3. Specialist And Sustainable Materials
For something distinctive, consider buckram, textured paper, or eco-friendly materials like FSC-certified boards and recycled cloths. At Ex Why Zed, all papers are FSC certified, reflecting a genuine commitment to sustainable printing. This ensures your book not only looks exceptional but is produced responsibly, an increasingly important factor for authors, brands, and publishers today.
Whether you prefer the sleek polish of coated paper or the heritage feel of woven cloth, your cover material sets the tone for the story inside. It’s the finishing touch that transforms a printed book into a lasting piece of craftsmanship.
What Are The Best Paper Types And Finishes For Hardback Book Interiors?
The interior pages of a hardback book are just as important as the cover; they shape how readers experience your content. Paper choice influences everything from colour vibrancy and readability to overall weight and feel. Selecting the right finish ensures your book looks professional and feels balanced in the hand.
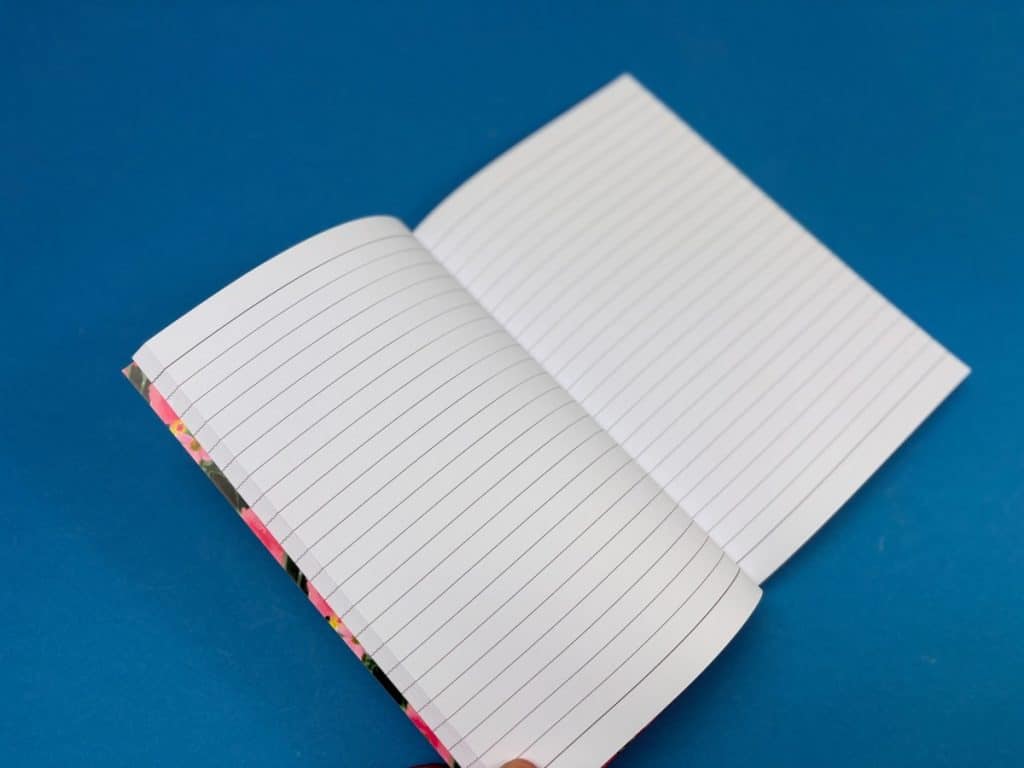
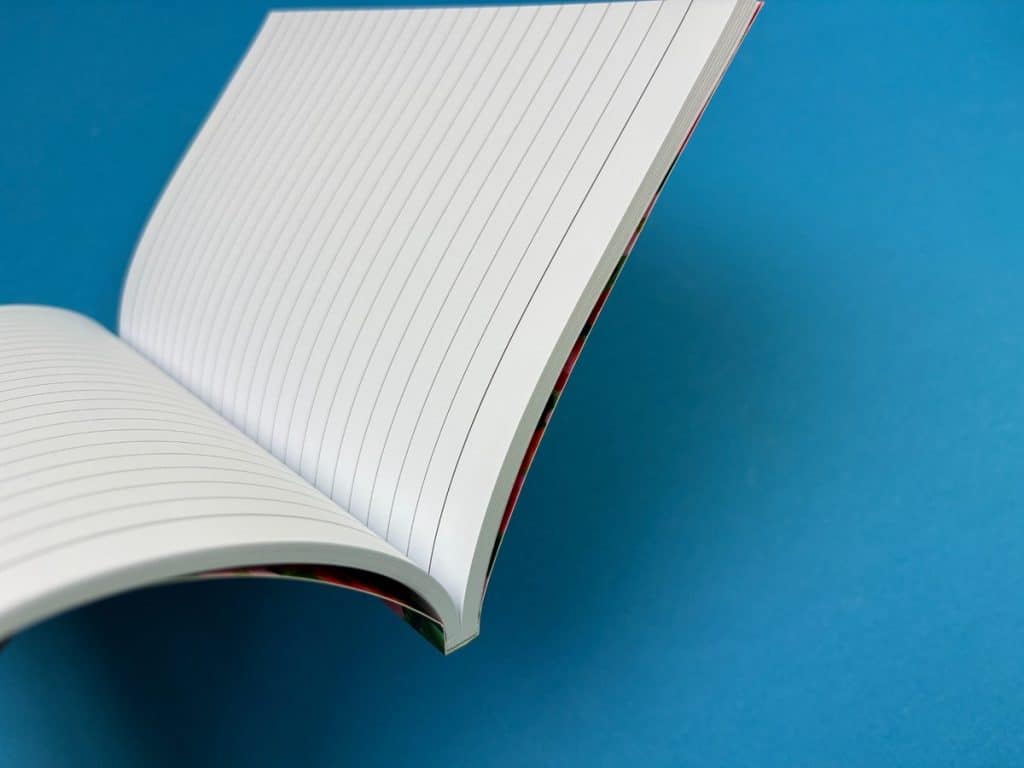
1. Uncoated Paper
Uncoated paper offers a smooth, natural texture that makes reading comfortable and glare-free. It’s perfect for novels, poetry collections, or text-heavy books where clarity and readability are key. The ink sinks slightly into the fibres, giving a soft, tactile finish that feels organic and timeless.
2. Silk Finish
Silk paper strikes a balance between text and imagery. It has a subtle sheen that enhances printed colours without being overly glossy, making it ideal for illustrated books, educational materials, or mixed-content projects. It reproduces photos and graphics with crisp definition while keeping text sharp and easy on the eyes.
3. Gloss Paper
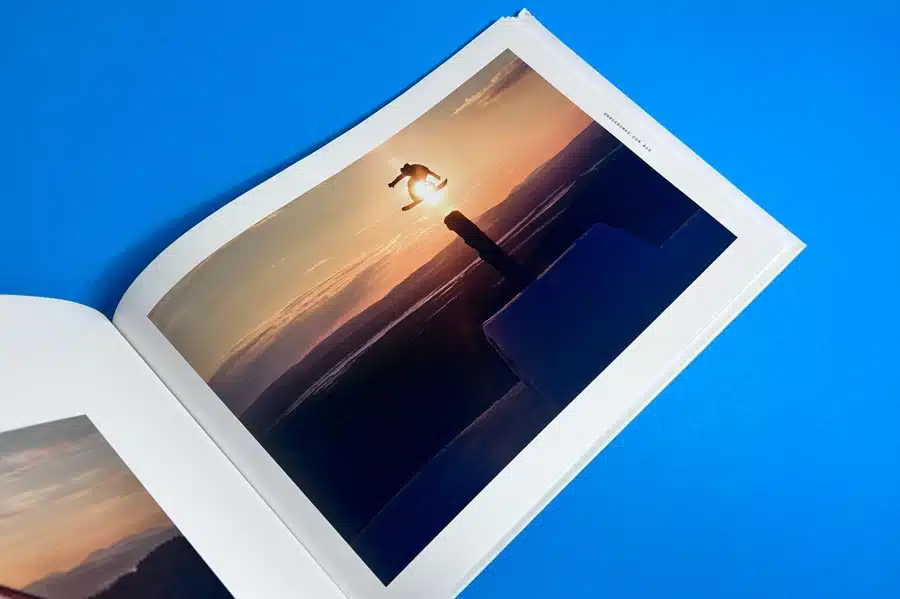
Gloss paper provides high colour depth and strong contrast, giving images a vibrant, polished appearance. It’s the go-to choice for hardback photo book printing, art catalogues, or promotional pieces that rely on striking visuals. The reflective surface makes colours pop, adding a premium, professional finish.
How to Choose The Right Paper Weights And Finishing Details?
Once you’ve chosen your paper type, it’s time to consider thickness and finishing touches. For hardback interiors, paper weight typically ranges from 115gsm to 170gsm, depending on how substantial you want your book to feel.
115–130gsm works best for text-based books that need flexibility and ease when turning pages.
150–170gsm suits image-heavy or luxury editions that benefit from thicker, more durable stock.
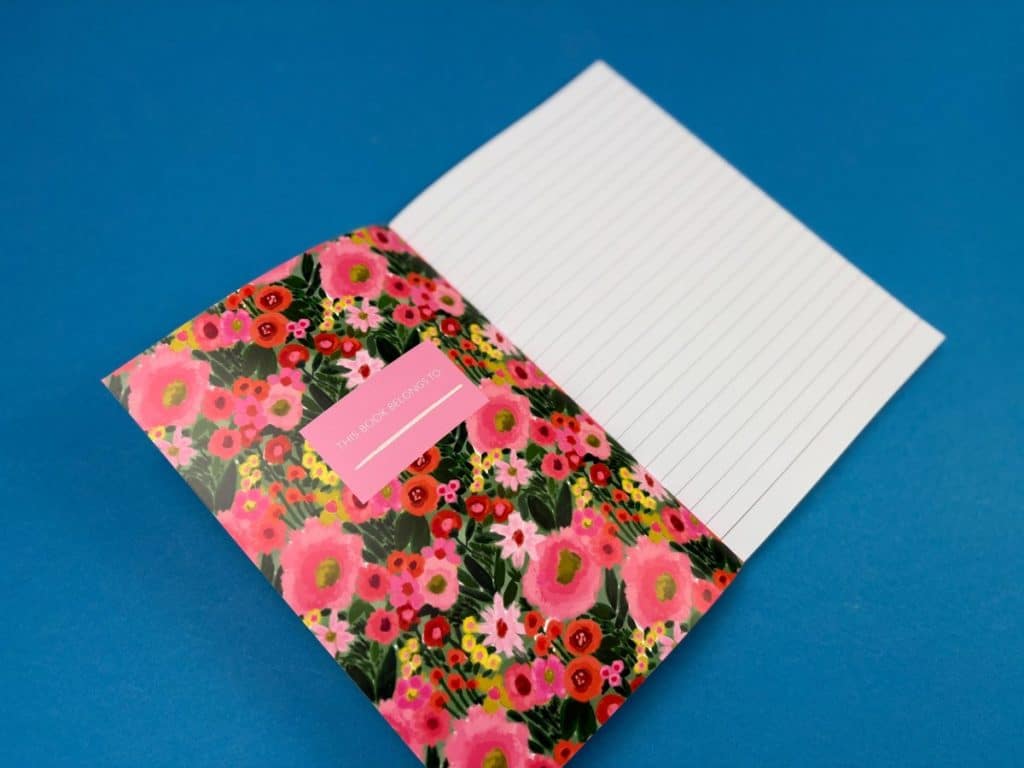
The Role Of Endpapers
Endpapers connect the inner pages to the cover, adding both structure and aesthetic value. They can be blank for simplicity or printed to complement your design. Coloured or patterned endpapers give keepsake and limited-edition books an elegant, personalised finish.
How To Choose The Right Paper?
Your paper and finish choices should align with your book’s purpose:
Choose uncoated for readability and warmth.
Go for silk if you want a smooth balance between text and images.
Opt for gloss to make visuals stand out with high contrast and shine.
If you’re uncertain, Ex Why Zed offers sample packs to help you compare textures and finishes before printing. Selecting the right stock ensures your hardback book printing project feels balanced, durable, and beautifully produced.
What Print Quality And Colour Options Are Available For Hardback Book Printing?
The print quality you choose has a big impact on how your book looks and feels. Whether you’re creating a text-heavy novel, a photo-rich art book, or a professional report, selecting the right colour option ensures your content stands out exactly as intended.
Popular options include:
Print Quality
Advantages
Black & White
Cost-effective and ideal for text-based books such as novels, manuals, and academic content.
Greyscale
A balanced option that adds depth to illustrations or images without the full cost of colour printing. Great for graphic novels or sketch collections.
Full Colour
Premium quality with vibrant tones, perfect for cookbooks, children’s stories, and hardback photo book printing projects.
Your print choice should match your content. Text-focused publications, like dissertations or novels, often look best in black and white or greyscale. However, books that rely on imagery, such as art portfolios, photo books, or marketing materials, truly shine in full colour.
How To Set Up Artwork For Hardback Book Printing
Setting up your artwork correctly is one of the most important parts of preparing a professional hardback book. A well-prepared file ensures your covers align perfectly, pages print cleanly, and the final product looks polished. Here’s how to do it step by step.
1. Create The Cover Spread
Design your cover as a single flat spread that includes the front cover, back cover, spine, and flaps (if any). Extend your artwork into the bleed area to avoid white edges after trimming. Add a 3 mm bleed on all sides and include crop marks for precise cutting.
Make sure your cover file accounts for spine width, which depends on your total page count and paper weight. For instance, a 40-page book printed on 130gsm silk will have a thicker spine than one printed on 115gsm uncoated stock.
What to Avoid: Forgetting bleed, misaligned spines, or text placed too close to the edges; these are the most common causes of layout errors.
2. Add Endpaper Files (If Printed)
If your book includes printed endpapers, design them as separate two-page spreads. These attach the text block to the inside of the front and back covers and can feature colours, patterns, or subtle artwork that complements your book’s theme. If your endpapers are blank, you can skip this step.
What to Avoid: Using artwork that runs too close to the fold or placing essential details near the edges.
3. Prepare Inside Pages
Set up your inside pages as single pages in reading order. The first page of your PDF should be the first right-hand page of the book. Keep text and important design elements at least 5 mm inside the trim edge to prevent them from being cut off during binding.
What to Avoid: Exporting your inside pages as spreads or leaving insufficient margins: both can cause cutting or alignment issues during production.
4. Export For Print
When your artwork is finalised, export each file as a high-quality print PDF (PDF/X-1a). This ensures all fonts and images are embedded and that colours are correctly converted to CMYK. Check that each file includes the 3 mm bleedand crop marks before submission.
What to Avoid: Exporting files in RGB colour mode or skipping the printer’s file setup guidelines, which can lead to unexpected colour shifts or layout problems.
By taking the time to prepare your artwork carefully, you’ll ensure your hardback book printing project comes out perfectly aligned, vibrant, and truly professional.
How Should You Prepare And Submit Files For Hardback Book Printing?
Getting your files right is key to achieving a clean, professional finish. Here’s what you need to prepare and how to submit it properly.
Step 1: Gather Your Files
You’ll typically need three main files:
Cover file: A flat spread including the front, spine, back, and flaps (if any)
Inside pages: A single PDF in reading order (set up as single pages, not spreads)
Endpapers: Only if printed, provided as two additional two-page spreads
If your endpapers are blank, you can skip them and just send the cover and inside page files.
Step 2: Follow The Right Technical Specifications
Before exporting, double-check your settings:
Format: PDF (PDF/X-1a preferred)
Bleed: 3 mm on all sides
Crop Marks: Required
Colour Mode: CMYK
Resolution: 300 dpi
Safe Zone: Keep text and key elements 5 mm from trim and spine
These settings ensure crisp text, accurate colours, and perfect alignment during binding.
Step 3: Submit Your Files For Printing
Once ready, compress your files into a single .zip folder and send them via WeTransfer or Dropbox. Include details like book size, paper type, quantity, and any special finishes. At Ex Why Zed, we also offer a free file check to confirm your artwork is fully print-ready before production begins.
Step 4: Run A Final Check Before Sending
Before you hit send, review your files one last time to avoid small but costly mistakes:
Fonts and images are embedded correctly
Page numbers and spine alignment are accurate
Image resolution and colour consistency are maintained
A careful final review ensures a smooth production process and a hardback book that looks just as polished in print as it does on screen.
What Are The Different Types Of Hardback Books And Their Uses?
Hardback books come in many forms, each designed to suit a specific purpose, from storytelling and research to preserving memories. Here’s how different types of hardbacks serve unique needs:
Hardcover Novels: Add a sense of substance and elegance to storytelling.. Their sturdy design protects pages and gives a premium feel, making them ideal for collectors, special editions, and well-loved classics.
Dissertations and Theses: Offer professionalism and long-term protection for academic work. Hardback binding keeps research safe while meeting university standards, giving your work a polished, lasting finish.
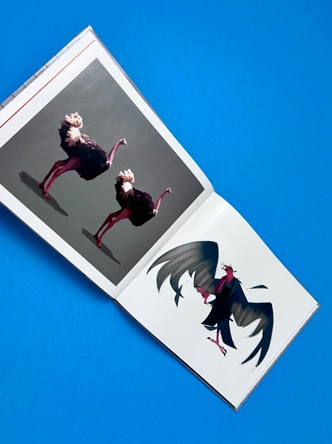
Photo Albums And Art Books: Bring images to life with vibrant colour and fine detail. The rigid cover protects delicate pages, perfect for portfolios, exhibitions, and hardback photo book printing projects.
Yearbooks: Preserve memories worth revisiting with yearbooks. Durable covers protect the pages while allowing for creative, personalised designs that capture each milestone or graduating year.
No matter the purpose, hardback book printing blends strength, style, and longevity, turning every project into something worth keeping.
Thinking about printing a yearbook? Check out our detailed guide on How Much Does It Cost to Print a Yearbook to explore pricing, options, and tips for creating a yearbook that truly stands out.
What Factors Affect The Cost And Turnaround Time Of Hardback Book Printing?
When planning your hardback book printing, it’s important to understand what influences both cost and production time. Factors such as page count, printing method, materials, and finishes all play a part in determining your final budget and delivery schedule.
1. Page Count And Printing Method
The number of pages in your book directly affects cost and turnaround time. More pages mean more paper, longer print runs, and higher binding costs.
Your printing method also makes a difference:
Offset printing is ideal for large print runs, offering lower costs per unit once setup is complete.
Digital printing suits smaller quantities, with minimal setup but a slightly higher per-copy cost.
If your project has a very low page count, booklet printing can be a better fit, perfect for short stories, children’s books, zines, or small catalogues.
2. Unit Cost Considerations
The unit cost (cost per book) depends on several key factors, including:
Cover finishes and extras (like foiling or ribbon markers)
For instance, a 200-page black-and-white book will cost less per unit than a 100-page full-colour edition. Balancing these choices helps you stay on budget while maintaining quality.
3. Royalty And Profit Considerations
If you’re publishing commercially, factor in your royalty rates: the percentage earned from each sale. These rates vary based on publisher agreements and book pricing. Understanding production costs upfront allows you to price your book fairly while still earning a reasonable return.
Bring Your Hardback Book To Life With Ex Why Zed
If you’re looking for professional hardback book printing that blends creativity, quality, and care, Ex Why Zed is your ideal partner. We make it easy for authors, designers, and businesses to transform their ideas into beautifully bound books that leave a lasting impression.
Here’s what sets us apart:
Premium Quality: Every book is printed using top-tier digital and litho technology for exceptional colour accuracy and detail.
Sustainable Materials: All our papers are FSC certified, and we use eco-conscious inks to keep your project planet-friendly.
Short-Run & One-Off Options: Whether you need a single copy or a full print run, we deliver consistent quality every time.
Flexible Customisation: Choose from printed or cloth covers, silk or uncoated papers, foiling, ribbons, dust jackets, and more.
Free File Check: Our team reviews your artwork before production to ensure your book is perfectly print-ready.
UK-Based Expertise: With years of experience and a hands-on approach, we guide you through every step, from setup to delivery.
At Ex Why Zed, we don’t just print books; we help you create something worth keeping. Start your hardback book printing project today and see how easy it can be to turn your vision into a timeless, professionally finished masterpiece.
Ready To Get Started?Get in touch with our team to discuss your project, request a quote, or ask a question; we’re here to help you every step of the way.
Conclusion
Hardback book printing gives your work the durability, finish, and presence it deserves. Once you’ve chosen your paper options, finalised your design, and prepared your print file, the printing process becomes straightforward. Whether your project calls for a perfect bound softcover or a casebound edition, planning the inner pages and materials carefully will make all the difference to the final result.
Remember, hardbacks remain a popular choice for authors and creators who want long-lasting quality and visual impact. Once you’ve approved your files, a professional printer will take care of the rest, ensuring a smooth workflow and fast turnaround so your finished book arrives exactly as you envisioned, ready to be opened, displayed, and treasured.
Frequently Asked Questions
What are the benefits of printing a novel in hardcover?
Printing a novel in hardcover adds durability, elegance, and long-term value. It protects the pages from damage, enhances presentation, and appeals to collectors and readers who appreciate premium-quality editions that feel substantial and look professional on any shelf.
Is it possible to print a hardcover book on a regular printer?
A regular home printer cannot produce a true hardcover book. Professional hardback printing requires specialised binding equipment, durable materials, and precise alignment to create the rigid cover, spine, and finish that define a high-quality hardcover edition.
How much does hardback book printing typically cost?
The cost of hardback book printing depends on page count, paper type, colour options, and quantity. Prices are generally higher than paperbacks due to materials and binding, but bulk or short-run printing options make it affordable for various project sizes.
How long does it take to print and receive a hardback book?
Production time varies by project, but most hardback books are printed and delivered within seven to ten working days. Custom finishes, complex designs, or large quantities may take slightly longer to ensure quality and consistency in every copy.
Can I order a small print run of hardback books in the UK?
Yes, small or short-run hardback book printing is available in the UK. This option is ideal for authors, artists, and businesses who want professional-quality books in limited quantities without the high setup costs of traditional large-volume printing.
Why are hardback books more expensive to print than paperback books?
Hardback books cost more to print because they use thicker cover materials, extra binding layers, and higher-grade finishes. The production process is more complex, ensuring strength and durability, which naturally increases cost but enhances overall quality and longevity.
“Ink captures moments the mind might lose.”
Every page in a journal is a canvas for memories, ideas, and reflections; an archive you can revisit whenever inspiration strikes. Journal printing isn’t just about hitting print; it’s a carefully curated process that brings your creation to life.
Whether you're printing a poetry collection or a sketchbook, understanding how each element fits together is key to making your journal truly special.
In this blog, we’ll walk you through the steps of choosing paper, setting up layouts, and final touches to help you print professional-quality journals without the guesswork. Ready to bring your ideas to life on paper? Let's begin!
What Is Journal Printing?
Journal printing is the art of transforming your creative vision into a tangible, custom-made product. From vibrant cover designs to carefully crafted layouts, this process lets you personalize every aspect, ensuring your journal stands out. Whether it’s for a meaningful gift, a promotional item, or a product to sell online, custom journal printing ensures your designs shine with exceptional quality.
And when it’s time to elevate your creation, Ex Why Zed, one of the top journal printing companies, is the only partner you need. With an unmatched commitment to quality and craftsmanship, we bring your custom journal to life from concept to creation with precision. From premium papers to meticulous printing techniques, Ex Why Zed ensures your journal isn’t just printed; it’s brought to life in a way that’s as unique and personal as your design.
Who Is the Target Audience of My Journal?
Thinking of printing your journal? Great, but before choosing paper stock or print finishes, ask yourself: Who will hold this journal in their hands? Identifying your target audience is the cornerstone of meaningful journal design. A journal meant for mindfulness enthusiasts will look and feel entirely different from one created for design students, workshop attendees, or executive teams.
Teens and creatives might gravitate toward vibrant covers, dot-grid pages, or open-format interiors for sketching and free writing. In contrast, corporate users may prefer minimalist branding, ruled pages, and date headers for structured note-taking. By tailoring your design to a specific audience, your journal won’t just be printed; it’ll be purposeful.
How to Choose the Right Materials for Your Journal?
Once you are aware of your target audience, it's time to focus on choosing the right materials for your journal. From selecting the best paper to opting for the perfect binding options, the materials you select will impact both the look and usability of your next journal.
1. Choosing the Right Paper for Your Custom Journal
The paper you choose will affect how your journal feels and performs. For durability, thicker paper (70lb to 80lb uncoated) prevents ink bleed-through and gives your journal a substantial feel. If you're looking for smooth writing, uncoated paper is ideal for use with a pen or pencil. Blank pages are perfect for free expression, while notepad layouts provide a structured format for lists and detailed notes.
When choosing paper for your custom journal, Ex Why Zed offers high-quality options to suit every need. From smooth, uncoated paper for easy writing to eco-friendly recycled choices, we have got you covered. You can also choose silk or gloss finishes for a refined touch. With options ranging from 70lb uncoated to 300 gsm, Ex Why Zed ensures your journal is both functional and a pleasure to use.
2. Hardcover vs. Softcover: Which Is Right for Your Journal?
Your journal’s cover determines its feel and longevity. Hardcover is sturdy, offering a clean, professional finish that lasts. They’re perfect for high-quality, long-term use. Softcover journals, however, are lighter and more portable, making them ideal for on-the-go use or when shipping in bulk.
Your choice depends on the purpose: whether you need durability or easy portability.
3. Selecting the Best Journal Binding
Binding impacts both the look and usability of your journal. Perfect binding gives a sleek, polished finish that is ideal for paperback journals. For a more flexible option, spiral binding allows the journal to lie flat, making it easier to write in. Each binding method offers distinct advantages, so choose one based on how you want your journal to feel and how your audience will use it.
At Ex Why Zed, we help ensure your journal receives the perfect finish. Whether you choose perfect or spiral binding, our expert team will guide you in selecting the ideal option. With high-quality printing and quick turnaround times, Ex Why Zed guarantees exceptional results every time. Check out our binding options now!
How to Print Journals Step-by-Step?
Printing journals is simple. Just follow the steps below, and you will be good to go.
Step 1: Designing Your Journal Layout
Designing your journal layout is the first creative step toward bringing your vision to life. This is where you can experiment with different styles, fonts, and layouts that reflect your journal’s purpose. Whether it’s a simple, lined format or a creative, free-flowing design, the layout sets the tone for the entire journal. Keep in mind both functionality and aesthetics to ensure it’s easy to write in.
Pointers to Consider:
Font Selection: Choose readable fonts for body text and bold fonts for headings.
Margins & Spacing: Ensure there’s enough space for notes or doodles.
Page Layout: Decide whether you want one page or a spread design.
Numbering: Ensure pages are numbered for easy navigation.
Step 2: Preparing Files for Printing
Once your layout is finalised, it’s crucial to prepare your files correctly for printing. This step ensures that your design translates perfectly to the printed page. Ensure your files are high-resolution, properly formatted, and meet the printer’s requirements to avoid any issues. Having everything set up perfectly ensures smooth production and high-quality results.
Pointers to Consider:
File Format: Save your file as a high-quality PDF or TIFF for clarity.
Resolution: Ensure your images are at least 300 DPI for crisp printing.
Bleed Area: Extend the design slightly beyond the page border to avoid white edges.
Proofread: Double-check for spelling errors, alignment issues, and image clarity.
Step 3: Choosing a Printing Method
Now that your files are ready, decide on a printing method that suits your journal’s purpose and budget. The two most common options are digital printing and offset printing.
Pointers to Consider:
Digital Printing: Best for small batches and quick turnaround. Ideal for short-run journals or test versions.
Offset Printing: More cost-effective for large runs. Offers consistent color quality and durability.
Color Choices: Decide whether you want full-color or black-and-white printing.
Paper Type Compatibility: Make sure the method supports your chosen paper type and finish.
Step 4: Finalizing Print Specs and Placing the Order
After choosing a printing method, finalise the specifics of your journal, including paper size, binding type, cover finish, and quantity. This step ensures everything is communicated clearly to your printer to avoid delays or errors.
Pointers to Consider:
Trim Size: Confirm the final size of your journal after cutting.
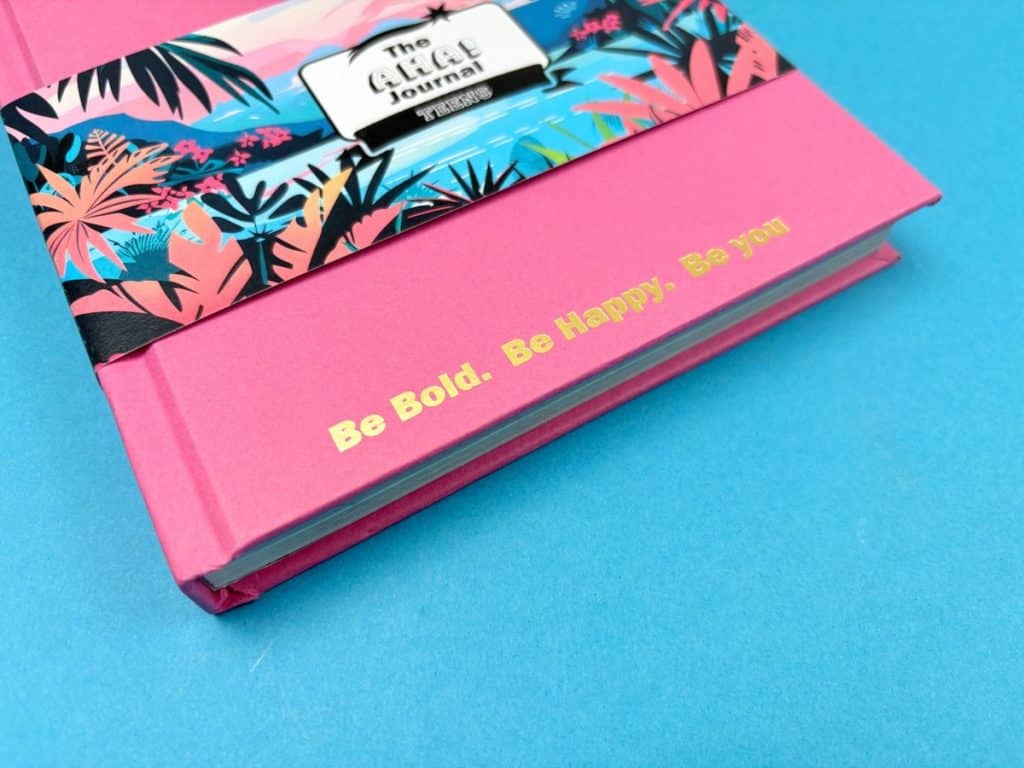
Binding Style: Choose from perfect, hardback, or saddle-stitch binding. For hardback binding, you can choose glued inside pages, like the pink journal example above, or section sewn inside pages like below. Glued is a lot cheaper but for a journal, section sewing the insides so they are literally sewn in will enable to end-user to press the pages flatter when they come to write their notes.
Cover Finish: Decide between matte print, gloss print, or soft-touch lamination.
Quantity: Order based on your needs—whether personal use or bulk distribution.
Lead Time: Check estimated turnaround and delivery times.
Step 5: Reviewing Proofs Before Final Production
Before mass production begins, request a digital or physical proof to ensure everything looks exactly how you envisioned. This is your chance to catch any final mistakes and confirm print accuracy.
Pointers to Consider:
Proof Type: Choose between soft proof (PDF) or hard proof (physical sample).
Review Checklist: Double-check margins, color fidelity, font clarity, and image placement.
Final Approval: Only give the go-ahead once you’re completely satisfied.
Adjustments: Make any last-minute tweaks before full production starts.
Bring Your Journal Vision to Life with Ex Why Zed
If you are thinking where to print journals, consider Ex Why Zed for all your printing needs. We are your trusted partner in making every page count. Whether you’re crafting a personal journal, creating a gift, or building a promotional item, Ex Why Zed brings your ideas to life with precision. Our expertise in print, paired with a keen eye for quality, ensures that your journal not only looks great but feels extraordinary.
With a wide range of premium paper options, professional binding, and quick turnarounds, Ex Why Zed guarantees that your custom journal will exceed expectations. Choose us for your next project, and experience the difference of print made with passion and care. Get a quote now.
Conclusion
Printing a custom journal is more than a production task; it’s the final step in turning ideas into something tangible and lasting. By carefully designing your layout, preparing print-ready files, and choosing the right materials, you ensure every page looks and feels precisely as you envisioned.
Additionally, from personal keepsakes to branded products, a well-printed journal elevates your message, delights your audience, and stands the test of daily use. Now that you have the roadmap, all that’s left is to press “print” and watch your concept become a beautifully bound reality.
Frequently Asked Questions
What is the best paper for journal printing?
For custom journal printing, uncoated paper works well for blank pages and notepads. It is smooth, allowing you to write on it easily. The paper makes the final product suitable for both sketches and notes. A thick stock, such as 70lb-80lb paper, helps the pages last longer. This does not make your journal cover too heavy or oversized.
Can I print journals at home, or should I use a professional service?
Printing at home works for small batches. But professional services can help make high-quality products. They also handle shipping, ensuring that everything arrives on time and in good condition.
How many copies should I print for personal or business use?
For your own use, it is best to start with just one or two custom journals. If you run a business, check the demand on sites like Amazon. This helps you avoid trouble with shipping and fulfillment. Custom journal printing gives you more choices, no matter if you work on a large or small scale. It helps you manage your inventory practically and effectively.
What are the common mistakes to avoid when printing journals?
Be aware of a few key considerations when ordering custom journal printing. These include not adding bleed margins to artwork files, selecting the wrong type of binding (such as not using perfect binding for a professional look), and ignoring the design of the journal cover. When you use the right specifications for printing your custom journal, the final product is more likely to turn out how you want.
Our cherished moments and memories are like treasured gems that deserve to be preserved meticulously. In today's era, we have managed to bottle up these moments in photographs, but often, they are left in the digital world, seldom glanced at or appreciated. An innovative and elegant solution to this is a hardback photo book. These aesthetically pleasing compilations are more than just albums; they are personal galleries that celebrate our lives, milestones, and everyday joys. A hardback photo book brings your digital memories to life, providing them with a physicality that makes them tangible and enduring.
This blog aims to delve into the exquisite world of hardback photo books, guiding you through different types, how to design one, and how to maintain it, ensuring every precious moment is vividly alive within its pages. Whether for personal use or as a thoughtful gift, let's unravel how to immortalise our fleeting moments into a stunning hardback photo book.
What are Hardback Photo Books?
A hardback photo book is a high-quality album with sturdy covers that provide durability and protection for your cherished photos. These books offer a professional look and feel, making them ideal for preserving special memories for years to come.
What are the Different Types of Hardback Photo Books?
There are various types of hardback photobooks available, each catering to different styles and preferences. Be it an elegant standard hardcover for your travel snapshots, a sleek layflat hardcover to showcase your wedding memories seamlessly, or a timeless leather hardcover for a family photo album that exudes class and sophistication. Each type of hardback photo book offers a unique touch to your photos, allowing you to choose the one that best captures the essence of your favourite memories. Let us look at them in detail:
Standard Hardcover
A standard hardcover photo book is popular due to its classic design and robust structure. This type of photo book shines in its versatility, making it suitable for almost any occasion – from family albums and travel adventures to professional portfolios.
Additionally, it offers room for personalisation on the cover, giving you an opportunity to feature your best shot or a chic design. With its durability and class, the standard hardback photo books ensure a perfect harmony of function and aesthetics.
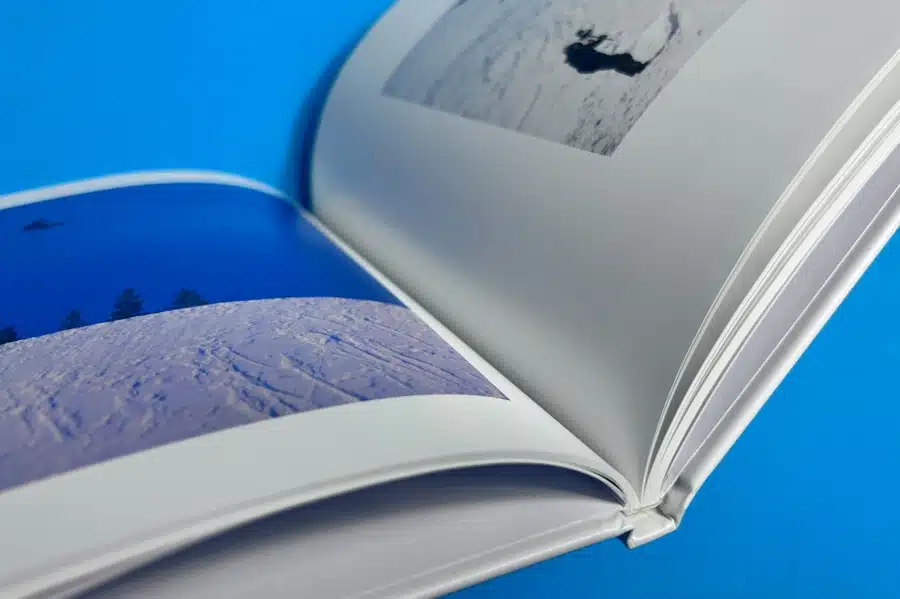
Layflat Hardcover
Want to bring those panoramic shots to life or give your photographs an interrupted full-page display? The layflat photo book is the way to go. As the name suggests, it opens flat, letting your photos stretch across both pages without any break in the spine, allowing a continuous flow of visuals.
This process is achieved at Ex Wy Zed by section sewing the inside pages. Yes, literally sewing the pages in. This gives maximum resilience and allows the reader to open and press the pages flat without any risk of them 'popping out' from the spine.
This allows you to fully appreciate landscapes, group photos or any large image uninterrupted, adding an exclusiveness to your photo viewing experience. It's a fantastic option for travelogues, weddings, or any event with high-impact visuals.
Leather Hardcover
High Impact Photo or your name in lights? Which do you think is the best choice for an engaging photobook cover?
Apt for those who appreciate timeless elegance and luxury, the leather hardcover photo book is the essence of sophistication. The leather-bound hardcover provides added durability and gives the book a vintage charm that pairs well with monochrome photographs or historical snapshots.
If you wish to create a family heirloom or are searching for a special gift for anniversaries or significant milestones, the leather hardcover option is certainly worth considering. Its high-end appeal adds an aura of prestige to your precious memories and keeps them secure for decades.
We buy all of our cover materials from Winter & Company. Check out their range for hundreds of ideas on colour, texture and finish.
How to Design Your Hardback Photo Book
Designing a hardback photo book includes multiple steps, each adding a personalised touch to your creation. Using online editors or photo book makers like Ex Why Zed, you can create a bespoke photo book as a self-curated gallery of your favourite moments. To achieve the best outcome, it is essential to consider the following steps:
Choosing a theme
The theme of your photo book provides a conceptual framework around which your photos are organised. It sets the tone of your narrative and gives your photo book an aesthetic coherence. Themes can be tied to occasions (e.g., weddings, birthdays), locations (e.g., travel photo books), people (e.g., family photo albums), or even timeframes (e.g., yearbooks).
Selecting a theme that aligns with your photos ensures a compelling narrative flow and provides a more holistic experience to anyone flipping through the book.
Selecting the layout
The layout plays a crucial role in determining how your photos are displayed and interacted with. This considers factors like the number of images per page, positioning, orientation, and size. While more photos per page give a collage effect, a single photo per page allows singular focus. A mix of both can provide variety and interest.
Moreover, the layout must be selected strategically to enhance the visual impact of your photos. For instance, wide landscape shots might work best on a two-page spread in a layflat photobook.
Customising the cover
The cover of your hardback photo book is the first point of engagement, making it important to customise it thoughtfully. Your cover image should represent the content inside, and its design should reflect the theme of your photo book.
Be it a significant photo, minimalist design, or an impactful title, ensure it piques the viewer's interest. Some photo book makers also offer options like gloss or matte finishes and add-ons like foil or embossed titling for an additional professional touch.
How to Use Hardback Photo Books for Various Occasions
Hardback photo books offer flexibility in usage and can be customised for a myriad of occasions. They can narrate the story of a beautiful wedding, encapsulate the excitement of globetrotting adventures, or embrace the joy encompassed in family gatherings. They transcend the restrictions of being just albums and transform into timeless keepsakes, celebration memorials, or sentimental gifts. Here are a few ideas on how you can create hardback photo books specific to various occasions:
Wedding photo books
A wedding is an emotional rollercoaster packed with picturesque moments. A hardback photo book provides a beautiful platform to chronicle all these memories – from the laughter and tears to the intimate details. You can design it as a narrative that takes one through the journey of the wedding day or as a collection of the best shots. These wedding photo albums can be cherished as personal keepsakes or shared with loved ones as a wonderful reminder of your special day.
Travel photo books
Venturesome journeys through unknown lands create memories that are worth cherishing forever. A travel-themed hardback photo book can be an engaging diary of your exploration. Featuring significant landmarks, breathtaking panoramas, local experiences or memorable incidents, a travel photo book captures the essence of your journey.
Not only does it allow you to relive your adventures, but it also serves as an inspirational coffee table book, stirring up an intriguing conversation with guests about your travels.
Family photo books
Family is at the heart of our most precious moments, and a family-themed photo book curates these into a single-bound tribute. This could encompass holiday traditions, birthdays, anniversaries, or simply everyday snippets of love and laughter. A personalised hardback family photo book sprinkled with candid shots, humorous moments, and cosy bonding communicates the warmth and charm of familial bonds.
It can be an endearing keepsake that embraces the joys of togetherness and celebrates the love that makes a family, a family.
Hardback Book Pinterest Board
For stacks more inspiration on what can be achieved, dive into our pinterest board and enjoy seeing what your peers have achieved in terms of page layout, finish and winning print specs for their hardback photo book printing.
How to Take Care of Your Hardback Photo Book?
Here are some essential tips to ensure the longevity and beauty of your hardback photo book:
Storing your photo book
Proper storage is paramount to the preservation of your hardback photo book. Here are some recommendations:
Avoid Extreme Conditions: Store your photo books in a place with controlled temperature and humidity, as fluctuations can damage them.
Stay Away from Sunlight: Direct sunlight can cause fading or discolouration. Thus, keeping them out of immediate sunlight can prevent this.
Keep it Upright: Storing your photo books upright, just like other books on a bookshelf, helps maintain their shape and prevents unnecessary bending or warping.
Cleaning your photo book
Maintaining the cleanliness of your hardback photo book ensures that your memories continue to pop brightly off the pages. Here are some cleaning tips:
Wipe Gently: Use a soft, dry, and non-abrasive cloth to wipe your photo book. This aids in removing dust without scratching the surface.
Avoid Chemicals: Refrain from using harsh products or liquids for cleaning as these may damage the ink and paper.
Clean Hands: Always handle your photo books with clean hands to avoid smudging and oil marks.
Best Practices for a Timeless Keep Sake
Designing a hardback photo book is an art that combines creativity, storytelling, and craftsmanship. By following these best practices, you can create a timeless treasure that tells a story, resonates with emotions, and is a testament to printed memories' power. Whether you're a seasoned designer or a novice, remember that every photo book is a journey – one that's worth every page turn.
Prioritise Quality Imagery: Your photo book's essence lies in its images. Ensure you use high-resolution, impactful photographs that captivate the viewer. Remember, every image should tell a story, evoke an emotion, or capture a moment in time.
Embrace Diverse Themes: Variety is the spice of life. Incorporate a range of subjects and themes to keep the content fresh and engaging. From landscapes to portraits, from candid moments to staged shots, diversity will enrich the reader's experience.
Highlight Historical Significance: Every photo has a backstory. Use captions, annotations, or short narratives to provide context. This not only adds depth to the images but also helps in preserving memories and moments in history.
Artistic Presentation is Key: A unique layout, artistic design, and thoughtful sequencing can set your photo book apart. Experiment with layouts, use complementary colours and ensure a coherent flow to guide the reader through a visual journey.
Delve Deep into Themes: If your hardback photo book revolves around a specific theme or subject, provide comprehensive insights. This enriches the reader's experience and offers a more profound connection to the content.
Celebrate Iconic Moments: Highlight and celebrate iconic moments or figures that resonate with a wide audience. This can evoke nostalgia and make the book more relatable.
Collaborate for Quality: Consider collaborating with professional photographers, designers, or writers. Their expertise can elevate the quality of your photo book, ensuring it's top-notch.
Invest in Archival Quality: A photo book is often a keepsake. Prioritise the use of high-quality materials that ensure longevity, from the paper quality to the binding and cover.
Narrative Flow Matters: A coherent story or theme should guide the reader. Whether it's chronological, thematic, or abstract, ensure there's a seamless flow that enhances the visual and informational journey.
Create Your Hardback Photo Book Online with Ex Why Zed
Creating your own hardback photo book is simpler than ever with platforms like 'Ex Why Zed'.
We allow you to design a photo book that not only houses your memories but also reflects your style. With high-quality prints, a wide variety of formats and sizes, and the ability to personalise every aspect of your book from the comfort of your home, 'Ex Why Zed' has made the process of creating a hardback photo book very user-friendly. So whether it's for you or as a thoughtful gift, create an everlasting memoir using Ex Why Zed.
Ready to transform your photos into timeless treasures? Get a Quote Today!
Final Thoughts
Nothing compares to the joy of turning the pages of a hardback photo book, feeling the printed texture of memories under your fingertips, and allowing every photo to narrate a precious moment from your life. Even in our digitised world, the charm of a physical photo book hasn't faded; rather, it's become even more special. From standard, leather to layflat hardcovers, each type provides robust protection, ensuring your pictures remain preserved in prime condition throughout the years.
Furthermore, the process of designing your hardback photo book is now made surprisingly easy with online platforms, where one can put together a personalised photo book right from home. It puts you at the helm, where you can choose themes, lay out your photos, and customise your cover, as well as the entire book. This flexibility in design, coupled with superior printing quality, allows your photos to truly come to life, immortalising the emotions encompassed within them. With their aesthetic appeal and bespoke design, a personalised photo album truly celebrates your life's adventures and cherished moments, making them an exquisite addition to your bookshelf or coffee table.
Frequently Asked Questions
How long does it take to create a hardback photo book?
The time to create a hardback photo book varies depending on the number of photos and the layout and design complexity. However, online editors and convenient photo book makers make it possible to design and order a personalised hardback photo book within hours.
What is the cost of a hardback photo book?
The price of a hardback photobook can vary based on size, quality of paper, cover material and the number of pages. The cost can range from a few pounds for smaller, simpler photobooks to over fifty pounds for larger, premium photo books.
How can I ensure my photos are printed to the best quality?
Ensuring your photos are of high resolution is crucial for excellent print quality. Using professional online photo editing tools can enhance the brightness, contrast and sharpness of your images. Choosing a good-quality photo paper and a reputable printing service can also significantly impact the final outcome.
Can I add messages to my personalised photo book?
Yes, most online photo book makers provide options for adding text or messages within your book. This allows you to describe images and add anecdotes or personal notes, making your photo book more intimate and comprehensive. The text's font, size and positioning can also usually be customised.
How long does it take to make a photo book?
The process time of creating a photo book depends on factors like the number of photos, the complexity of the design and layout, and the speed of the maker's interface. One can create a basic photo book within minutes to hours with easy-to-use online platforms.
Why should you choose hardback over softcover photo books?
Choose hardback over softcover photo books to preserve your memories in style for durability and elegance. Hardbacks offer superior protection, lasting quality, and a luxurious feel that elevates your precious moments. Opt for hardback for a timeless display of your cherished photos.
Are you looking to elevate the presentation of your written works or personal projects? Hardback binding might just be the solution you've been searching for. In this comprehensive guide, we delve into the intricate art of hardback binding, exploring the materials and tools essential for a successful endeavour. From selecting cover materials to understanding different paper types and weights, we've got you covered every step of the way.
Follow our expert step-by-step instructions to master the hardback binding process, ensuring a professional and durable finish. Discover the nuances of creating endpapers, attaching book blocks, and adding those final touches that truly make your project shine.
Let's set foot in the world of binding, where durability meets aesthetics to make physical copies of your work stand out. Stay tuned for valuable insights into achieving top-quality hardback binding results!
What are the Materials and Tools Used for Hardback Binding?
Hardback binding requires specific materials and tools to get the job done correctly. Be it the right quality of paper or the suitable glue; every material plays a critical role. These include the cover material, different paper types, and weights depending upon the need and usage of the book, as well as binding tools such as bone folders, brushes, and cutters. Let's discuss these in detail.
Classy, durable and with a textured surface - ideal for premium books and albums but less adept at taking foiling on it's coarse surface.
A closer look at Wibalin Natural
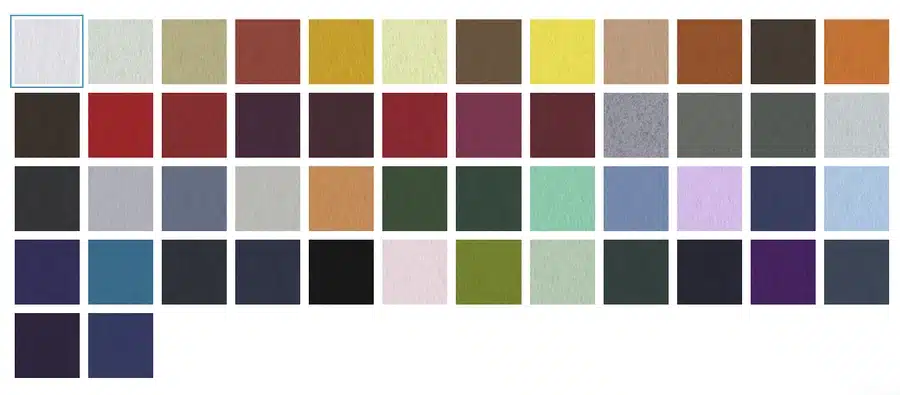
Wibalin® Natural by Winter & Company is a high-quality, uncoated, dyed-through paper that is 100% recyclable. Available in 50 vibrant colours, it serves as an excellent choice for book covers, premium packaging, stationery, hang tags, and labels. Its versatility allows for various printing techniques, including offset, digital, and screen printing, as well as finishing options like blind or hot foil stamping. Produced according to ISO 14001 standards, Wibalin® Natural is FSC™ certified (FSC-C007992), vegan, and REACH compliant, making it an environmentally responsible option for high-quality cover work.
Paper Types and Weights
Paper Type
Usage
90gsm Uncoated
Lightweight, ideal for black and white documents like thesis. Think, photocopier paper thickness.
120gsm Uncoated
Good for coloured documents, business reports
130gsm Silk
Gives a professional sheen, fitting for colour-printed books
Essential Binding Tools
Binding tools are indispensable for a successful binding process. Some of the vital tools include:
Bone folders, a versatile tool for folding and creasing.
Knives and cutters for clean and precise cuts.
Brushes to apply the glue evenly without any lumps.
A binding press or clamps to hold everything together while drying.
An awl or punch to make holes for threading in Smyth-Sewn binding.
Step-by-Step Guide to Hardback Binding
Ready to transform your written words into a tangible, beautiful book? This step-by-step guide will walk you through the process of hardback bookbinding. From preparing your pages to adding the finishing touches, you'll learn how to create a unique and personalised book that you can cherish for years to come. Let's get started.
Step 1: Prepare the Pages for Binding
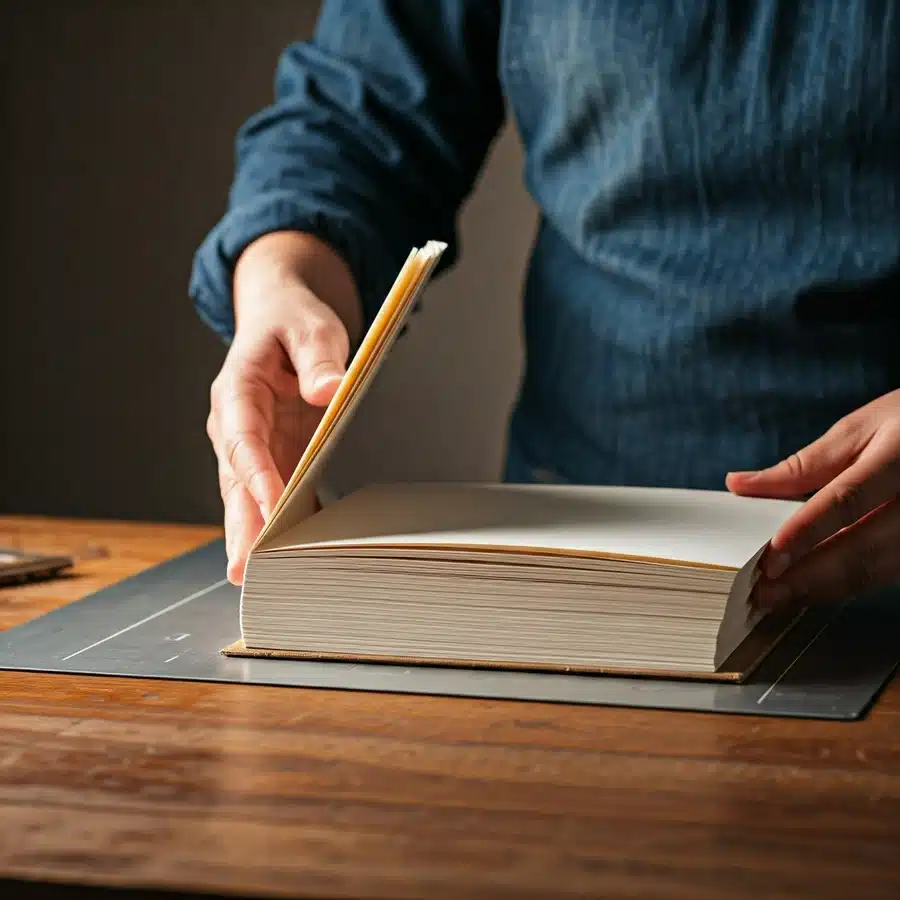
Before we dive into the binding process, it's essential to prepare your pages. This involves collating your printed pages, ensuring they're in the correct order, and making any necessary adjustments to the page edges. Let's get started!
Print and Trim the Pages
To start the hardback binding process, the pages need careful printing and trimming. Precision is key in ensuring a professional finish. Whether it's for a thesis or a dissertation, accurate trimming is crucial for a polished outcome. The front cover, back cover, and book spine should all align perfectly once the pages are trimmed to size. This step sets the foundation for the entire binding process to follow. Utilise the right tools and techniques for crisp edges and a tidy final product.
Align the Pages
Ensure precise alignment of the pages before binding to maintain a professional look. Utilise a straightedge or aligning tool for accuracy. Proper page alignment is crucial for a flawless end result, especially in perfect binding. Pay attention to the edges and corners to avoid any misalignments that can detract from the overall quality of the final hardback binding. Take your time with this step to guarantee a clean and polished finish.
Sew or Glue the Pages
To ensure a secure binding, consider either sewing or glueing the pages together. Sewing provides durability and flexibility, ideal for thick or frequently referenced books. Conversely, Glueing offers a simpler and quicker method, often preferred for lightweight publications like booklets. Experiment with both techniques to find what suits your project best. Remember, the choice between sewing and glueing impacts the overall quality and longevity of your hardback binding. Explore different options before proceeding with your final decision.
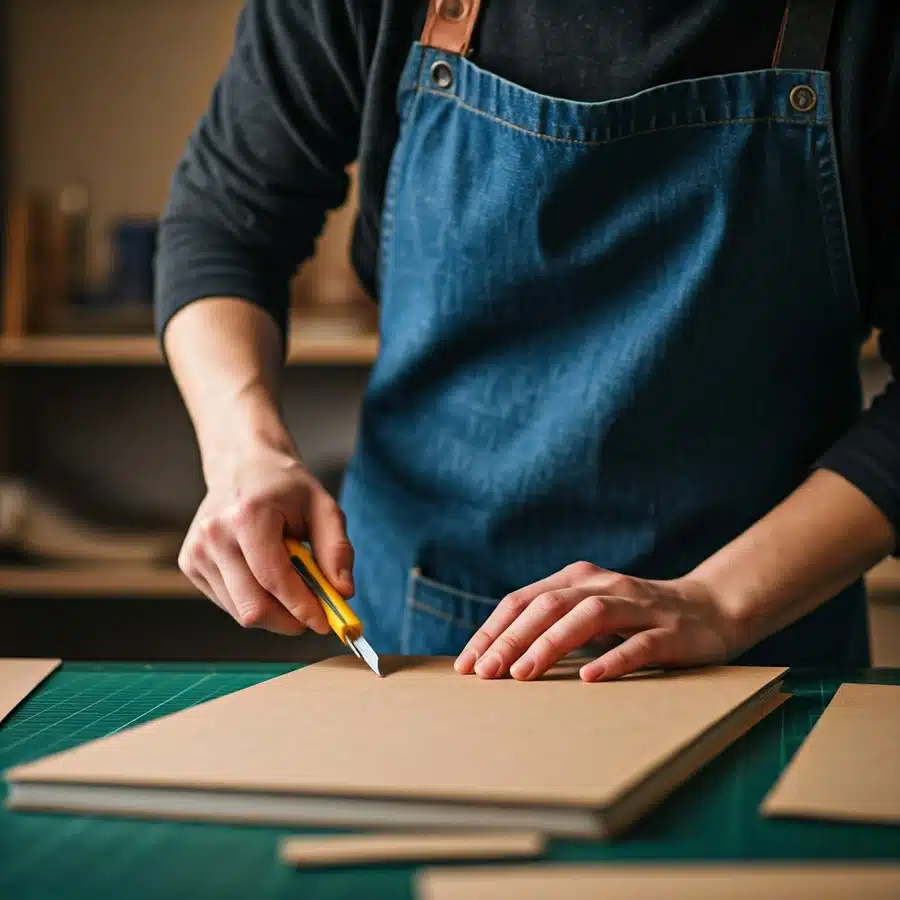
Step 2: Prepare the Cover Board
The cover board is the backbone of your hardbound book. In this step, we'll guide you through the process of selecting the right materials, cutting the boards to size, and preparing them for the binding process. A strong and well-constructed cover will protect your book for years to come.
Select and Cut the Cover Boards as well as the Spine Board
For hardback binding, selecting and cutting the cover boards and spine boards is crucial. Choose durable materials for longevity. Cut the boards to the appropriate size, ensuring they fit the book snugly. The spine board is essential for the book's structural integrity. Precision in cutting is key to achieving a professional look. Take time to measure accurately and use sharp tools for clean cuts. Careful selection and cutting set the foundation for a well-bound hardback book.
Step 3: Choose and Prepare the Cover Material
The cover material is the face of your book. In this step, we'll explore various options for covering your book boards, from classic cloth to modern faux leather. We'll also discuss how to cut and apply the cover material to create a professional and attractive finish.
Select a Cover Material
When selecting a cover material for hardback binding, consider options like durable hard covers or flexible soft covers. Choose materials that complement your content, whether it's for reference books or artistic thesis projects. Ensure the cover colour and printing match the theme. In the UK, London-based services offer a range of cover options for booklets and dissertations.
Cut the Cover Material
When cutting the cover material for hardback binding, precision is key. Use a sharp blade and a cutting mat to ensure clean edges. Measure and mark the material according to the size of your book covers, adding extra for wrapping around the edges. Carefully trim along the marked lines to create precise covers for your hardback project. This step is crucial for achieving a professional and polished look for your finished book.
Glue the Cover Material to the Boards
To secure the cover material to the boards, apply a thin, even layer of adhesive using a brush or roller for a smooth finish. Carefully position the cover material over the boards, starting from one edge, to prevent wrinkles or bubbles. Press firmly to ensure proper adhesion, especially around the edges and spine. Trim any excess material for a clean look. Allow sufficient drying time before proceeding to the next step in the hardback binding process.
Wrap the Edges
To wrap the edges of a hardback binding, carefully fold the cover material over the boards' edges. Ensure a snug fit without bunching or overstretching. Use a bone folder to create crisp, neat folds for a professional finish. Secure the material by applying adhesive along the edges before neatly folding it in place. This step not only reinforces the durability of the binding but also adds a polished look to the overall presentation of the hardback book. Mastering this technique elevates your hardback binding project's aesthetic appeal and longevity.
Step 4: Attach the Book Block to the Cover
Now that we have our prepared book block and cover, it's time to combine them. This step involves attaching the book block to the cover, ensuring a strong and durable bond. We'll guide you through the process of glueing and pressing the book to achieve a professional finish.
Create Endpapers
To create endpapers, select a durable paper that complements your hardback binding. Endpapers provide a strong foundation and aesthetic appeal to your book. They are crucial for reinforcing the front and back covers, ensuring a professional finish. Carefully glue the endpapers to the book block, aligning them neatly for a seamless look. This step enhances the overall durability and presentation of your hardbound masterpiece. Choose quality endpapers that elevate the visual appeal and longevity of your project.
Glue Endpapers to the Book Block
To secure the endpapers to the book block, carefully apply a thin layer of adhesive on the trimmed endpaper edges. Position the pasted side of the endpapers against the first and last pages, ensuring a smooth attachment without any creases. Gently press the endpapers onto the pages to guarantee a firm bond, taking care not to affect the paper quality. This process contributes significantly to the hardback binding's overall stability and aesthetic appeal.
Attach the Book Block to the Cover
Carefully align the book block with the prepared cover. Securely attach the book block by glueing the endpapers to it, ensuring a tight bond. Press gently to set the binding in place and allow adequate drying time. Monitor the alignment and binding security to guarantee a professional finish. Add any final embellishments or trim excess material for a polished look. This step is critical in ensuring the durability and quality of the hardback binding. Success lies in meticulous attention to detail.
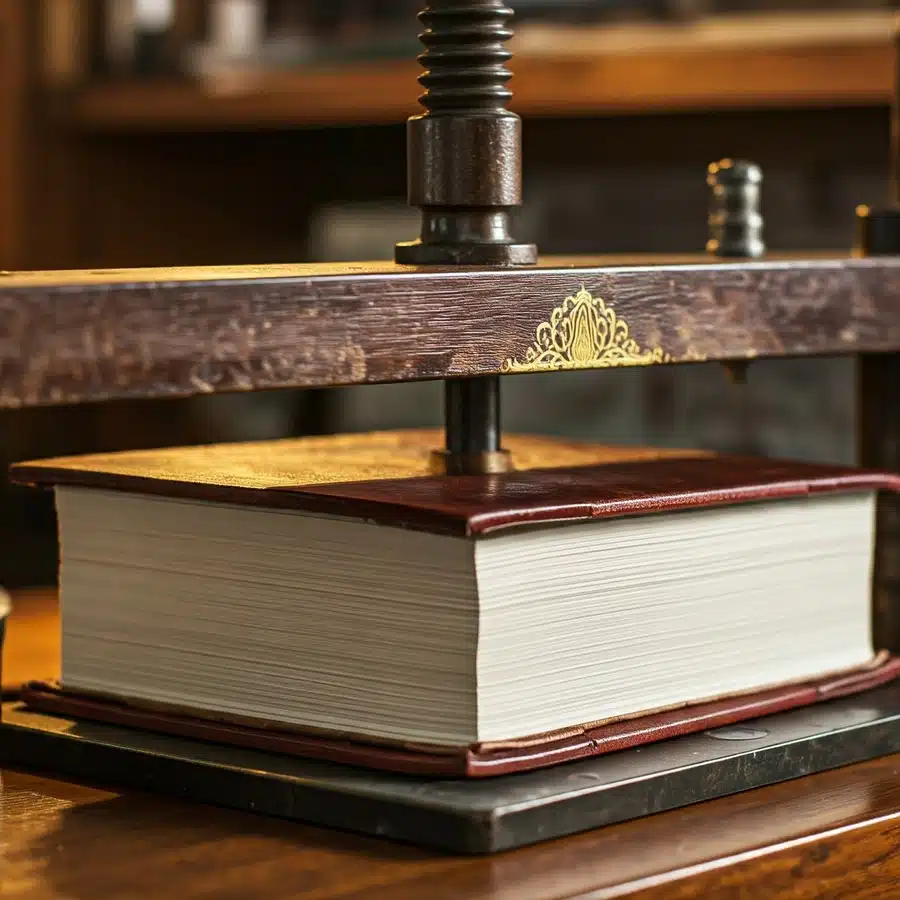
Step 5: Press and Let the Book Dry
After carefully assembling the book, pivotal step involves pressing the hardback to set the adhesive and allow it to dry thoroughly and firmly. This crucial step ensures that all components bond seamlessly, enhancing the finished product's durability. Patience is key here; allowing ample time for the book to dry naturally guarantees a professional outcome. A well-pressed and dried hardback speaks volumes about the precision and care invested in the binding process.
Step 6: Final Touches and Quality Check
The final step in the hardback binding process involves adding those finishing touches that elevate your book from good to great. We'll explore techniques like headbands, endpapers, and edge gilding to enhance the aesthetic appeal and durability of your book.
Check for Alignment and Binding Security
Inspecting alignment and binding security is crucial in hardback binding. Ensure the book spine aligns correctly with the front and back cover. Verify that all pages are secure and evenly bound within the cover. Additionally, check for any loose pages or potential weak spots in the binding. This attention to detail guarantees a professionally finished hardback book that looks appealing and stands the test of time. Quality checks in alignment and binding security are vital for a durable and aesthetically pleasing final product.
Add Finishing Touches
Take your hardback binding to the next level by adding elegant finishing touches. For a sophisticated touch, consider incorporating foil stamping or embossing on the front cover. Round off the look with a dust jacket for that extra layer of protection and style. These final details can elevate your hardcover book's aesthetic appeal, making it stand out on any shelf. Make sure to carefully inspect the alignment and overall quality before finalising your project. Finish strong with these expert touches.
Trim Excess Material (if necessary)
Removing excess material is crucial to give your hardback binding a professional finish. Using a sharp blade, carefully trim any protruding edges from the cover boards and book block to ensure a clean and neat appearance. Pay close attention to the corners and edges to maintain a consistent look. Precision in trimming excess material is key to enhancing the overall aesthetics and durability of your hardback-bound project. Always strive for a polished final product with no loose ends.
What are the 5 Most Common Types of Hardback Binding?
There are several types of hardback binding, each with its unique characteristics. The common types include Case-Bound Binding, Smyth-Sewn Binding, Perfect Binding, Library Binding, and Board Binding. Each type functions to cater to different requirements and purposes, offering a variety of aesthetics, durability, and functionality factors. Let's delve deeper into understanding these types.
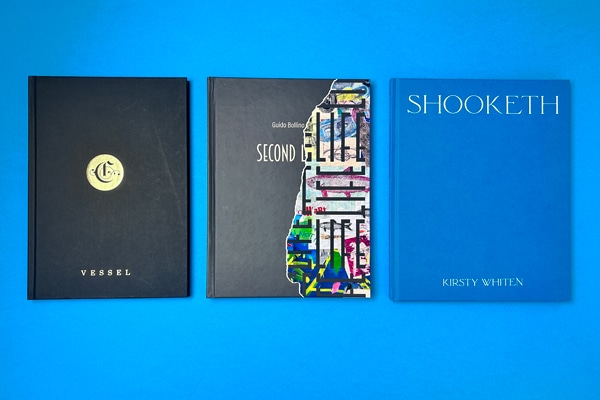
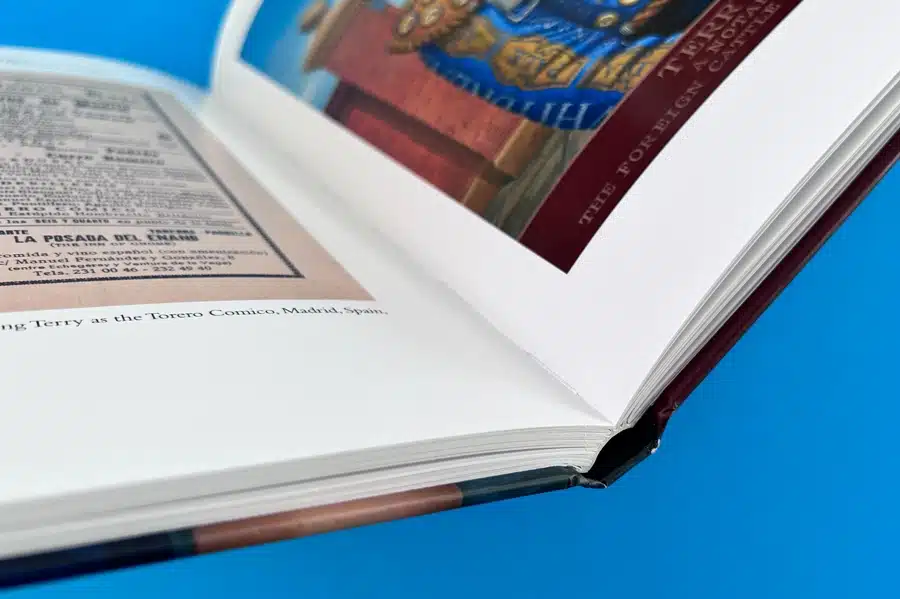
Examples of Successful Hardback Books from Ex Why Zed
To help you make informed print choices when you embark on your hardback book printing journey, we have curated, analysed and dissected a series of recent hardback book projects to show you what can be achieved.
Case-Bound Binding
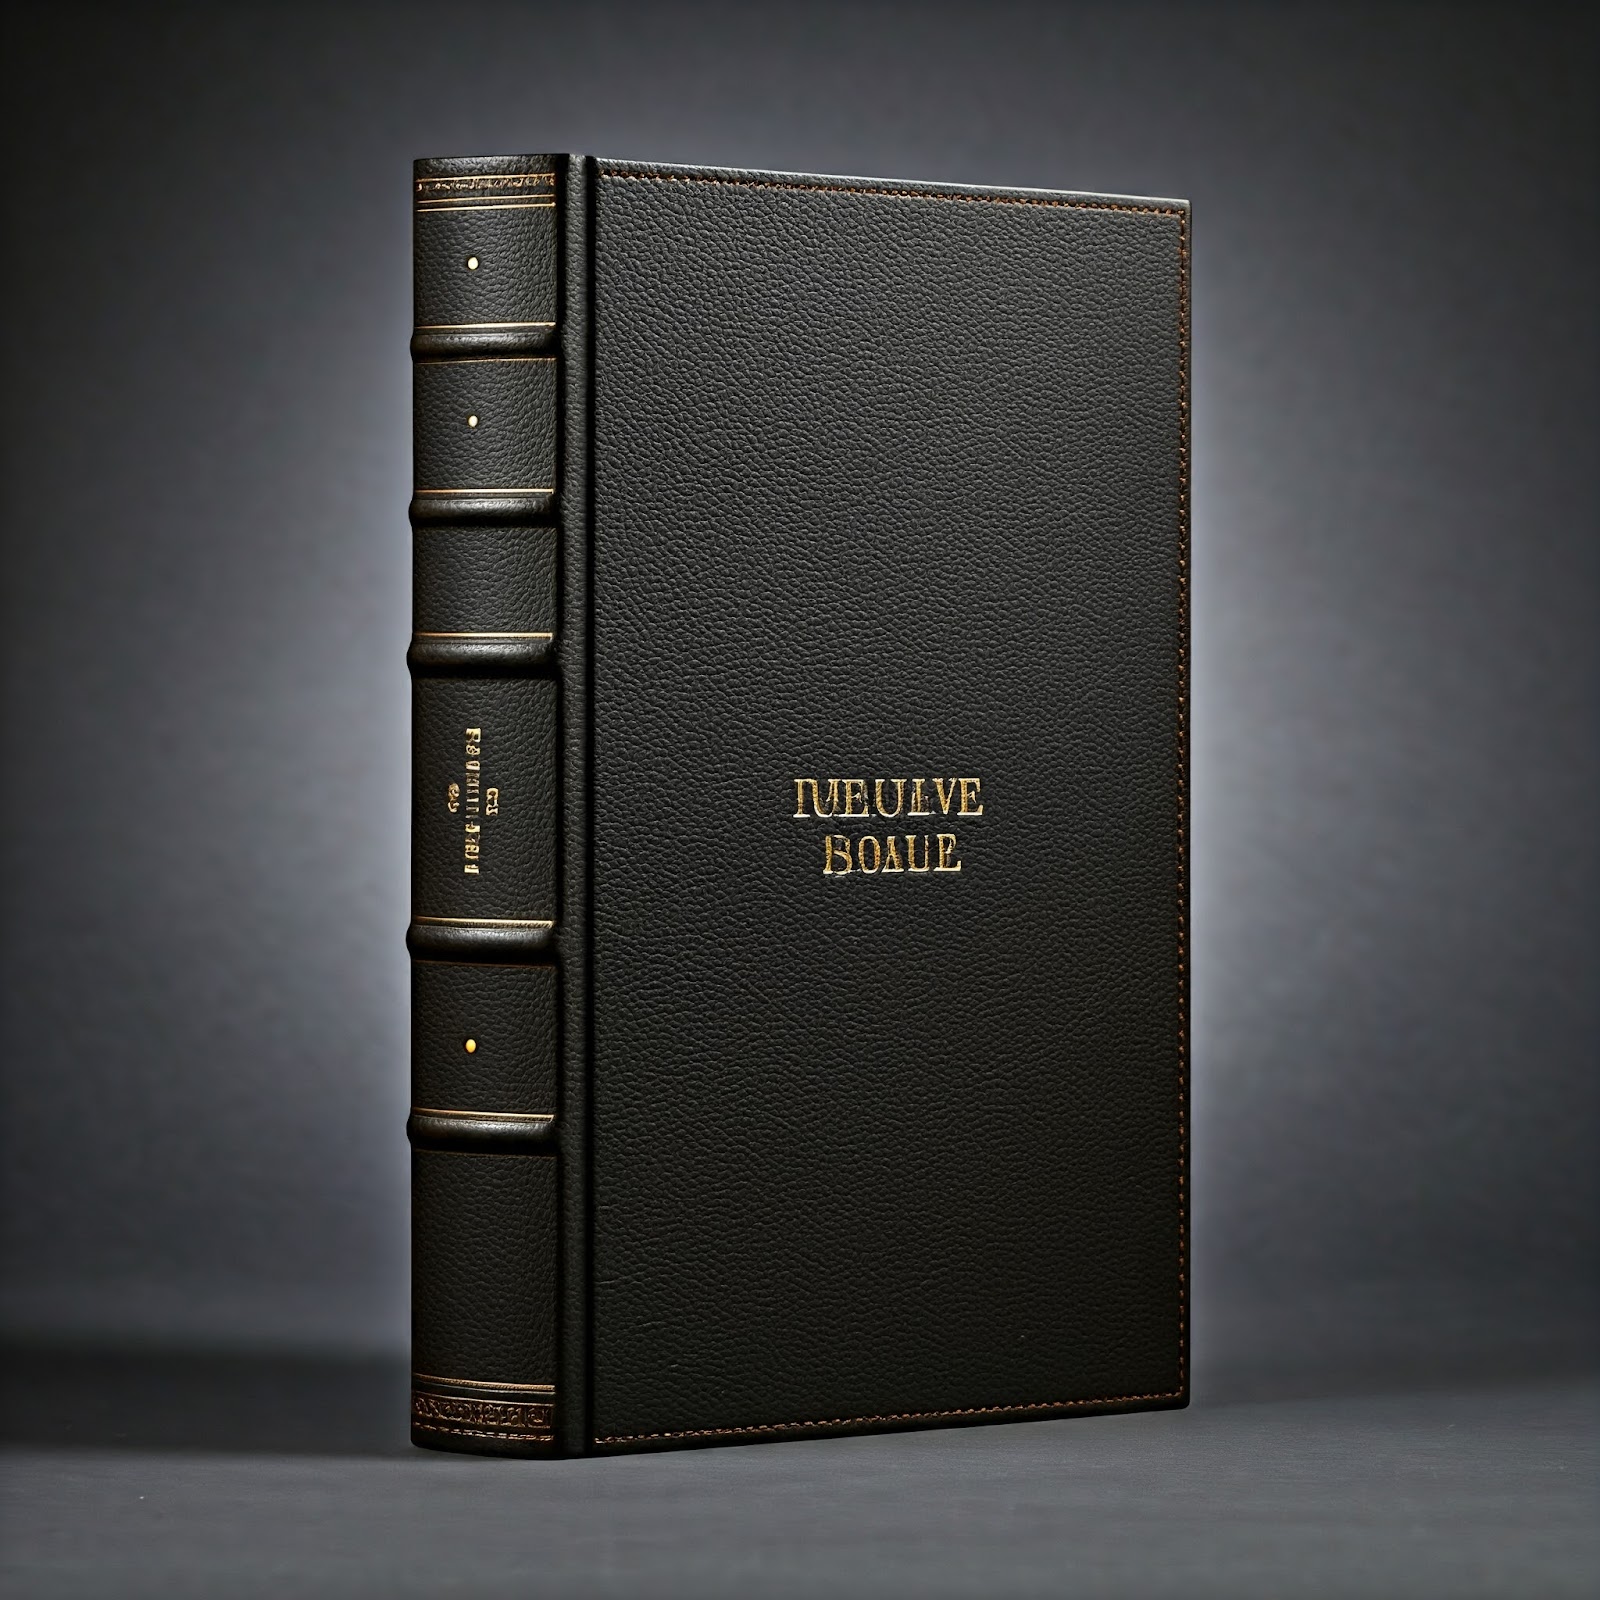
Case-bound binding, also known as hardcover binding, is a popular method for creating durable and professional-looking books. This technique involves attaching the book block to a sturdy cover made of rigid boards, typically wrapped with decorative materials like cloth or leather. Case binding ensures the book's longevity and enhances its aesthetic appeal, making it a preferred choice for high-quality publications such as novels, reference books, and art books. The process demands precision and attention to detail to achieve a flawless final product.
Smyth-Sewn Binding
Smyth-Sewn Binding is a durable and high-quality bookbinding method. It involves sewing together the gathered signatures of a book before attaching them to the cover. This technique ensures a strong and long-lasting binding that is commonly used for reference books and any publication requiring frequent use. The Smyth-Sewn Binding provides a professional finish, making it a preferred choice for those seeking a top-quality hardback binding solution.
Perfect Binding
When opting for perfect binding, the pages are glued to a cover along the spine, creating a clean and professional finish. This method is commonly used for paperback books, magazines, and catalogues, providing a sharp and modern look. Perfect binding offers a cost-effective solution for various printing projects, ensuring durability and a polished appearance. With its versatility in accommodating different paper weights and sizes, perfect binding is a popular choice for projects requiring a sleek and uniform finish.
Library Binding
Library Binding involves a durable, high-quality hardcover, making it ideal for reference books and dissertations. Typically seen in libraries, this method prioritises longevity and sturdiness. The process includes sturdy case binding that ensures the book's resilience. For reliable library binding, consider leveraging professional services that offer various delivery options. When opting for library binding, durability is key, guaranteeing that your content remains intact for an extended period.
Board Binding
For board binding, rigid boards like chipboard or binder board are utilised for the cover. This method is sturdy and commonly used for hardback books, especially for reference materials and photo albums. The cover boards provide strong support and protection for the book's content. Board binding ensures durability and a professional finish, making it a preferred choice for high-quality publications that require robust construction. This type of binding is ideal for projects that necessitate a solid and long-lasting hardcover solution.
Why Should You Choose a Professional Binding Service Provider Over Doing It Yourself?
Professional binding service providers offer a valuable solution for individuals and businesses seeking high-quality results in their hardback binding projects. Utilising these professionals' expertise, specialised tools, and experience can save time and ensure a flawless finish that exudes durability and professionalism.
One of the key benefits of engaging in a professional binding service is their ability to handle various types of binding techniques, such as perfect binding, saddle stitching, spiral binding, or case binding. These experts have in-depth knowledge of different materials and methods required for each type of project, ensuring that your final product meets the highest standards.
Moreover, professional binders can offer customisation options to suit your specific needs, whether it involves embossing, foil stamping, debossing, or other finishing touches. This level of personalisation adds a unique and professional touch to your bound documents or books.
Additionally, working with a professional binding service provider allows you access to a wide range of paper stocks, covers, colours, and textures to enhance your project's overall look and feel. Whether you are binding high quality annual reports, presentations, manuscripts, portfolios, or any other document, these experts can guide you in selecting the most suitable materials for your desired outcome.
Hence, opting for a professional binding service provider not only ensures high-quality results but also saves you time and effort in achieving a polished and professional finish for your hardback binding projects.
Leverage Ex Why Zed for Top-Quality Hardback Binding Services
For those wanting a professional finish to their hardback binding projects, look no further than Ex Why Zed for top-quality hardback binding services. With a reputation for excellence and precision, Ex Why Zed offers a wide range of paper coatings to ensure the best results for your hardback book printing. Our online ordering system is user-friendly, allowing for maximum file uploads and efficient processing.
We have a customer service team with print experts who can guide you through every step of the process, from selecting the correct number of pages to ensuring the clearest printed text. Choose Ex Why Zed for a premium hardback binding that exceeds expectations.
If you have any questions or need assistance, please reach out to our customer services team via phone at 01206 766647 or email us at hello@exwhyzed.com.
Hardback Book Printing Showcase Video
To help you make informed print choices when you embark on your hardback book printing journey, we have curated, analysed and dissected a series of recent projects to show you what can be achieved.
Final Thoughts
Creating a hardbound book is an experience in itself. It requires attention to detail, practice, and the correct materials and tools. The sophistication, durability, and quality that a well-bound hardback book provides are unparalleled. Whether you are looking to collate your thesis, create a memorable yearbook, or publish a novel, hardback binding can set your work apart.
By being mindful of the common mistakes and adopting measures to ensure longevity, you can successfully create a hardback project that stands the test of time. After all, a book is not just a collection of single pages held together; it's a seamless blend of information, creativity, hard work, experience, and a testament to the writer's dedication.
Frequently Asked Questions
How do I choose the right material for my project?
The choice of material chiefly depends upon the type of project and its intended usage. Use durable materials while opting for a classy, delicate appearance for special projects or books.
Can I bind my work with different types of bindings?
Yes, you can bind your work with various types of bindings, such as perfect binding, saddle stitching, wire-o binding, spiral binding, and hardcover binding. The best binding method depends on the specific requirements of your project, such as the number of pages, the desired look, and the intended use of the document.
How long does the binding process take?
The time frame varies depending on the type of binding, number of books, size, the service provider's capacity, and other factors. At Ex Why Zed, we aim to deliver hardback books in 7 working days if you are ordering up to 500 copies. For larger orders, litho printing the books will be most cost-effective and maximum quality. Rome wasn't built in a day so allow 4-6 weeks for this but in October to December we get super busy and turnaround on long run hardback books (700 copies+) can drift to 2-3 months. So, plan early!
Can you print a book online?
Yes, companies like Ex Why Zed offer an online printing system that allows you to upload your PDF file and have your books printed and delivered, offering maximum convenience without compromising on quality. Plus, they offer very competitive prices, so you can get your project printed without breaking the bank.
How much does it cost to bind a hardback book?
The cost varies greatly depending on the type of binding, size, page count, cover finish, and other features. However, companies like Ex Why Zed offer competitive, cost-effective pricing based on your specifications.