There’s a moment in almost every print project where you can feel the momentum wobble.
You’ve got a PDF. You’ve got a vision. You’ve even got a rough idea of what you want it to feel like in someone’s hands. And then the questions start piling up:
“Should this be uncoated or silk?”
“Will this page count work with wire stitching?”
“How thick will the spine be?”
“Is this cover stock strong enough?”
“Do the colours need a tweak before we commit?”
These are good questions — they’re the difference between a book that looks “fine” and a book that lands exactly as intended. The snag is that email isn’t always the best place to solve them.
That’s where a Zoom print chat changes everything.
Why a Zoom call beats 67 emails
Print is visual. Tactile. Full of small decisions that are much easier to make when you can see what someone’s talking about.
On Zoom, we can:
Share screens and review your file together (layout, margins, spreads, cover setup — the lot).
Use visual cues to explain formats, bindings, and how page count affects thickness and handling.
Show you real printed examples from the thousands of books, zines, catalogues and publications we’ve produced and keep in our studio.
Translate specs into real-world feel, so you understand the “why” behind a paper or binding choice — not just the numbers.
Instead of a long chain of “what do you think?”, you get a single conversation that ends with: clear decisions, clear next steps, and a spec that fits your project.
Who it’s for (spoiler: almost everyone)
We run Zoom print chats with:
Novice authors and first-time self-publishers who want reassurance and a straight answer.
Rockstar authors who know what they like, but want a printer who can keep up and refine the details.
Designers who want to talk through production possibilities quickly, with real examples to hand.
Indie presses who need reliability, consistency, and a print partner who actually gets the intent behind the work.
If you’re trying to make something readers will keep, share, sell, gift, or put on a shelf with pride — it’s worth talking it through.
What we actually cover on the call
Every project is different, but most Zoom chats naturally land on a few core areas:
1) Format: size, page count, and how it’ll handle
We’ll help you pick a size that suits the content and the way the book will be used. Pocketable? Coffee-table? Mail-friendly? Gallery-shop ready? Then we’ll sense-check the page count so you don’t end up fighting a binding method that was never meant for it.
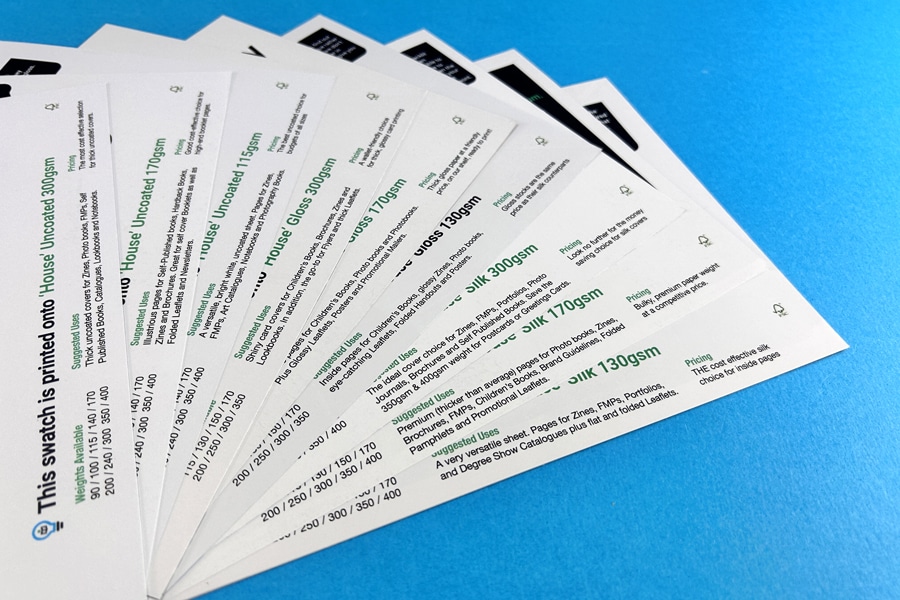
2) Paper: what looks good and feels right
Paper is where books become physical. We can talk you through the difference between a smooth coated stock for crisp images and a more tactile uncoated paper for a warmer, softer read — and show examples live so you’re not guessing.
If you’ve never ordered samples before, we’ll point you to the right next step. Request Paper Samples.
3) Binding: the right build for your book
Wire stitched, perfect bound, hardback — each comes with strengths. On Zoom we can explain it with real books in hand, so the pros/cons aren’t abstract.
Cover choices are half design, half durability. We’ll talk through what’s sensible for your budget and how the finish will behave in the real world (scuffs, fingerprints, handling, shine vs no shine).
5) File setup: the practical stuff that prevents pain later
Bleed, spine width, export settings, black values, image resolution… not glamorous, but crucial. A quick screen share can catch issues early and save you a reprint later.
The big difference: we’re a printer you can actually talk to
A lot of print companies hide behind a website. You fill in a form, get a number, and hope the end result matches what you pictured.
We do it differently.
Ex Why Zed is powered by people who handle books all day, every day — people who enjoy the details, and can explain them clearly. Zoom is simply the most direct way to share that experience with you.
It’s friendly, it’s visual, and it gets your project moving.
How to book a Zoom print chat
If you’d like to talk your book through, here are three easy ways to start:
Bring your questions, your PDF (even if it’s still in progress), and a rough idea of what you want the book to do in the world.
We’ll bring the print brains, the samples, and the honest advice.
Have you Zoomed us yet?
The fastest way to turn your PDF into a polished booklet is to let us handle the print – but if you’d like to test on your own printer first, our clear guides below have you covered.
Great, upload your PDF file along and our experts will give it a thorough preflight check. If we notice anything that needs changing, we'll let you know.
Excellent, we have step-by-step guides. We have clear instructions for printing your booklet from PDF in Acrobat, MS Publisher, InDesign and Affinity Publisher.
If you’re considering getting your PDF printed as a booklet professionally, here’s why we at Ex Why Zed stand out:
✅ Top-Quality Results
We’re print perfectionists. Your booklet will be handled by experts who specialise in short-run booklets, zines, and books. We ensure crisp text, vibrant images, and a clean finish that represents you or your brand beautifully.
⚠️ Our team double-checks every PDF so you get a result that a typical home printer just can’t match.
✅ Free UK Delivery
No one likes surprise costs. We offer free delivery on all orders UK-wide, so the price you’re quoted is the price you pay – no extras. Whether you’re in London, Manchester, or a small village, your printed booklets will arrive safely at your doorstep without any shipping fee.
✅ Easy Online Quotes & Ordering
Using our Printed Project Builder you can get an instant price for your booklet project. Just input your specs (size, page count, quantity, etc.) and see the price – or use our Booklet Printing product page for guidance on options. When you’re ready, you can upload your PDF using WeTransfer. It’s a smooth, hassle-free experience – no need to email large files or worry about FTP. (And of course, if you prefer a human touch, you can always email us or call – we’re here to help.)
✅ Guidance and Support
We’re not just a print shop; we’re your printing partners. If you have questions, need a template, or aren’t sure about something, check out our Resources like the File Set-Up Knowledge Base or just reach out. Our friendly team will guide you, as we genuinely want your project to succeed. Printing can be complex, but we make it simple by being available to assist at each step.
In short, we’re passionate about printing and we take pride in helping creators like you. Feel free to get a quote or ask us anything – even if you’re not ready to print just yet. We’re here to provide advice, reassurance, and of course, top-notch printing when you need it.
Introduction
Printing a PDF as a booklet can feel intimidating to first-timers. You might be worried about page order, margins not fitting, or how to print double-sided without messing up the layout. We get it – these concerns stop many budding authors and creators in their tracks. The good news is that turning your PDF into a real booklet is easier than it seems, and we’re here to walk you through it step by step.
At Ex Why Zed, we speak your language. We specialise in helping novice and self-publishers – from independent authors and artists to community groups and small businesses – get their PDF documents printed as professional booklets. In this guide, we’ll show you exactly how to print a booklet from a PDF. We’ll cover everything from setting up your PDF correctly, to using common software (Adobe Acrobat, Microsoft Publisher, Adobe InDesign, and Affinity Publisher) to arrange and print your pages in booklet format, and finally to double-checking technical details like margins, bleed, and printer settings. By the end, you’ll be confident that your booklet will look and feel right.
✅ Expert Tip If at any point you feel overwhelmed or simply prefer an expert to handle it, we’ve got you covered. All we need is your PDF file – send us your PDF and we’ll do the rest.
Which software is best for printing a PDF as a booklet?
You might be wondering what software or tools you can use to create a booklet from your PDF. The answer is: there are several options, from beginner-friendly to professional design programs. Below, we’ll go through four popular methods step-by-step:
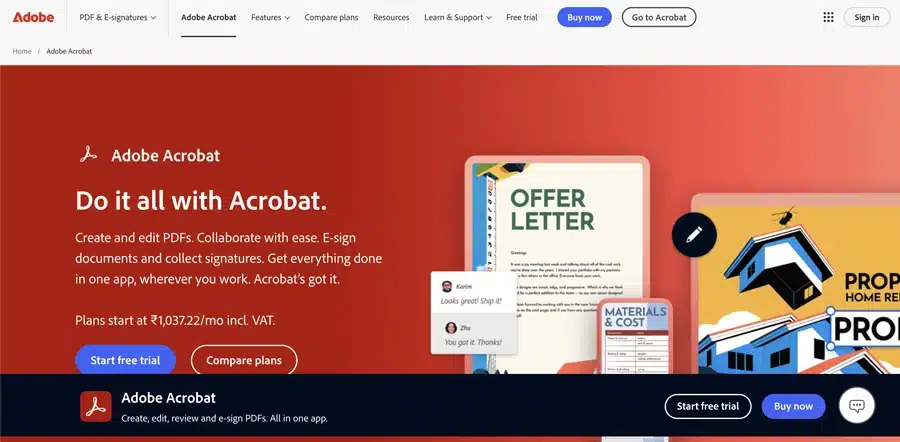
Adobe Acrobat or Reader Great for most users. Acrobat (including the free Adobe Reader) has a built-in booklet printing feature that simplifies the process.
Microsoft Publisher Good for home office users. Publisher can import PDFs and arrange them into a booklet format.
Adobe InDesign Advanced option for designers who want fine control over layout and typography.
Affinity Publisher Advanced and affordable alternative to InDesign, ideal for designers on a budget.
Scroll down to your program of choice ⬇️
1. Printing a PDF as a Booklet using Adobe Acrobat (or Adobe Reader)
Adobe Acrobat is one of the simplest ways to print your PDF as a booklet. Even the free Adobe Acrobat Reader application includes a booklet print setting that arranges pages automatically. Follow these steps to print a booklet from your PDF using Acrobat:
Open your PDF in Acrobat: If your PDF is already saved on your computer, double-click to open it in Adobe Acrobat or Reader. If you only have the PDF open in a web browser (for example, from an email or online link), first save it to your computer. (In most browsers, you can click the download icon and choose a location to save the file.)
Access the Print settings: Go to File > Print in Adobe Acrobat/Reader (or simply press Ctrl+P on Windows or Cmd+P on Mac). The Print dialog will appear. Under “Page Sizing & Handling,” select the option for Booklet. This tells Acrobat you want to print in booklet format, which will automatically arrange two pages per sheet in the correct order.
Choose Booklet subset & printer settings: In the booklet print settings, decide how you’ll print:
If you have a duplex printer (one that can print both sides automatically): choose Both Sides. Acrobat will handle printing all pages in the right sequence.
If you have a simple home printer (single-sided) and will flip pages manually: select Front side only for the first run. Once the first sides are printed, you’ll reload the printed pages into your printer (usually flip the stack and put them back in the tray – Acrobat may provide instructions or a diagram). Then print the Back side only to get the other sides printed. (Tip: Do a small test with a few pages first to confirm how to orient pages when reinserting, so that everything lines up correctly.)
Print your booklet: Check the print preview in the dialog to make sure the page order looks right (for example, page 1 and the last page should appear on the same sheet in preview). If everything looks good, hit Print. Once printed, fold the sheets and staple them along the fold (if you have a long-arm stapler) to create your booklet. Congratulations – your PDF is now a physical booklet!
2. Printing a PDF as a Booklet using Microsoft Publisher
Microsoft Publisher isn’t as commonly used as Acrobat for PDFs, but it’s a handy tool if you have it as part of Microsoft Office. Publisher can import your PDF pages and arrange them for booklet printing. Here’s how to do it:
Launch Microsoft Publisher: Open Publisher on your computer. On the Start screen, create a blank Print publication (you can choose any template size for now, we’ll adjust to booklet size next).
Import your PDF pages: Go to File > Open. Navigate to your PDF file, select it, and click Open. Publisher will convert the PDF into a Publisher document, placing each PDF page onto a page in the Publisher file. (This might take a moment if your PDF has many pages.)
Set up the booklet layout: Now tell Publisher you want a booklet format. Go to the Page Design tab (or Layout tab in some versions). Click on Size and look for a Booklet page size option (for example, A5 booklet if your PDF pages are A4, etc.). Select the appropriate booklet size. Publisher will rearrange the pages into spreads (two side-by-side pages per sheet) suitable for folding into a booklet.
Check page order: It’s a good idea to preview the layout. Go to File > Print and look at the Print Preview. Ensure that the pages appear in the correct order in booklet form. For instance, in a 8-page booklet, you should see page 8 and page 1 on one sheet in the preview, page 2 and page 7 on another, etc. (Publisher should handle this automatically once in booklet mode.)
Configure print settings: In the Print menu, set your printer to Print on Both Sides (duplex) if available. If printing manually, you might have to print odd pages then even pages – but Publisher’s Booklet setting typically manages the sequence if you print all pages and choose the booklet option.
Print the booklet: Click Print and let Publisher output the booklet. If you’re manually duplexing, follow any on-screen prompts to flip the pages. Finally, fold and staple your printed pages to form the booklet.
3. Printing a PDF as a Booklet using Adobe InDesign (Advanced)
If you have Adobe InDesign and your PDF needs more sophisticated layout adjustments, InDesign offers powerful control. This is typically used by design professionals or if you want to add or tweak design elements while creating the booklet. The process is a bit more involved: you’ll place the PDF into an InDesign document and use the Print Booklet feature.
Here’s how to print a PDF booklet with InDesign:
Open InDesign and set up a new document: Launch Adobe InDesign. Create a new document (File > New > Document). Set the page size to match your PDF’s page size (for example, if your PDF is A4 pages and you want an A5 booklet, set pages as A5 – or simply match whatever final size you desire for each booklet page). Also set the correct number of pages if known, or you can adjust later.
Import (Place) the PDF into InDesign: Go to File > Place. Locate your PDF file and select it. Make sure “Show Import Options” is checked if you want to import specific pages or ranges. Click Open. Then click on the InDesign page canvas to place the PDF pages. InDesign may place one page per new page frame; you might need to do this for each page or use a script if importing a long PDF. Ensure each PDF page is placed on a separate InDesign page, in the correct order.
Adjust layout and margins if needed: With the PDF pages now in InDesign, you can tweak anything necessary – though if the PDF was already designed, you might not need to change content. However, check the Margins and Bleed settings (File > Document Setup) to ensure you have appropriate margins for a booklet (including a larger inner margin for binding if using staples, often called the gutter). If any content is meant to run to the edge of the page, make sure it extends into the bleed area (typically 3mm bleed beyond trim line) for a clean edge once trimmed.
Use InDesign’s Print Booklet feature: Go to File > Print Booklet. InDesign will automatically impose (arrange) the pages into booklet order when printing. In the Print Booklet dialog:
Under Booklet Type, choose 2-up Saddle Stitch (this is the typical booklet style where pages are folded and stapled).
Check the preview to see that InDesign has rearranged page order correctly.
Click Print Settings within this dialog to select your printer and paper settings. Make sure duplex printing is enabled if your printer supports it (or choose to print one side at a time if not).
Print from InDesign: Once settings are configured, click OK in Print Settings to return to the booklet dialog, then Print. InDesign will send the imposed booklet layout to the printer. Collect the printouts, fold, and bind (staple) as needed.
✅ Expert Advice InDesign gives you the most control, so it’s ideal if you plan to design the booklet further or merge multiple PDFs, add new content, etc., before printing. But for simply printing an existing PDF as-is, the earlier methods might be quicker.
4. Printing a PDF as a Booklet using Affinity Publisher (Advanced)
Affinity Publisher is an increasingly popular design tool (a one-time purchase alternative to InDesign) that also can handle booklet printing. If you own Affinity Publisher, you can use it similarly to InDesign to arrange and print your PDF as a booklet. Follow these steps:
Open Affinity Publisher and create a new document: Launch Publisher and go to File > New. Set the page size to the size of your PDF pages (or the desired booklet page size). For example, if your PDF is A4 and you want an A5 booklet, set the document to A5 pages. Also set the document to have facing pages (for a booklet layout) and the appropriate number of pages (you can adjust page count later too).
Import (Place) the PDF pages: Go to File > Place and select your PDF file. Click on the first page of your Affinity document to place the PDF content. Affinity will import the PDF pages; you might need to do this page by page or it may prompt to place all pages. Each PDF page should now be on its own page/spread in Affinity Publisher.
Ensure booklet layout and order: Make sure the pages are in the correct order in the Pages panel. If they’re out of order or not as spreads, you can use Document > Facing Pages and Add Pages to arrange as needed. Affinity should handle spreads automatically if facing pages is enabled.
Check layout, margins, and bleed: Just like with InDesign, double-check that nothing vital is too close to the edges. Use File > Document Setup to confirm margins, add bleed if your design extends to edges, and consider gutter space for the fold. Adjust any content that might be near the fold or trim so that everything will look centered and proper once printed and trimmed.
Print the booklet from Affinity: Go to File > Print. In the print dialog, look for layout or booklet options. Affinity Publisher doesn’t have a one-click “Print Booklet” feature like InDesign’s, but you can achieve the same by selecting Booklet in the printer settings if your printer driver offers it, or by exporting a PDF and using a booklet imposition (Affinity could also export the document as PDF for print, imposed as spreads). An easier method: Export to PDF with the pages in spreads, then use Acrobat’s method (Method 1) to print as booklet. However, if printing directly:
Select your printer and proper paper size (usually the paper should be twice the size of a single page – e.g., A4 paper for an A5 booklet).
Enable duplex printing (print on both sides).
If an option for Booklet arrangement exists in your print settings, use it. If not, you may need to manually set it up or simply export and use Acrobat as mentioned.
Use Preview if available to ensure the pages are paired correctly (first with last, etc.).
Finalise printing: Click Print and produce the booklet. Then fold and staple the pages just as with the other methods.
✅ Affinity Publisher is powerful, but for a straightforward PDF-to-booklet task, some users might prefer the simpler Acrobat route unless they are already working in Affinity.
Preparing Your PDF File for Booklet Printing
Regardless of which software you use, a successful print starts with a properly prepared PDF. Here are the key things to get right in your PDF before you hit print:
Page Size and Layout: Make sure your PDF page size matches the intended booklet page size. If you want an A5 booklet, for example, your PDF should ideally be formatted as A5 pages. Consistent page layout ensures the content isn’t awkwardly scaled or cropped when printing as a booklet. Keep a uniform margin around text and images on each page, so nothing important gets too close to the edges or fold.
Margins and Gutter: Maintain adequate margins on all sides of your pages. This white space keeps text from being cut off and makes reading easier. For bound booklets (especially thicker ones), remember to allow extra space on the inner margin (the gutter) where the fold or binding goes. This prevents content from disappearing into the fold. Many booklet templates or the print software will help set this up, but it’s worth double-checking your PDF – no critical content (like page numbers or images) should sit right on the inner edge.
Bleed for Edge-to-Edge Colour: If any background colours or images in your PDF go all the way to the edge of the page, you must include bleed in the PDF. Bleed is typically an extra 3mm of image/colour beyond each edge of the page. It ensures that when the pages are trimmed to size, there’s no white sliver border. In your design software, set bleed to 3mm (or 0.125") on all sides and extend those images out to cover the bleed area. This way, your booklet will have a nice clean edge once cut.
Resolution and Images: Use high-resolution images in your PDF – ideally 300 dpi for printed work. Low-res images might look fine on screen but will print fuzzy or pixelated. If your PDF is a compilation of scans or pictures (for example, an artist’s portfolio booklet), make sure they’re high quality before making the PDF.
Embedded Fonts: Export or save your PDF with fonts embedded. This ensures that your chosen typography appears correctly when printed. If fonts aren’t embedded, there’s a risk they could default or substitute, which might ruin your layout. (Most PDF creation tools have an “embed fonts” setting enabled by default – keep it on.)
In short, a well-prepared PDF means less chance of surprises when printing. If you’re unsure about any of the above, don’t worry – at Ex Why Zed, we run a free pre-print file check (preflight) on every PDF you send us. We’ll let you know if anything is amiss (like missing bleed or low resolution images) before we print, so you can fix it and avoid disappointment.
✅ Ready for a flawless finish? Upload your PDF and we’ll do the folding, trimming and stapling for you.
Double-Checking Your Printer Settings
When you’re ready to print, taking a moment to verify your printer settings can make the difference between a flawless booklet and a frustrating misprint. Pay attention to these settings:
Paper Size and Orientation: Confirm the paper size in the print dialog matches the paper in your printer. For example, if you’re printing an A5 booklet on A4 paper (two A5 pages per A4 sheet), select A4 and landscape orientation. Using the correct paper size prevents unwanted scaling or clipping.
Duplex Mode (Two-Sided Printing): As discussed earlier, decide between automatic duplex (the printer prints both sides in one go) or manual duplex (you’ll flip the pages). If your printer supports auto-duplex, ensure that option is checked. If not, look for instructions on printing one side at a time. Important: Also check “Flip on short edge” vs “Flip on long edge” if that option is present – for booklets, you typically flip on the short edge since pages are in landscape orientation when printing spreads.
Print Quality: For a professional-looking booklet, use a high print quality setting. In your printer’s settings, this might be called High Quality, Best, or even an option to print at 1200 dpi. High quality printing ensures sharp text and images. (Keep in mind this might be a bit slower and use more ink/toner, but the result is worth it for final copies.)
Colour Settings: If your document is in colour, make sure your printer is set to colour printing (unless you intentionally want black & white). For best fidelity, disable any “auto colour correction” your printer might do, especially if your PDF colours have been designed carefully. We prepare everything in CMYK colour mode for professional print, which ensures what you see on screen is what comes out in print. If you’re printing at home, you might not have CMYK control, but it’s good to know we’ll handle colour management if you print with us.
Paper Type and Tray: If your printer allows, select the correct paper type (e.g. plain, heavyweight, glossy, etc., depending on what stock you’re using for your booklet). This adjusts how the printer lays down ink/toner. Also select the correct paper tray if your printer has multiple (for instance, you loaded the booklet paper in the manual feed tray).
Before printing the entire run, we highly recommend doing a test print of a few pages of your booklet (or even the whole booklet in a draft mode). This trial run will reveal if the margins are correct, if the page order works out, and if any settings need tweaking. It’s much better to catch an issue on 4 printed pages than on 100!
Exporting to PDF
If you made any changes in InDesign, Publisher, or another program (for example, adding bleed or adjusting layout), you’ll likely export a new PDF to print from or send to a printer. When exporting your final PDF for booklet printing, keep these in mind:
Use PDF/X-1a or PDF/X-4 standards if available. These are PDF standards for print that embed fonts and images and lock in the format. They’re preferred in the print industry for ensuring compatibility and quality.
Embed all fonts: As mentioned, ensure your PDF export settings have font embedding on (this avoids any missing font issues).
Include bleed and crop marks: If your booklet has any bleed elements, export the PDF with bleed included. Also, add crop marks if you’re sending to a professional printer (crop marks show where to trim the paper). Crop marks aren’t needed if you’re printing and trimming manually for a simple project, but for a polished job we use them.
Resolution and compression: Export images at 300 dpi and avoid heavy compression in export settings. For example, in Adobe Acrobat or InDesign, choose high-quality print presets (they usually won’t downsample images too much). This keeps your booklet pages crisp.
Colour mode: Export in CMYK colour mode for professional printing. If you’ll print on a home/office printer, sRGB (the default colour mode) is usually fine, but CMYK is what commercial printers (like us) use to match colours accurately.
✅ By paying attention to the export settings, you’ll create a PDF that is truly print-ready. If all of this sounds technical – don’t worry. As part of our service, we handle these technicalities for you. Simply supply the best PDF you can, and we’ll ensure it meets the requirements before printing.
Conclusion: From PDF to Booklet – You’ve Got This!
Printing a booklet from a PDF might seem tricky at first, but as we’ve shown, it can be a straightforward process with the right steps. Whether you use a basic tool like Acrobat Reader or professional design software, the key is careful setup and a bit of patience. Always double-check your page order, settings, and do that small test print. With a bit of preparation, you’ll end up with a stunning booklet that you can be proud of.
Remember, the goal is to have your story, artwork, or information presented in a tangible, easy-to-read format. There’s nothing quite like holding that finished booklet in your hands – it makes your PDF’s content feel real and impactful. We hope this guide has demystified the process and empowered you to print booklets confidently.
And if you ever hit a snag or decide you’d prefer the professionals to handle the printing, you know where to find us! Ex Why Zed is here to help you at every step – from prepping files to the moment your beautiful booklets arrive at your door.
Frequently Asked Questions
Q: How do I arrange pages for booklet printing in my PDF?
A: The good news is you usually don’t have to rearrange pages manually – the software will do it for you. Simply keep your PDF in the normal reading order (1, 2, 3, 4, …). When you select a booklet printing option (for example, in Adobe Acrobat’s print dialog, choose “Booklet”), the program will automatically impose the pages into the correct order for booklet format. This means the first and last page end up on one sheet, second and second-last on another, and so on. If you’re printing at home and not using a booklet feature, you’d need to manually arrange pages in a new document – but using the built-in booklet print settings is by far the easiest and least error-prone method.
Q: How do I split a PDF into a booklet?
A: “Splitting into a booklet” can be interpreted a couple of ways. If you mean arranging one PDF into a booklet format, you don’t actually split it – you print it as a booklet (as described above) by selecting the booklet layout in print settings. The software handles which pages print on the same sheet. If you meant splitting a regular PDF file to make two booklet files (like splitting content into two booklets), you’d use PDF editing software to divide the pages into two separate PDFs, then print each as a booklet. But generally, to convert a PDF into a booklet format, use the print settings designed for booklet output, rather than trying to reorder pages yourself in the PDF.
Q: How do I convert a PDF to a booklet for free?
A: You have a few free options:
Adobe Acrobat Reader (Free): As mentioned, the free Reader software has the booklet print feature. Download Acrobat Reader if you don’t have it (it’s free), open your PDF, and go to print > booklet. This doesn’t cost anything aside from your paper and ink.
Online Tools: There are free online PDF utilities (like Booklet creators or PDF imposition tools) where you upload your PDF and they generate a new PDF arranged as booklet spreads. You can then print that new PDF. If using these, double-check that they keep your content in order and be mindful of any potential privacy concerns uploading your file.
LibreOffice Draw: This is a free open-source program that can import PDFs and might allow booklet printing (though it’s a bit more manual than Acrobat Reader).
⚠️ In summary, you don’t need to buy expensive software – Acrobat Reader, which most people might already have or can get for free, is usually the fastest path to print a booklet from a PDF without spending a penny on software.
Q: Is there any specific file format required for booklet printing?
A: Typically, PDF is the preferred format for booklet printing (and you’re already there!). Printers love PDFs because they preserve layout, fonts, and images reliably across different systems. As long as your PDF is high quality (see our preparation tips above), you’re set. You don’t need to convert it to another format. If your content is in a Word document or another format currently, the best approach is to export it as PDF. This locks in your design. In rare cases, a printer might accept other formats (Adobe InDesign files, Illustrator files, etc.), but you’ll have to include fonts and images – with PDF you avoid all that complexity. So, short answer: PDF is the way to go for booklet printing.
Q: Can I use my home printer to print a PDF as a booklet?
A: Yes, you can use a home printer to print a PDF as a booklet by using the methods described (like Acrobat’s booklet print setting). Many people do this for short, simple booklets. However, there are a few caveats to be aware of:
Print Quality: Home inkjet or laser printers are fine for drafts or small quantities, but they might not achieve the sharpness, colour accuracy, or professional look that a commercial printer will. If your booklet is something like a portfolio, a program for an event, or a book you plan to sell or distribute widely, professional printing will significantly elevate the quality (without streaks, paper jams, or colour shifts).
Paper and Binding: Home printers usually handle basic office paper (80-100gsm) well. If you want thicker covers or higher-end paper, a home printer can struggle. Likewise, you’ll need to manually fold and staple the booklet. This is okay for just a few copies, but for many copies it gets tedious and staples might not bind a thicker booklet securely unless you have special equipment.
Cost of Ink/Toner: Home printing ink costs can add up quickly for a large number of pages, especially colour pages. Sometimes, using a professional service (like ours) can actually be more cost-effective for quantities beyond just a handful of booklets, once you factor in ink and decent paper.
We obviously encourage you to print your booklet with us at Ex Why Zed for the best results – our prices are fair, our team will check your files, and the quality of our printing (high-resolution, vibrant inks on proper paper, with full bleed) is substantially better than what you’ll achieve on a typical home printer. Plus, you don’t have to do the collation and stapling yourself. But for a one-off or an experiment, a home printer is a good start using the tips in this guide. If you try it at home and aren’t satisfied, you know where to find us to get a quote for a truly polished booklet!
Next Steps: Get Your PDF Printed as a Booklet
We hope this guide has been helpful in turning what might have been a daunting task into an achievable project. If you’re ready to take the next step:
Go ahead and try printing your booklet using the guidance above. There’s a special satisfaction in DIY and seeing it come together!
Or, let us handle it for you. Use our Printed Project Builder to get a quote, or visit our Booklet Printing page to explore paper options, cover finishes, and more. We’d love to print your booklet and make it look its absolute best.
Whatever you choose, the team at Ex Why Zed is here to support you. Happy printing, and good luck with your booklet project!
Recently, the print industry has undergone exciting changes, moving away from the past to embrace innovation. If you’re a designer, artist, publisher, or print business owner, you’ve likely noticed that print has evolved beyond ink on paper. In 2025, it’s not just about what you print, but how and why you print it.
From AI-powered workflows and sustainable materials to hyper-personalized prints and short-run flexibility, the print world is undergoing a creative and technological renaissance.
Whether you're navigating rising material costs, exploring new revenue streams, or just trying to keep your production process efficient, staying ahead of the trends is no longer optional—it’s essential.
The good news? There’s never been a more exciting time in this industry. In this post, we break down the top 10 print trends shaping 2025—so you can work smarter, create better, and stay ahead of the curve.
What Are the Print Industry Trends in 2025?
Print nowadays is smarter, faster, and more sustainable than ever. From AI automation to eco-conscious materials, the industry transforms how we design, produce, and deliver print. Here are the top ten trends that's making waves in the print industry:
1. Print on Demand (POD)
You're not alone if you’ve ever guessed how much stock to print and ended up with unsold material. Print on Demand, as a business model, fixes that for your online business and supports your business growth. Print on Demand trends 2025 is a must-have for small brands and indie creators who want to sell unique products in high demand and creative designs.
You upload a design, someone places an order, and it gets printed—it's that simple. There’s no upfront inventory cost, storage stress, or pressure for massive runs, contributing to a favorable average profit margin. This makes it ideal for testing products or running a lean eCommerce brand in an online store.
The best part? It syncs perfectly with personalization, especially for high demand products. Whether it's art prints, tees, or merch, customers want unique items including home decor items.To fulfill these needs, POD delivers fast, high-quality results without locking you into bulk.
If you’re an author ready to publish or a creative launching new designs, POD gives you the freedom to test and grow without the upfront risk. At Ex Why Zed, we specialize in high-quality short runs, offering the flexibility and professional finish independent creators need. With a helpful team and no-pressure order sizes, it’s a reliable way to bring your work to life, your way.
2. Digital Printing
Let’s be real—time is money, especially when clients want results yesterday. Digital printing provides the speed, precision, and personalization modern businesses need without setup headaches or long delays.
Forget large minimum orders. Whether you're printing brochures for a pop-up or custom labels for a product launch, digital printing scales effortlessly.
Tech upgrades in inkjet and toner mean print quality now rivals traditional offset. You get sharp color, quick turnarounds, and happy customers, minus the waste or waiting.
If you're exploring digital printing for your creative work, ExWhyZed offers a flexible, high-quality solution. Our HP Indigo presses are ideal for short runs—whether it's one copy or a few hundred. You’ll get sharp, professional results without the bulk commitment.
We also offer free file checks and paper samples to help you get it right the first time. Plus, with fast turnaround and optional fulfillment, the process stays smooth from start to finish. You can check out the complete details of digital printing here.
3. 3D Printing
Think 3D printing is still just for models? Not anymore. Currently, it’s reshaping everything—from jewelry and packaging to prosthetics and product parts—with custom, on-demand designs that actually work.
Picture this: a designer creating made-to-order metal rings. A startup printing functional product samples in hours, not weeks. 3D printing makes it real and fast.
It’s perfect for one-offs, short runs, and complex ideas that traditional methods can’t afford. If your business thrives on innovation or personalization, this is your playground.
And it’s not just plastic anymore. With materials like ceramics, metal, and biocompatible materials in the mix, 3D printing is unlocking design freedom across industries.
4. Artificial Intelligence and Machine Learning
AI and ML aren’t just buzzwords—they’re changing how print businesses operate day to day. In 2025, these technologies will power a smarter, faster printing process, boosting efficiency and personalizing outputs.
AI-led automation streamlines tasks and allocates resources better, so your team spends less time fixing errors and more time delivering results over a long time. Marketing efforts are enhanced as ML analyzes customer data to create tailored print materials that include product recommendations, boosting engagement and loyalty.
Technically, AI improves print quality by automatically optimizing colors, resolution, and sharpness—no extra steps are needed.
Thanks to predictive maintenance, ML helps identify equipment issues before they cause downtime, keeping operations smooth. With all this built in, AI and ML aren’t future upgrades—they’re tools helping print companies work smarter and save money today.
5. Cloud Printing
Cloud printing is a game-changer. In 2025, it is helping businesses stay lean, creative, and responsive by connecting print processes with the flexibility of the cloud.
Need to fulfill a custom tote bag order from across the country? No problem. Cloud printing lets you design, approve, and send jobs from anywhere—perfect for remote teams and eCommerce sellers.
It also supports real-time collaboration and helps automate production queues, so deadlines are met faster with fewer errors. Plus, it cuts infrastructure costs and scales as you grow.
Cloud printing offers freedom, efficiency, and a competitive edge to businesses looking to move fast and stay ahead in the print industry.
6. Eco-Friendly Printing Innovations
Sustainability nowadays isn’t optional anymore—it’s a value customers expect. Eco-friendly printing will go mainstream, with print shops using smarter materials like compostable phone cases and cleaner processes to cut their environmental footprint.
Think recycled paper, water-based inks, and energy-efficient machines. It’s not just about going green—it’s about staying relevant to conscious buyers who care how products are made. These changes, from reduced waste to lower emissions, show your commitment to the planet and build long-term customer trust.
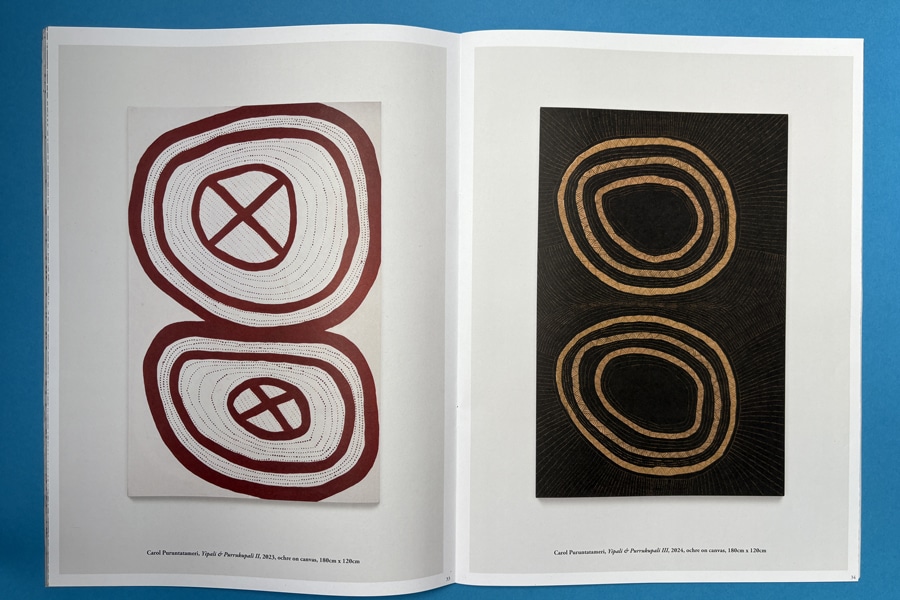
ExWhyZed is committed to eco-friendly printing and is exemplified in their collaboration with Moof Magazine. For Issue 12, we have utilized 100% recycled Evolution Uncoated paper for both the 160gsm cover and 90gsm inner pages, achieving a sustainable yet high-quality finish.
This approach demonstrates that environmentally conscious choices can coexist with vibrant design and professional production. ExWhyZed's dedication to sustainability ensures that creators can produce compelling print materials without compromising their environmental values. Check it yourself here.
7. Product Personalization
Everyone wants something made just for them. That’s why personalization is a powerhouse trend, turning generic prints into meaningful experiences customers connect with.
Using digital printing and variable data, brands can tailor every piece—from names on mailers to custom colors on packaging—without slowing down production.
Personalization is more than a design tweak. It increases emotional connection, boosts response rates, and builds loyalty. Customers feel seen, and they keep coming back.
As AI and machine learning evolve, expect even deeper personalization at scale. The future of print isn’t one-size-fits-all—it’s tailor-made, every time.
8. Smart Packaging
Technology is reshaping print, and innovative packaging is leading the charge in 2025. It blends digital features into products, offering interaction and visual storytelling beyond basic information. Smart packaging connects with smartphones to deliver nutritional data, usage tips, or even augmented reality experiences.
Consumers can scan codes or tap embedded chips to access brand videos or games, enhancing their experience with product descriptions that attract target customers. It also boosts authenticity and traceability, fighting counterfeiting and showing the product’s journey. Interactive packaging builds brand affinity by offering engaging experiences.
Smart packaging adds value beyond the label as expectations rise, redefining what print means in a connected world.
9. Pocket Printers
Pocket printers are booming currently, offering sleek, mobile printing for those who need quick results anywhere. Compact and wireless, these devices enhance the shopping experience by freeing users from bulky desktop printers. From photos to labels, the convenience is unmatched.
They’re more than gadgets—they spark creativity. Print a photography on a trip becomes a real-time memory.
Moreover, these printers redefine how people engage with physical media, making print personal and accessible.
As digital life speeds up, portable printers highlight how print remains relevant—agile, fun, and fully integrated into modern lifestyles.
10. Data Analytics and Decision-Making
In 2025, data is essential for print businesses seeking efficiency and growth. Analytics tracks performance, trims costs, and reveals opportunities. It empowers smarter decisions by highlighting production output, satisfaction levels, and operational gaps.
Understanding trends and customer behavior uncovers innovation paths. Predictive tools help forecast demand, improving planning.
Besides, data-driven resource allocation cuts waste and boosts performance. Lastly, analytics provides the clarity needed to pivot quickly, optimize services, and stay competitive.
Data ensures it moves forward with purpose and precision as the print industry evolves.
Stay Ahead in Printing Trends with Ex Why Zed
As the print industry evolves, Ex Why Zed is your strategic partner for staying ahead in the market. Our expertise in various printing media helps streamline your operations smoothly as we deliver innovative, customized solutions, keeping in mind various industry trends.
Plus, our ability to seamlessly integrate eco-friendly practices and personalization into print operations makes our client stand out in the industry.
Let us help you stay ahead of the curve, streamline your processes, and create lasting impressions with customers in the world of print. Contact us now!
Conclusion
The print world isn’t what it used to be—and that’s good. In 2025, printers aren’t just pushing ink on paper anymore; they’re pushing boundaries. Whether battling fierce competition or responding to what today’s customer really wants (think: fast, personal, and eco-friendly), the industry is in full-on transformation mode.
We’re seeing way more than just sleeker machines. AI, machine learning, and 3D printing are baked into everyday print workflows. It's not just about speed—it’s about smart, data-driven choices. And let’s talk about customization. From personalized packaging that tells a story to pocket printers that fit in your palm, everything’s getting more personal, mobile, and interactive.
Even traditional setups are evolving. Cloud printing, digital workflows, and Print on Demand Market Trends 2025 models are helping businesses move faster, reduce waste, and stay profitable in a tough market. This isn’t just progress—it’s a total reimagining of what print can do.
Frequently Asked Questions
How significant is the impact of AI on the print industry?
Artificial Intelligence (AI) significantly impacts the print industry by automating complex tasks, optimizing operational processes, and enhancing quality control in the manufacturing process. It allows real-time adjustments, predictive maintenance, and personalized print content, increasing efficiency, decreasing waste, and lowering operational costs.
What are the environmental advantages of adopting green printing practices?
Eco-friendly printing significantly reduces the industry's environmental footprint by utilizing sustainable materials and practicing energy-efficient operations. It minimizes waste, decreases toxic emissions, conserves natural resources, and promotes a healthier planet.
How can small print businesses adopt sophisticated e-commerce solutions?
Small print businesses can integrate sophisticated e-commerce solutions by partnering with all-in-one production software platforms. These platforms can automate print production, enhance quality control, offer online ordering, payment processing, and shipping automation, providing an effective way to improve efficiency and scalability in print production, graphic design, and distribution.
What should print businesses focus on to remain competitive in 2025?
To stay competitive in 2025, print businesses in the printing industry should embrace advanced technologies like AI and data analytics, adopt practical ways for eco-friendly printing practices, utilize the right tools to offer personalized printing solutions with sustainable printing partners, integrate smart packaging technology, leverage digital and cloud printing services, and respond quickly to changing consumer preferences.
How does personalization affect consumer engagement in the print industry?
Personalization greatly enhances consumer engagement in the print industry. It enables businesses to deliver unique designs and tailored experiences that resonate with individual customer preferences. By providing personalized print materials, enterprises enhance customer experience, increase customer loyalty, and ultimately drive sales growth.
You've poured hours into creating that perfect digital piece—every stroke, every shade, every tiny detail just right. But now comes the nerve-racking part: printing. Will the colors stay true? Will the resolution hold up? What paper should you even choose?
For many artists, turning digital work into a tangible print feels more like a leap of faith than a creative step. We get it. The printing process can be confusing, especially if you’re new to it. But don’t worry—this blog is here to simplify it for you. We’ll walk you through the essential steps you need to know, helping you make informed decisions.
Whether you’re planning a small print run for personal use or preparing a larger batch for a gallery show, this guide will ensure your digital art looks just as stunning in print as it does on your screen. Let’s get started!
What Is Digital Art Printing?
Digital art printing is turning your digital designs into physical prints. This method lets artists bring their artwork to life on canvas, paper, fabric, and metal. One benefit of digital printing is its ability to match the original artwork closely, capturing all the fine details and vibrant colors.
Imagine you've just finished a digital drawing you're really proud of. Instead of leaving it on your screen, you print it and hang it on your wall—or even sell it at a local art fair. That’s the power of digital art printing: it turns your digital work into something real you can share, display, or sell.
What Are the Different Digital Printing Techniques?
When it comes to printing digital art, choosing the right technique at your local print shop can elevate your work and ensure it reaches its full potential. Each method offers unique benefits tailored to different needs, from fabric prints to fine art reproductions. Let's check out various techniques.
1. Direct to Garment (DTG) Printing
Direct-to-Garment (DTG) printing is a game-changer for fabric-based artwork. This inkjet-based technique prints directly onto garments, allowing for sharp, detailed designs with no setup costs per color.
Key Advantages:
Precision: Great for intricate, detailed digital designs.
Vibrant Colors: Water-based inks soak into fabric, resulting in true-to-life colors.
Unlimited Color Use: No extra cost for multi-color designs, making it ideal for bold artwork.
Quick Turnaround: Faster results than traditional printing methods, perfect for time-sensitive projects.
Affordable for Small Runs: No minimum order makes small print runs cost-effective.
Direct-to-Garment (DTG) Printing is the perfect choice for printing intricate designs on fabric with vibrant, long-lasting results, making your artwork pop on clothing.
2. Giclée Printing
Giclée Printing is the top choice for fine art prints, offering unparalleled high quality and longevity. Giclée uses inkjet technology with archival-quality inks to produce high-resolution prints that are vivid and long-lasting, perfect for artists selling limited or open editions.
Key Advantages:
Exceptional Detail: Captures the finest details of your artwork.
Rich, Vibrant Colors: Uses pigment-based inks for colors that pop.
Longevity: Archival-quality materials ensure your prints last for decades.
Versatility: Works on various surfaces, from canvas to fine art paper.
Giclée Printing is the go-to for fine art prints, delivering rich colors and exceptional detail, ideal for creating lasting masterpieces on canvas prints or fine art paper.
3. Screen Printing
Screen printing may be older, but it’s still a powerful technique for certain styles. It’s known for bold, vibrant prints, especially on unconventional surfaces. While it’s great for large runs, the initial setup costs can be higher, but once that’s done, it’s cost-effective for big orders.
Key Advantages:
Bold Colors: Uses thick ink to produce bright prints, even on dark surfaces.
Durable: Prints withstand weather and wear, which is ideal for outdoor artwork or products.
Cost-Effective for Large Runs: Best suited for enormous quantities where the initial investment is worth it.
Versatility: Works on nearly any material, from fabric to metal, expanding your creative possibilities.
Screen Printing is a classic technique that brings bold, eye-catching prints to life, especially for larger runs or when you want your designs to stand out.
4. Laser and Inkjet Printing
Both Laser and Inkjet printing are standard, but offer different advantages based on your project. Laser printing is fast and durable, while inkjet printing excels in color control and fine detail.
Laser Printing benefits:
Speed: Great for quick, high-volume prints.
Durability: Long-lasting prints, especially for black-and-white work.
Cost-Effective for Bulk: Low running costs when printing in large quantities.
Inkjet Printing benefits:
Color Accuracy: Superior color control is ideal for high-definition, multi-color artworks.
Fine Detail: Perfect for capturing the subtle nuances of digital art.
Ideal for Canvas: Pigment-based inks produce vibrant, long-lasting prints, especially on canvas.
Laser and Inkjet Printing are efficient options that balance speed and precision, ensuring your prints come out crisp and accurate, whether you’re doing bulk work or intricate art.
A Step-by-Step Guide to Printing Your Digital Art
Printing your digital art doesn't have to be a daunting task. By following this step-by-step approach, you can create stunning prints that do justice to your art.
Step 1: Prepare Your Digital Files for the Best Results
Before you send your art to print, ensure your digital files are optimized for the highest quality output, including the number of pixels to enhance resolution for a printed image. For this, you must:
a. Adjust Your Image Resolution
For fine art prints, 300 dpi (dots per inch) is the best dpi for printing digital art. It ensures your print looks crisp and professional, especially if you’re working with larger formats or gallery-style prints. While images at 72 dpi work for small prints, increasing the resolution gives your art the sharpness it deserves when displayed, as long as you have the proper resolution.
To change resolution in software like Photoshop or Sketchbook Pro, follow these easy steps:
Photoshop: Go to “Image” → “Image Size,” then check the “Resample Image” and “Constrain Proportions” boxes. Choose Bicubic for sharp scaling.
Sketchbook Pro (Mac): Go to “Image” → “Size,” then adjust resolution while keeping proportions intact.
b. Fine-Tune Color Adjustments
Your art’s colors may shift when changing resolution, so it's essential to check and tweak the color palette after adjusting the resolution. Keep a note of your original colors in Photoshop for reference to bring back that perfect tone.
c. Consider Professional Software for Larger Prints
If you’re printing posters, banners, or any large-scale art, it’s worth using professional resizing plug-ins like Perfect Resize or Blow Up. These tools maintain quality when enlarging your artwork, providing a seamless experience without pixelation.
d. Increase Contrast for Vivid Details
Adjusting contrast enhances the vibrancy and sharpness of your artwork. Depending on your photo-editing software, you’ll find a slider for contrast adjustments. Increasing contrast subtly can make your art pop, especially when printing. Just be cautious not to overdo it.
e. Sharpen Your Art for Precision
Sharpening can make a significant difference in Photoshop. Duplicate your art layer, apply High Pass from the Filter menu, and adjust the opacity for a crisp finish. This sharpens edges without compromising the resolution, ensuring your work appears clean and detailed when printed.
f. Save Your Files in the Right Format
After making adjustments, save your artwork in a JPEG or TIFF format for the best print quality. While JPEG is a widely used format, remember to keep it multiple times, as quality can degrade with each save. On the contrary, TIFF files are ideal if you want to maintain the integrity of your artwork even after repeated edits.
Step 2: Choose the Right Paper and Ink for Longevity
The perfect paper and ink can make or break the print's appearance. Here’s what you need to know:
a. Dye-Based Inks for Vivid Prints
For high-impact colors, dye-based inks are the way to go. These inks dry quickly and work exceptionally well with glossy paper, delivering brilliant results. However, they may fade faster (within 5 years) and are not waterproof.
b. Pigment-Based Inks for Durability
Pigment-based inks are your best choice for prints that will stand the test of time. These inks offer longevity, lasting up to 150 years, and work best with matte papers. While the colors may not be as vibrant as dye-based inks, the trade-off is more than worth it for the longevity of your prints.
c. Choose Acid-Free, Archival Paper
Your print’s paper quality plays a pivotal role in how it looks and lasts. Opt for acid-free, archival-grade paper to ensure your artwork stands the test of time. Papers made from 100% cotton or rag are ideal, as they provide a premium feel and prevent yellowing or degradation over time.
d. Paper Finish: What Works for Your Art?
Consider the finish that suits your artwork:
Glossy Finish paper type is perfect for high-contrast, colorful digital art, but may create glare, making it challenging to view from certain angles.
Semi-gloss balances vivid colors and reduced glare, making it perfect for artwork that will be displayed under glass.
Matte Finish is ideal for black-and-white artwork or any art intended to be framed behind glass, as it eliminates glare and provides a smooth texture.
At ExWhyZed, we offer various paper types suitable for your printing needs. These include gloss papers, silk papers, uncoated papers, as well as recycled papers. Want to know the overall cost you'll have to pay for your next project while using these papers? Request a quote from us now!
e. Opt for Heavier Paper Weights for Quality
If you want your print to feel premium, go for heavier paper (around 20–24# for regular prints and 50# or higher for posters or gallery prints). Heavier paper adds a refined, luxurious touch to your artwork and ensures durability.
Step 3: Printing Your Digital Art
A Print-on-Demand (POD) service might be a wise choice if you're starting or working with a limited budget. POD companies can provide high-quality prints without investing in expensive equipment. You’ll also have more flexibility regarding order quantities, and the prints will still match professional standards.
For slightly larger print runs or when you want a more tailored approach, digital printing is an excellent next step. It’s fast, cost-effective, and ideal for small to medium book and booklet runs—perfect for up to 700 copies. At Ex Why Zed, we use the industry-leading HP Indigo press to deliver sharp, professional results.
To get the best outcome, it’s important to optimize your artwork before sending it over. Whether you're a seasoned designer or just getting started, our team is here to guide you via email, phone, or live chat. This guide will help simplify the overall process.
Tips for Selling and Marketing Printed Digital Art
After mastering the art of printing digital art, breaking into the art market might be your next venture. To ensure success, follow the steps below:
Consider offering limited edition prints to create a sense of exclusivity, thus attracting collectors and enhancing the price of your work.
Storytelling in your brand-building process can make a personal connection with prospective buyers.
After researching and comparing prices of similarly experienced artists, strategic pricing can guide your price brackets.
Investing in quality photography for online presentation or attractive displays for art shows can significantly uplift the appeal of your prints.
Utilize your social media platforms, websites, email marketing, or advertisements for promotions.
Collaborating with galleries or platforms offering print-on-demand services can give your work visibility and simplify the logistics of selling.
Bring Your Digital Art to Life with ExWhyZed
Ex Why Zed offers premium digital art printing services designed to elevate your artwork. With cutting-edge technology, we ensure vibrant colors, fine details, and top-notch precision, transforming your digital designs into high-quality prints.
Whether you're selling prints at conventions or simply showcasing your work, ExWhyZed guarantees exceptional quality and quick turnaround. Our reliable service allows your art to transcend the digital space, making it ready to shine in any home, gallery, or business space. Contact us today to make a difference!
Conclusion: Bringing Your Digital Creations to Life
Digital art printing bridges the gap between virtual creativity and physical expression. It transforms digital designs into tangible pieces that can be experienced in ways screens can't replicate. Each process step offers valuable insight and satisfaction, from selecting the right software and color profiles to understanding printing techniques and choosing the best printer.
Furthermore, venturing into the world of printed art opens up exciting opportunities in the art market. With this guide, you’re ready to navigate the process with confidence. While it may seem challenging at first, with practice and patience, you'll soon master it and take your digital artistry to new, exciting heights.
Frequently Asked Questions
What is the best file format for printing digital art?
High-resolution JPEG and TIFF are generally recommended formats for printing digital artwork. While TIFF files might take up more storage space, they retain high-quality vector images, becoming ideal for professional-grade prints. However, JPEG works well for more straightforward prints and smaller sizes.
How do I ensure my digital art prints are correct on different materials?
You should understand the nuances of different printing techniques, including acceptable art printing methods, and the most suitable materials. For example, DTG Printing is great for textiles, and Giclée Printing works well on fine paper or canvas. At the same time, laser and inkjet printing are suitable for high-resolution outcomes on regular paper.
Can I print my digital art at home or use a professional service?
While it's technically possible to print digital art at home, it's recommended that you use a local printer or request a test print from a professional printing service for your digital art printing needs. A professional service can easily deliver high-quality, color-accurate prints, offer advice on materials and finishes, and provide a range of more sophisticated options for a professional-grade finish.
What are the cost implications of different printing methods?
Different printing techniques have varying costs. While DTG and Inkjet printing offer cost-effectiveness and flexibility for lower volumes, Screen Printing becomes economical for large print runs. However, considering the costs associated with buying printing equipment, using a print-on-demand service can be more cost-effective.
How do I protect the copyright of my printed digital art?
To protect the copyright of your artwork, consider registering it with a copyright office. Additionally, using watermarks on online images, keeping low-resolution samples online, and creating limited edition prints can thwart unauthorized reproductions. Consulting with a legal professional may provide additional measures tailored to your situation.
When you fall in love with a piece of digital art or find a breathtaking image online, you naturally want to see it hanging on your walls or printed on your favorite book. But merely hitting the print button isn't enough—selecting the optimal file format for printing is crucial to unlock your digital masterpiece's vibrant, striking display.
Additionally, your printer's compatibility with the file format chosen is paramount. Choosing wrongly may result in a below-par print and technical difficulties that could have been easily avoided.
This blog will help you learn about various formats, including JPEGs, PNGs, TIFFs, and PDFs, comparing their strengths and pitfalls in printing. Whether you're giving your living room a facelift or your workspace a new vibe, picking the right file format is indispensable to bringing your digital finds to life, just as you imagine them.
What Are File Formats in Digital Art?
When printing digital art, the file format is crucial for maintaining quality. Formats like JPEG, PNG, TIFF, and PDF each have unique strengths in preserving color, sharpness, and detail. Think of it like choosing the right frame for a painting – the right format enhances your art when printed.
Raster vs. Vector: What’s the Difference?
Raster images consist of pixels, and enlarging them can lead to pixelation. JPEGs are a standard raster format, but repeated saving can degrade quality due to compression.
Meanwhile, Vector images use geometric shapes, maintaining quality no matter how large they are scaled. Formats like EPS and PDF are ideal for large prints, keeping the image crisp.
No matter the format you choose, Ex Why Zed has you covered. Our advanced digital printing setup ensures each file—be it a detailed TIFF or a sharp PDF—translates seamlessly from screen to print. With expert handling and an artist-first approach, ExWhyZed helps bring your digital art to life exactly as you imagined.
Why File Format Matters?
The right file format ensures your print stays true to your digital art. It preserves details, colors, and sharpness, and ensures compatibility with printing devices. Choosing poorly can result in technical issues and disappointing quality, while the right format delivers a vibrant, accurate print.
What Are Some Best File Types for Printing Digital Art?
The file format utilized can significantly influence the output when translating your digital art from the screen to paper for print. Here, we'll break down the four leading players in the world of digital art printing: JPEG, PNG, TIFF, and PDF. This will help you decide best file for printing art for your next project.
1. JPEG (Joint Photographic Experts Group)
JPEG is a widely used image format for digital photos and web graphics. It uses lossy compression, meaning that some image data is discarded to reduce file size, which makes it ideal for sharing and online use.
Pros:
Efficient Compression: JPEG compresses images well, making file sizes smaller and perfect for online sharing and storage.
Widely Supported: Almost all devices and software support JPEG, making it an easily accessible format for both personal and professional use.
Quick Transfers: JPEGs are ideal for fast transfers and emailing due to smaller file sizes.
Cons:
Loss of Quality: Lossy compression can reduce image quality, especially when the file is enlarged for printing.
Artifacts: Repeatedly saving a JPEG file can introduce compression artifacts, which distort image quality.
Pixelation: Enlarging JPEG images too much can lead to pixelation or blurriness, making them less suitable for large-scale prints.
2. TIFF (Tagged Image File Format)
TIFF is preferred for high-quality prints, particularly among professional photographers and publishers. Unlike JPEG, TIFF uses lossless compression, preserving every detail of an image.
Pros:
High-Quality Detail: TIFF maintains all the image data without sacrificing quality, ensuring that the colors and details are preserved.
Non-Lossy Compression: TIFF offers optional lossless compression, meaning no data is lost during the compression process.
Archival Quality: TIFF is an excellent choice for archiving images that need to maintain long-term quality over time.
Cons:
Large File Size: Due to its lossless nature, TIFF files can be huge, making them more challenging to share and store.
Limited Compatibility: Not all devices or software support TIFF, which can cause issues with accessibility, especially in casual or web use.
3. PDF (Portable Document Format)
PDF is a versatile format often used for documents and graphics. It excels at preserving the original layout and design, making it a reliable choice for professional printing.
Pros:
Consistent Layout: PDFs retain the original layout, fonts, and colors, ensuring that your print design looks strictly as intended.
Universal Compatibility: PDF is one of the most universally accepted formats, making it easy to share and open across various platforms and devices.
Professional Standard: It’s widely used for professional print jobs and offers high-quality output without altering the design.
Cons:
Editing Challenges: Editing a PDF file can be complex, especially if you need to change the original content.
Large File Sizes: High-resolution PDFs can become large, making them difficult to email or upload.
Limited Transparency Support: While PDF can handle complex designs, it’s less flexible with transparency than other formats, like PNG.
4. PNG (Portable Network Graphics)
PNG is commonly used for web graphics and images requiring transparency. Unlike JPEG, PNG uses lossless compression, ensuring no image quality is lost during compression.
Pros:
High Image Quality: PNG supports high-quality images with better detail and clarity than JPEG, making it ideal for graphics and illustrations.
Transparency Support: PNG supports transparent backgrounds, making it perfect for logos, icons, and other graphic elements that require flexibility.
Lossless Compression: PNG retains all the original image data, preserving the integrity of the image.
Cons:
Larger File Sizes: PNG files are typically larger than JPEGs, which can be an issue for storage and sharing, especially for high-resolution images.
Compatibility Issues: Some older systems and software may have trouble with PNG files, especially for printing purposes.
Not Ideal for Photographs: PNG is best suited for graphics, logos, and illustrations, but due to its larger file sizes, it may not be the best choice for large photographic images.
Digital Art File Format Comparison Table
Having discussed the various digital art file formats and their pros and cons, let's now compare them more simply in the table below.
What Are the Best Practices for Printing Digital Art?
Printing digital art is not a one-click process. It requires attention to detail and familiarity with file formats and printing techniques. Adopting best practices can help ensure each piece you print is as vibrant and impressive as intended. Let’s explore these practices.
1. Formatting Art for Print
A well-prepared file makes a big difference in the final print quality. Here’s how you can set up your files for the best results:
Set the Correct Resolution: Aim for at least 300 DPI for a sharp print. This ensures the image remains crisp and clear, even at larger sizes.
Choose the Right Color Profile: Using the CMYK color profile is essential. It ensures the colors on paper match what you see on screen, reducing color shifts.
Balance Quality and File Size: High-resolution images are great, but large files can be difficult for online printing services with file size limits. Optimize your images to balance quality and file size.
2. Maintaining Quality in Print
To keep your prints looking their best, consider these tips:
Test Print: Always run a small test print. It lets you check how colors and details translate from screen to paper.
Use Professional Services: Professional printing services like Ex Why Zed have the tools and expertise to handle detailed files and provide guidance on achieving the best results. To get an estimate, request a quote from us now!
Preview Your Files: Preview your files in the format you plan to print. Before printing, spot any adjustments like color, alignment, or layout changes.
Choose the Right Paper: The type of paper you use affects your print. Glossy paper is great for vibrant photos, while matte paper gives prints a softer, textured look. At ExWhyZed, you can choose numerous options, from coated, uncoated, shiny, glossly, and much more. Just tell us your requirement and we are good to go!
Print Your Digital Art Perfectly with Ex Why Zed
When printing your digital art, Ex Why Zed is the trusted partner you need. We specialize in turning your digital files into vibrant, high-quality prints that preserve every color, texture, and detail. ExWhyZed ensures your artwork is prepared with the right resolution, color profiles, and file optimization for flawless results.
Whether you’re printing limited editions or personal pieces, they provide expert support to ensure your digital art looks as stunning on paper as on-screen. Trust us to bring your digital art to life with professional, top-notch prints. Contact us right away!
Conclusion
Printing digital art is more than just hitting print—it’s about choosing the right file format to make your artwork shine. Whether you’re an artist prepping for an exhibition or a hobbyist printing personal pieces, knowing what each format offers is key.
JPEG is great for quick prints, while PNG is perfect for transparency and crisp detail. TIFF delivers high-quality, archival prints, and PDF ensures your work stays true across platforms.
Picking the right format helps bring your digital art to life, preserving its vibrancy from screen to paper. Apply these tips to your next project and watch your art transform into stunning prints. Happy printing!
Frequently Asked Questions
Which file format is most commonly used for print projects?
PDF is the most widely accepted and reliable file format for everyday printing needs. It keeps all aspects intact—fonts, colors, images, and layouts. Hence, what you see on your screen is precisely what you'll get in print.
How do I decide between JPEG and PNG for printing?
If fine details and color ranges are your priority, PNG wins over JPEG. However, with JPEG's superior compression quality and smaller file size, it's a sensible choice for casual prints or situations where quick sharing and efficient storage matter more than supreme quality.
Can using an incorrect file format impact the print quality?
Absolutely! An unsuitable file format can lead to loss of detail, misaligned layouts, or color mismatches. It’s crucial to match the file format with the specific needs of your project to ensure the print reflects your vision accurately and brilliantly.
What is the best type of print for digital art?
The ideal print type for digital art depends on the demands of the artwork. TIFF is an exemplary choice for professional quality and archival prints. However, JPEG and PNG offer practicality for everyday prints, while PDF ensures layout consistency for complex designs.
Printing a PDF as a book involves more than just pressing print. Choosing the right software, adjusting the layout, and setting up your printer correctly are all crucial for a professional finish.
This guide covers everything—from why printing your PDF as a book is beneficial to preparing your document, selecting margins, print quality, and binding options, including the number of pages you have. Follow these steps, and you'll have a well-formatted, professionally printed book in no time! Ex Why Zed provides premium book printing services in the UK, offering the highest quality paper and binding options, along with a print preview before finalizing your order.
How to Print a PDF as a Book: A Step-by-Step Guide
Turning a digital PDF into a beautifully printed book in PDF format is an excellent way to bring your content to life. Whether you’re a self-published author, a business creating manuals, or a photographer assembling a portfolio, a well-printed book adds a professional touch. However, achieving high-quality results requires careful formatting, choosing the right materials, and selecting a trusted printing partner.
In this guide, we’ll walk you through the entire process, from formatting your PDF to selecting the best printing service—with a special focus on Ex Why Zed, a premier book printing service in the UK that ensures top-tier results.
1. Format Your PDF for Printing
Proper formatting is key to ensuring your book prints exactly as you envision. Here’s what you need to consider:
Set the Page Size & Bleed
Your book’s dimensions should be set before designing the content for pdf printing. Common sizes include:
A5 (148mm × 210mm) – A popular choice for novels and journals, especially when formatted in a PDF file.
A4 (210mm × 297mm) – Ideal for workbooks, manuals, and portfolios.
Custom Sizes – If you have a unique vision, custom dimensions can be accommodated by professional printers like Ex Why Zed.
If your book includes images or background colours that extend to the edge of the page, you need to set a 3-5mm bleed to prevent unwanted white borders during trimming.
Margins & Layout
To avoid content being cut off, leave sufficient inner margins (especially for bound books) and ensure enough spacing for readability. If your book will be perfect bound, the inner margin should be at least 15mm to account for the binding process.
Embed Fonts & Use High-Resolution Images
Fonts should be embedded to maintain consistency across different devices and printers. Additionally, images should be at least 300 DPI to prevent pixelation in print.
Check Page Order & Numbering
Odd-numbered pages should appear on the right, even-numbered pages on the left.
If your book has a blank page, ensure it’s placed correctly to maintain proper flow.
2. Choose the Right Binding Type
Your book’s purpose and page count will determine the best binding option:
Saddle Stitching – Common for booklets, zines, and short-form publications.
Wire-O Binding (Spiral) – Perfect for workbooks, manuals, and notebooks that need to lie flat.
Hardcover Binding – The most durable and premium choice, ideal for special editions and coffee table books.
Pro Tip:Ex Why Zed offers a variety of binding styles to match your project’s needs, ensuring durability and a high-quality finish.
3. Select a Trusted Printing Service
Choosing a reliable and experienced book printing company is crucial. Here’s why Ex Why Zed stands out in the UK printing industry:
Expert Craftsmanship – Whether you need a small batch or bulk printing, Ex Why Zed ensures precision and quality at every step. Customisation Options – From paper types to cover finishes, ExWhyZed provides tailored solutions. Eco-Friendly Printing – If sustainability matters to you, Ex Why Zed offers environmentally conscious printing options. Fast Turnaround – Quick production times without compromising quality, so you get your books when you need them.
Once your document is formatted correctly, it’s time to prepare it for submission and printer settings.
Convert to a Print-Ready PDF
To ensure your file meets printing standards, save it in PDF/X format (such as PDF/X-1a or PDF/X-4), which locks in fonts, colours, and layout.
Request a Proof Copy
Before printing a large order, always ask for a proof copy (digital or physical). A test print allows you to spot errors and make necessary adjustments. We can either bind this or send it out as flat sheets.
Define Printing Preferences
Paper Type: Matte, gloss, or uncoated? Choose based on your book’s purpose.
Cover Finish: Softcover, hardcover, lamination (glossy or matte).
Color vs. Black & White: Full-colour pages cost more but enhance visuals.
Need help deciding?ExWhyZed’s expert team can advise you on the best materials and finishes for your book.
5. Review and Finalise Your Order
Before placing your final order: Proofread thoroughly for typos, misaligned elements, or missing pages. Confirm Binding & Material Choices to match your vision. Check the Delivery Timeline so you receive your books on time. You can pay using a credit card or other payment methods.
Once everything is in place, place your order and track your shipment.
Ex Why Zed offers nationwide UK delivery with excellent customer support to keep you informed every step of the way.
🇺🇸 We now have two print hubs in the States - one on the East Coast, one on the West. So we can now deliver overland in 5/6 working days saving you both time and cost compared with shipping from the UK. Win win! You can choose which shipping method depending on how fast you need the books, but we tend to use UPS.
So our print price will be the same as we have already quoted but shipping will be much faster and cheaper (and no import Tariffs either, in case Trump launches them before you go ahead).
Ex Why Zed: Premium Book Printing in the UK
At Ex Why Zed, we bring your vision to life with beautifully printed books crafted to perfection. Whether you're dreaming of a striking hardback, a sleek softcover, or a bold coffee table book, we provide bespoke printing solutions tailored just for you.
With eco-friendly options, premium finishes, and meticulous attention to detail, your book will truly stand out. Let’s create something amazing together! Feel free to email us at hello@exwhyzed.com or call us on 01206 766647
Conclusion
Printing multiple PDFs as a book at home or in the office is easier than you think. Understanding the printing process, including page sizing, ensures a polished result within the printable area, whether it's a manual, booklet, or blog novel. You can use software like Adobe Reader in the process, including steps like folding.
From preparing your PDF with Adobe Acrobat or Microsoft Publisher to selecting paper size, print quality, and binding options like saddle stitch or perfect binding, each step matters.
We hope this guide helps you create high-quality booklets with confidence. Happy printing!
Frequently Asked Questions
Can I use my home printer to print a PDF as a booklet?
Yes, you can! If your home printer supports automatic duplex printing (double-sided printing) or manual duplex printing, including duplex printers, you can produce a simple booklet by printing on both sides of the paper, including the front side and back side. However, you may be limited by factors such as the maximum paper size your printer can handle and the print output quality.
Can I print a book-style PDF without special software?
Yes, some printers have built-in booklet printing options. However, software like Adobe Acrobat or Microsoft Publisher gives more control over layout and formatting.
How do I avoid blank pages in my printed booklet?
Ensure your page count is a multiple of four. If not, intentionally add blank pages to prevent awkward formatting. Your pdf file should be supplied with all the pages in reading order. If you need blanks in there to ensure the double-page spreads match up, please do include them in the PDF too.
What’s the best paper type for booklet printing?
For a professional look, use 100-120gsm paper for inside pages and 250-300 GSM for covers. Matte paper reduces glare, while glossy paper enhances colors.