Turn simple ideas into sleek, printed booklets that look polished and ready to share.
Create eye-catching designs that make your booklet stand out from the very first page.
Get smooth, high-quality prints without the stress or guesswork of setup and formatting with Ex Why Zed.
Bring your booklet vision to life with steps that make printing simple and mistake-free.
Craft professional-looking booklets at home or in the office with minimal effort.
From layout to finish, turn your booklet project into something that feels truly premium.
Making a booklet sounds simple, right? But when it’s time to design, format, and print, things can get confusing. Pages flip the wrong way, text looks off, and printing costs can add up fast.
The good news? With the right steps and a few smart tips, you can make a booklet that looks neat and professional. From choosing paper to printing and binding, we’ll show you exactly how to make a booklet.
Before finalising the booklet printing process, it’s important to plan carefully. The right paper, binding, and layout choices help your booklet look polished and professional.
Ready to bring your idea to life? Keep reading to discover the key steps and expert tips for designing and printing a booklet that looks sharp, reads smoothly, and leaves a lasting impression.
What Are Booklets? Everything You Need to Know to Make Your Own Booklet
If you’ve ever wondered, what is a booklet? It is a tiny version of a book that helps you showcase content beautifully in just a few pages. Booklets are made by folding and binding a few pages together. Each page fits neatly to share information in a clean, simple way. People often use them for marketing, events, or small guides. They’re held together with staples or stitches, making them easy to flip through and carry around.
Booklets are a fun and practical way to share information, from event programs and recipe books to product catalogues and storybooks. The best part? You don’t need fancy tools or a design degree. You can make a professional-looking booklet at home with just the right method and a bit of patience.
Below are five simple and effective ways to create your own booklet, whether you’re designing digitally or using paper by hand.
1. How to Make a Booklet Using Adobe Acrobat Reader DC
If your booklet is already designed in a PDF format, Adobe Acrobat Reader DC is your best choice for professional printing. It automatically arranges and flips pages into the correct order so that when you fold them, everything lines up perfectly. It’s great for printing finished booklets, like eBooks, manuals, or event programs, without messing up the layout.
Quick steps:
Open your PDF: Launch Adobe Acrobat Reader DC and open the file you want to print.
Go to Print Settings: Click File → Print.
Choose Booklet Layout: Under “Page Sizing & Handling,” select Booklet.
Select Page Range: Keep it on “All” unless you want to print specific pages.
Pick Perfect Binding Option: Choose Booklet subset → Both sides if your printer supports duplex printing. Otherwise, print front sides first, then flip.
Check Orientation: Keep the binding on the left side for western-style reading.
Preview and Print: Double-check everything, then click Print.
Fold & Bind: Once printed, fold the pages in half carefully and staple along the center fold.
Creative Tip: If your booklet has many pages, use a long-arm stapler or mini binder clips for a neat, strong finish.
2. How to Make a Booklet in Microsoft Word (Windows)
Microsoft Word is perfect if you’re starting from scratch. It helps you set up pages, adjust margins, and print in a folded, booklet-friendly layout. Ideal for making event programs, company brochures, or personal journals. Word’s built-in “Book fold” option makes it super beginner-friendly.
Quick steps:
Start a New Document: Open Word and create a blank file.
Set the Layout: Go to Layout → Margins → Custom Margins.
Under Pages, select Book fold from the dropdown.
Choose Paper Size: Stick to A4 or Letter size for easier printing.
Adjust Margins: Keep enough space near the centre for folding.
Add Content: Type in your text, insert photos, or add tables and charts.
Design the Cover: Use a full-page image or large title font for a clean look.
Add Page Numbers: Go to Insert → Page Numbers for a professional touch.
Preview Your Work: Use File → Print → Preview to make sure everything looks right.
Save as PDF: This locks your design so it won’t shift during printing.
Print and Fold: Use double-sided printing, fold your pages in half, and staple neatly.
Creative Tip: Consider adding section headings, coloured backgrounds, and borders to make your booklet pop.
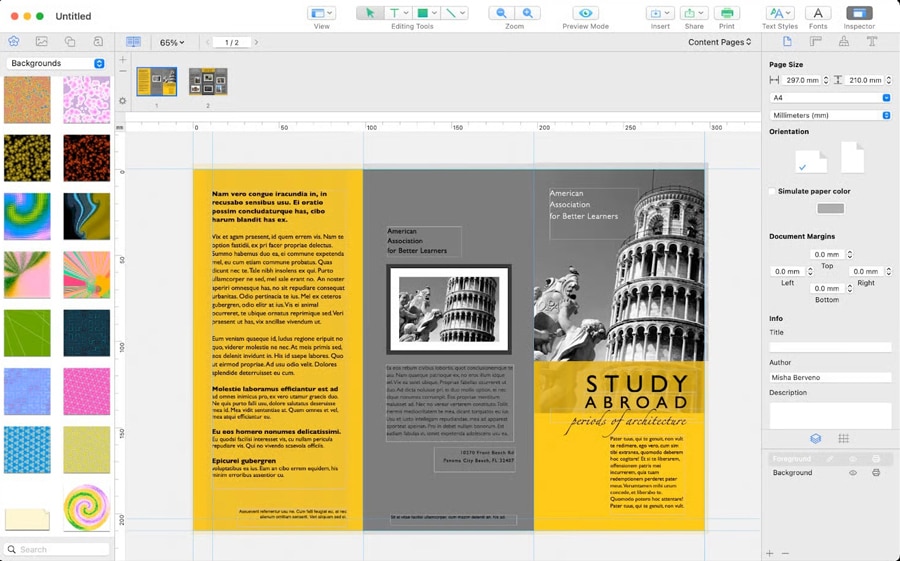
3. How to Make a Booklet in Microsoft Word (macOS)
If you’re using a Mac, you can still create a professional booklet in Microsoft Word for macOS. It’s slightly different in layout settings but just as easy. This method is the best fit for creative writers, teachers, and designers who prefer Apple devices.
Quick steps:
Open Word: Start a new blank document.
Set Up the Layout: Go to File → Page Setup → Layout → Multiple pages → Book fold.
Choose Paper Size: A4, A5, or custom size depending on your booklet type.
Adjust Margins: Make sure text doesn’t touch the fold area.
Add Text & Images: Keep each page balanced, short text, clean visuals.
Use SmartArt: Add simple charts or icons for visual appeal.
Preview Before Printing: Go to File → Print → Preview to check alignment.
Export as PDF: This keeps your design layout safe.
Print Double-Sided: Fold and staple down the centre line.
Creative Tip: Use slightly thicker paper (like 120gsm) for the cover, which makes your booklet feel premium.
4. How to Make a Booklet in Canva
Want your booklet to look amazing without design experience? Then Canva is your best friend. It’s an online tool packed with templates that make your booklet look professional and creative at the same time. This method is ideal for designing marketing booklets, portfolios, or lookbooks that need eye-catching visuals.
Quick steps:
Go to Canva: Visit canva.com and sign in.
Search Templates: Type “Booklet” or “Brochure” in the search bar.
Choose a Template: Pick one that matches your theme, minimalist, corporate, or artistic.
Customise It: Add your text, images, colours, and logos with simple drag-and-drop tools.
Use Consistent Fonts: Stick to 2–3 font styles for a clean layout.
Add Visuals: Use Canva’s free illustrations or upload your own.
Preview the Booklet: Click through pages to make sure spacing looks right.
Download Your Design: Click Download → PDF Print and select “Crop Marks & Bleed” if you plan to trim edges.
Print and Fold: Use a printer’s “Booklet” mode or have it printed at a local print shop.
Bind It: Staple, glue, or use binding clips, depending on your preferred finish.
Creative Tip: Add QR codes that link to your website or portfolio; it gives your booklet a modern, interactive touch.
5. How to Make a Booklet from Paper (Manual DIY Method)
If you don’t have design tools or just want something handmade, this method is for you! Making a booklet from paper is fun, relaxing, and perfect for kids, crafts, or journaling. It is also affordable, hands-on, and adds a personal, creative feel.
Quick steps:
Gather Your Supplies: Paper sheets (A4 or Letter), a ruler, scissors, and a stapler.
Stack and Fold: Place 4–6 sheets together and fold them in half. Press the fold with your ruler to make it sharp.
Cut If Needed: If your booklet is too thick, cut extra edges for a tidy finish.
Staple Along the Fold: Use 2–3 staples down the centre to hold the pages together.
Decorate the Cover: Draw, paint, or use stickers for a personal touch.
Label Pages: Number them or add doodles to keep it fun.
Trim Edges: Use scissors to make all sides of the paper even and avoid creases.
Enjoy Your Booklet: Use it as a mini scrapbook, zine, or event handout.
Creative Tip: Mix white paper with coloured or patterned sheets for a creative, layered look.
What Are the Necessary Steps to Follow Before Printing a Booklet?
Before finalising the booklet printing process, it’s important to plan carefully. The right paper, binding, and layout choices help your booklet look polished and professional. Here’s what to check before hitting “Print.”
1. Choose the Right Paper and Binding
Your paper and binding decide how your booklet feels and lasts. Choose glossy paper for images, matte for a soft look, or textured for premium results. For perfect binding, saddle stitch suits small booklets, while perfect or wire binding works best for thicker ones.
2. Prepare Content and Design
Organise your text, images, and layout before you print your own booklet. Keep your fonts, colours, and styles consistent for a clean look. Leave enough white space for readability and use clear headings or colour accents to guide readers easily through each section.
3. Plan Your Page Layout
Your page layout determines how the booklet folds and reads. Double-check page order, set safe margins, and include bleeds to avoid white edges. Adjust for “creep” in thicker booklets so that all pages stay aligned when folded.
4. Check for Printing Errors
Always preview your booklet print quality before making multiple copies. Print one test copy to check page order, colours, and alignment. This small step helps you catch mistakes early and reduce the cost of printing booklets.
5. Final Touches and Finishing
Once your design is perfect, choose finishing touches that match your purpose. Add a cover page, page numbers, or a short introduction. If possible, use slightly heavier paper for the cover to make it look more professional.
6. Export and Verify Print-Ready Files
Before sending your booklet to print, ensure your file is export-ready. Save your design as a high-resolution PDF using CMYK colour mode, not RGB, to maintain accurate print colours. Include bleed and crop marks to avoid trimming errors, and confirm all images are at least 300 DPI for sharp, professional results. Don’t forget to embed your fonts to prevent unexpected text changes.
Before finalising your order, double-check every detail. Ex Why Zed offers reliable, high-quality booklet printing that makes your project look polished and professional. Just upload your file or request a free quote to get your booklet professionally printed today.
How to Make Your Booklet Personalised?
A personalised booklet helps your readers feel more connected to your message. Personalisation doesn’t have to be complicated. It’s all about making the design and content match your purpose and audience. Here's how you can make your booklet personalised:
Add a Unique Cover Design: Your cover is the first thing people see. Add your logo, name, or event title. Pick colours that match your theme. Use textured or colored paper for a special touch.
Include Personal Messages: Write a short note or greeting. Say thank you or mention the event. This makes your booklet feel warm and personal.
Use Custom Photos and Graphics: Add real photos instead of stock images. Show people, places, or products that matter. Keep all images in the same style or tone.
Choose Fonts and Colours That Reflect Your Personality: Pick fonts that match your vibe, formal, fun, or bold. Use only two or three colours. It keeps your booklet clean and easy to read.
Add Interactive or Special Elements: Make your booklet fun to explore. Add QR codes for videos or websites. Use small doodles, quotes, or icons. Try shiny finishes like foil or embossing if printing professionally.
Mention Names or Custom Details: Add people’s names or special notes. It works well for weddings, events, or client booklets. This small detail makes everyone feel important.
End with a Personal Touch: Finish with a kind message. Add your contact info or a “Stay in touch!” line. It leaves a friendly final impression.
What Makes Ex Why Zed the Best Choice for Your Booklet Printing
Your booklet deserves more than basic printing; it deserves professional care. At Ex Why Zed, we blend creativity, precision, and quality to bring your ideas to life.
From paper selection to layout setup, our team works closely with you to ensure your booklet reflects your vision and brand.
Professional-grade printing with sharp, vibrant results
Personalised support from design to delivery
Flexible printing for both small and large projects
Expert advice on materials, finishes, and layout
Reliable customer service that actually listens
With Ex Why Zed, you don’t just print a booklet, you create something that leaves a lasting impression. Reach out to us today, and make your own booklet in your own terms.
Conclusion
Creating a booklet may seem hard, but once you understand what makes a good booklet, it becomes exciting. Every detail, from the cover design to the choice of paper, adds depth and meaning to your final product. It’s not just about printing pages; it’s about crafting a story your audience will connect with.
So, get creative, plan your design, and make your own booklet that stands out. With the right tools and professional guidance, your booklet can be as unique and professional as you imagine!
Frequently Asked Questions
What is the Ideal Page Count for a Booklet?
The ideal page count for a booklet is usually between 8 and 40 pages. It should be divisible by four for proper folding and binding. Ensuring a balanced, professional layout without blank or misplaced pages.
How Can I Ensure the Best Print Quality?
Use high-resolution images (300 DPI), choose quality paper, and set correct margins and bleeds. Always preview your design before printing. Use CMYK colour mode for accurate colour reproduction and sharp print results.
What are the Common Mistakes to Avoid While Printing a Booklet?
Avoid low-resolution images, incorrect page order, missing bleeds, and inconsistent margins. Double-check alignment, spelling, and colour settings before printing. Good paper choices for printing and no skipping test prints can also improve the final booklet quality.
How do I Print Special Symbols?
Use a font that supports the symbols you need and check character encoding before printing. If symbols appear incorrectly, convert text to outlines or embed fonts in your file to prevent display or print errors.
How to make a mini booklet?
Use one sheet of paper, fold it in half twice to create small pages, and cut a slit in the centre fold. Fold inward to form an 8-page mini booklet, perfect for notes or mini zines printing.
How to make an A4 booklet?
Open your document in Word or Acrobat and select “Booklet Layout” under print settings. Use A4 paper, print double-sided, and fold in the centre. Bind with staples or thread for a neat A5-sized booklet.
How to make a zine booklet at home?
Print your design on a single sheet, fold it twice, and cut the middle slit. Refold into a booklet shape. Add handwritten notes, collage art, or doodles for a creative, DIY zine-style finish.
How to make a mini booklet with 6 pages?
Cut paper into three equal sheets, fold them in half, and stack them. Staple or sew the fold to create a 6-page booklet. Use each page for short notes, sketches, or creative mini projects.
How to make a little booklet out of paper?
Take a few sheets of paper, fold them in half, and stack them evenly. Staple or glue along the fold to bind them together. Add a simple cover for a neat, handmade booklet.
Crucial Points to Act On
We need one PDF with the pages in reading order.
When the design is complete. export your Word file to PDF
You need to add an extra 3mm on each edge to help with trimming
Key Highlights
Microsoft Word offers built-in tools like the Book Fold layout to simplify booklet design and printing.
Setting up margins, gutters, and page order correctly ensures pages fold and align perfectly.
Adding consistent fonts, clear spacing, and visual dividers helps create a professional finish.
Previewing your layout and adjusting margins prevents misaligned or cut-off pages.
Saving your booklet as a PDF keeps formatting intact and ready for print.
Common issues such as blank pages or incorrect layouts can be fixed easily in Page Setup.
Printed booklets remain a versatile and effective format for manuals, catalogues, and programmes.
Once your file is ready, you can send it to Ex Why Zed for expert, high-quality printing.
You’ve spent hours designing your booklet. The layout looks perfect on screen, the content is ready, and you can already picture holding the printed version in your hands. But when it comes to actually printing it, things suddenly get confusing. The pages print out of order, the text runs too close to the fold, or worse, the entire layout shifts. Sound familiar?
Many people assume printing a booklet in Word will be simple, only to find it’s trickier than expected. Between page setup, margins, and double-sided printing, there are plenty of small details that can throw your project off if you don’t get them right. And when you’re aiming for a professional finish, whether it’s a company brochure, an event programme, or a personal project, those details matter.
The good news is that creating a well-formatted, print-ready booklet in Word isn’t complicated once you know the steps. In this guide, you’ll learn how to print booklet in Word from start to finish, including how to design, set up, and save it as a PDF ready to send to Ex Why Zed for professional printing.
Why Use Microsoft Word To Create And Print Booklets?
Most of us already have Microsoft Word on our computers, which makes it one of the easiest tools to use for creating a booklet. You can quickly set up your pages with features like the Book Fold layout and duplex printing, making printing a booklet in Word simple and accurate.
You can also add images, covers, headers, and footers to give your booklet a polished, professional look. When you’re happy with the design, simply export it as a PDF to keep your layout intact and ready for printing. If you’d like a high-quality finish, you can then send your file to Ex Why Zed for professional printing.
How To Set Up Booklet Layout In Microsoft Word?
Getting your booklet layout right from the start is crucial. Correct setup ensures your pages fold correctly and everything prints in the proper order.
Let’s go through the essential steps to set up your booklet layout in Word.
Step 1 – Open A New Document
Start by opening a new blank document in Word so you have a fresh page to build your booklet on. Next, set the page size according to the paper you will be using, such as A4 or Letter. This ensures your booklet will print at the correct dimensions and fold neatly.
Crucial Step - Add 3mm Bleed
We do need an extra 3mm around each edge to help with trimming. This is called 'bleed' If you have not printed anything before or set a file up for print then we understand 'bleed' will be a completely alien concept. Here is the video guide that will help you do it.
So, for example if you are printing an A5 booklet (210x148mm) then with the 3mm extra on each edge, the Word page needs to 216x154mm.
If you are printing a 210x210mm booklet, the Word page needs to be 216x216mm. For A4 booklets (297x210mm), you should set up the Word page as 303x216mm.
Step 2 – Choose The Total Number Of Pages
Before adding any content, decide how many pages your booklet will contain. A good rule of thumb is to have a total page count divisible by 4. This makes sure the pages align properly when folded and avoids any blank pages at the end.
Step 3 – Adjust Page Setup For Booklet Printing
Now it’s time to format your document for booklet printing. Go to Layout > Margins > Custom Margins. Under Multiple Pages, select Book Fold. This will automatically arrange your pages in the correct order for folding.
Next, adjust the Gutter to leave extra space for binding. This prevents text from getting too close to the fold. Finally, set the orientation to Landscape, which is essential for the booklet format to work properly.
Step 4 – Customise Margins And Paper Size
For a professional finish, tweak your inside and outside margins. This makes sure your content looks balanced on every page. Double-check your paper size under Layout > Size to match the sheets you plan to print on.
At this stage, your document is ready for content, and you’ve completed the main steps on how to print a booklet in Microsoft Word correctly.
Not sure which size works best for your project? Read our Guide to Booklet Sizes for Printing to find the perfect fit for your design and budget.
How to Design Your Booklet In Word?
Once your layout is set, it’s time to bring your booklet to life. Now we’ll look at how to add your text, images, page numbers, and create a professional cover, as well as organising your content effectively.
Step 5 – Add Text, Images And Page Numbers
Start by adding the main content of your booklet. Use Insert > Page Number to number your pages automatically, so readers can navigate easily. Apply Styles to headings and body text to keep your fonts consistent throughout the booklet.
Images can make your booklet more engaging. Insert them via Insert > Pictures, and adjust their size and position so they complement the text without crowding the page.
Step 6 – Create A Cover Page
The cover is the first thing readers see, so make it count. Use Insert > Cover Page for a ready-made template, or design one manually for a custom look. Include your title, logo, and background image to give your booklet a polished, professional appearance.
Step 7 – Organise Content Into Sections
For a structured booklet, use Section Breaks to separate chapters or different sections. This makes it easier to manage page layouts, headers, and footers.
Add Headers and Footers to include page numbers, titles, or other branding elements. This ensures your booklet feels cohesive and professionally formatted from start to finish.
How Can I Print A Booklet In Word?
Now comes the most important part: how do I print a booklet in Word? Before sending your booklet to the printer, it’s important to make sure everything looks just right. Taking a few minutes to preview and adjust your document can save you from misaligned pages or printing errors.
Step 8 – Preview The Booklet Layout
Start by going to File > Print > Preview. This allows you to see how your pages will appear once printed. Check carefully that odd and even pages are positioned correctly so your booklet will fold in the right order.
Step 9 – Set Print Margins And Clean Up Artefacts
Next, adjust your margins if needed, selecting Narrow to make sure the content fits neatly on the page. Take a moment to remove any formatting artefacts or extra blank spaces. Doing this now ensures your booklet looks clean and professional.
Step 10 – Choose The Correct Print Settings
Finally, choose the appropriate print settings. Select Booklet Printing in your printer settings, and make sure to choose Print on Both Sides (Flip Pages On Short Edge). Adjust the paper source if necessary to match your printer setup.
Once you have completed these steps, your booklet is now ready to be printed!
Looking for affordable printing options in the UK? Read our guide on cheap booklet printing UK to find out how to get great quality at a lower cost.
How To Save Your Word Booklet As A PDF?
Saving your booklet as a PDF is a great way to share it digitally or ensure it prints exactly as you intended. PDFs preserve your layout, fonts, and images, making your booklet look professional every time.
Step 11 – Export As PDF
Go to File > Save As > PDF. Before saving, select Options > Book Fold Printing to make sure the booklet layout is retained. Saving as a PDF is perfect for sharing with others or sending to a professional printer. It keeps your pages in order and ensures your design stays intact.
Step 12 – Double-Check Before Printing
Before sending your booklet to print, take a moment to review everything. Verify the margins, images, and page order to ensure nothing is out of place. Completing this step helps avoid errors and ensures a polished, professional booklet.
Once your PDF is ready, you can send it to Ex Why Zed for professional booklet printing. Request an instant quote to see how straightforward and efficient our printing process is.
Where Do You Commonly Use Printed Booklets?
Printed booklets are incredibly versatile and can be used for so many different purposes, both personal and professional. Some of the most common uses include:
Event Programmes: Set the tone for your event by outlining schedules, speakers, or performances in a format guests can easily follow and keep.
Training Manuals: Give employees or students structured guidance that’s easy to refer back to, whether in classrooms or on-site.
Activity Books: Engage children or learners with hands-on content like puzzles, colouring pages, or challenges they can complete offline.
Product Catalogues: Present your products or services clearly, helping customers browse and compare in a tactile, professional format.
Branded Magazines: Share company stories, interviews, and updates that strengthen brand identity and keep readers connected.
Staff Handbooks: Communicate policies, procedures, and workplace culture in a format that feels clear, consistent, and approachable.
Coffee Table Books: Showcase photography, design, or creative projects in a stylish format that invites people to pick it up and browse.
Newsletters: Keep your audience informed with updates and insights they can flip through at their own pace, making it a tangible break from the digital noise.
Whether for professional use or personal projects, printed booklets are a simple way to share information in an organised and visually appealing way.
What Are the Common Issues You Might Face When Printing Booklets In Word?
Even with careful setup, some issues can occur when printing a booklet in Word. Being aware of these common problems can save time and ensure a professional result.
Pages Out Of Order: This usually happens if the Book Fold settings are incorrect. Double-check that this option is selected in your page setup.
Blank Pages: Blank pages often appear when the total page count is not divisible by 4. Either adjust the number of pages or add filler content to correct this.
Margins Cut Off: If text or images are too close to the fold, increase the gutter width in your page setup to provide extra space.
PDF Layout Issues: When exporting to PDF, make sure Book Fold printing is selected. This keeps your layout intact and prevents pages from printing in the wrong order.
By addressing these issues before sending your PDF to Ex Why Zed for printing, you can ensure your booklet looks polished and professional.
How Can You Make Your Booklet Look More Professional? (4 Tips)
Creating a polished, professional booklet is about more than just getting the pages to print correctly. Here are some practical tips to make your booklet look its best:
Keep Fonts and Sizes Consistent: Use the same font family and size for headings and body text throughout your booklet. This makes your content easier to read and gives a cohesive, professional appearance.
Maintain White Space: Avoid crowding your pages. Leaving enough space around text and images improves readability and gives your booklet a clean, balanced look.
Add Borders or Dividers for Style: Simple visual elements like lines, borders, or section dividers can help organise content and make your booklet visually appealing.
Test Print a Few Pages First: Before printing the entire booklet, print a few sample pages. This allows you to check alignment, margins, and overall design, helping you avoid surprises in the final print.
Following these tips will make your booklet not only functional but visually professional. If you’d like expert guidance or help preparing your file for print, contactthe Ex Why Zed team today; we’re here to make sure your booklet turns out perfectly.
Conclusion
Designing and formatting your own booklet in a Word document is easier than most people think. Once you understand how to print a document as a booklet in Word, you can confidently create professional-looking programmes, manuals, or catalogues without needing complex design software.
If you’ve been wondering, can you print a booklet in Word, the answer is yes, and the steps you’ve followed in this guide show exactly how. Now that your booklet is designed and saved as a PDF, your next step is simple: send it to Ex Why Zed for professional booklet printing. We’ll ensure your hard work looks just as impressive on paper as it does on screen.
Frequently Asked Questions
How do I print a booklet in Word 2010?
Open your document and go to the File menu, then select Print. In the Print dialog box, under Page setup options, choose the Book fold option to arrange pages correctly. For the best results, print on both sides of the paper and select your preferred paper size.
How to print a 4 page booklet in Word?
To print a short, 4-page booklet, use the Book fold option in Page setup. This automatically arranges pages in order. Check your print setup to ensure double-sided printing is enabled, and preview before printing to avoid alignment issues.
How to print an A5 booklet in Word?
In Page setup options, choose A5 as your paper size and select the Book fold option. Printing an A5 booklet is ideal for small brochures or manuals. Ensure your printer is set to flip on the short edge for the best results.
How to print a booklet in Word 2007?
In Word 2007, go to the Page Layout tab, select Margins, then Custom Margins. Choose the Book fold option under Multiple Pages. Once complete, go to the File menu and print using duplex settings to print on both sides of the paper.
How to print a booklet in Word for Mac?
Open your document on a Mac, then select File > Page Setup. Under Layout, choose Book fold option. In Print setup, enable double-sided printing. This ensures both sides of the paper print correctly for a folded booklet.
Which Word templates are best for creating and printing booklets?
You can use any booklet template available in Microsoft Office or download one online. Templates designed for brochures, event programmes, or manuals work perfectly. They make layout design easier and ensure professional results for your writing project.
How to print to a booklet with correct page order?
Go to Page setup options and select Book fold option to automatically arrange pages in the right order. In your print setup, ensure duplex printing is enabled so both sides of the paper are used on each sheet of paper.
Can you create and print a booklet in Google Docs similar to Word?
Yes, but Google Docs doesn’t have a built-in book fold option like Word. You’ll need to adjust margins manually and export your document as a PDF. For the best results, use your printer’s print setup to print on both sides of the paper.
What Is Staple Binding?
➡️ Staple binding, or saddle stitching, folds sheets and secures them with staples through the spine for a quick, affordable booklet. It works best for magazines, zines, brochures, event programs, and manuals with 8–64 pages. However, saddle stitch is not possible for books with a hard cover, as the staple and folding method cannot properly secure rigid materials; it is designed for flexible paper stocks rather than hardcover binding.
➡️ It works best for magazines, zines, brochures, event programs, and manuals with 8–64 pages.
➡️ Required tools include paper, optional cardstock cover, stapler, staples, ruler, pencil, and a flat surface.
➡️ The process involves preparing print-ready files, printing, adding finishes, trimming, collating, folding, stapling, trimming edges, and final quality checks.
➡️ Staple binding is not suitable for thick books, as spines can bulge and pages may misalign.
➡️ Ex Why Zed produces sharp, professional stapled booklets with fast turnaround and flexible order sizes.
You don’t always need fancy tools or expensive techniques to make a booklet that looks great. Sometimes, a few staples are all it takes. Staple binding, also called saddle stitching, is one of the easiest ways to turn a stack of loose pages into something polished and professional.
You don’t always need fancy tools or expensive techniques to make a booklet that looks great. Sometimes, a few staples are all it takes. Staple binding, also called saddle stitching, is one of the easiest ways to turn a stack of loose pages into something polished and professional. However, saddle stitch binding is generally best suited for thin booklets with fewer pages, as staples may not securely hold very thick books. For thicker publications, other binding methods are usually recommended.
Whether you’re putting together a zine, a brochure, or a simple programme, this method is affordable, quick, and perfect for smaller projects. In this guide, we’ll walk you through how to staple bind a book, why it works, and why so many creators and businesses still love it.
Is Stapling the Same as Saddle Stitching?
Yes! Staple binding, often called saddle stitching, is a straightforward bookbinding technique. To create it, sheets of paper are folded in half, placed together over a “saddle” (a V-shaped holder), and fastened with staples through the crease. This secures the pages at the spine without the need for glue or complex machinery. However, staple binding is generally not suitable for books with a hard cover, as the method is designed for soft covers and thinner booklets. Hard covers are too rigid for staples to penetrate and do not allow the booklet to lay flat for stapling.
The method is named after the “saddle” used during production, not the staples themselves. Because the staples go right through the fold, the number of pages open easily and lie relatively flat, making it convenient for quick reference and casual reading.
Unlike perfect binding (which uses glue) or wire-o binding (which uses coils), staple binding is purely mechanical and fast to produce.
So, when you ask, what is the easiest way to bind a book? For small projects, staple binding is hands down the fastest and most efficient method.
What Are Staple Bound Books Best For (and Where Do They Fall Short)?
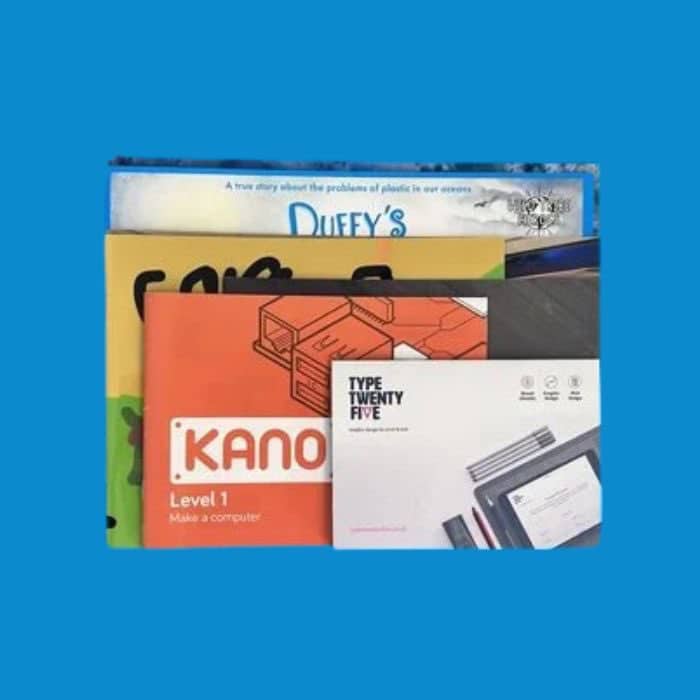
Because of its practicality, staple binding shows up in all sorts of everyday materials:
Magazines and comic books – Lightweight and easy to flip through.
Event programs and playbills – Compact handouts for concerts, plays, and community events.
Marketing catalogs and brochures – Perfect for showcasing products without overspending on production.
Instructional manuals and zines – Straightforward, functional, and easy to distribute.
The Limitations You Should Know:
The one major drawback of staple binding lies in the page count. Staples need to pierce through folded sheets, which means thickness quickly becomes an issue. Generally, this method works best for booklets of 8 to 64 pages, though the exact limit depends on paper weight. Push beyond that, and you’ll end up with:
Pages that stick out unevenly (known as “page creep”)
An overall unpolished, unprofessional look
In short, staple-bound booklets shine when used for smaller, concise projects. But when your content grows larger, it’s better to switch to sturdier binding options like perfect bound or wire-o.
What Tools Do You Need To Staple Bind A Book?
Before you begin, set out everything you’ll need. Staple binding doesn’t require special equipment, just a few basic supplies:
Paper – Regular printer paper works fine. Use thicker sheets if you want more durability.
Cover sheet (optional) – A piece of cardstock or heavy paper gives your booklet a more professional finish.
Stapler – A long reach stapler is easiest, but you can also use a regular stapler with a soft surface like cardboard underneath.
Staples – Standard ones are usually enough, but use longer staples if your booklet is thick.
Ruler and pencil – Helpful for marking even staple positions.
Flat surface – A sturdy desk or table keeps everything aligned while you work.
Once these are ready, you can move straight into the binding process.
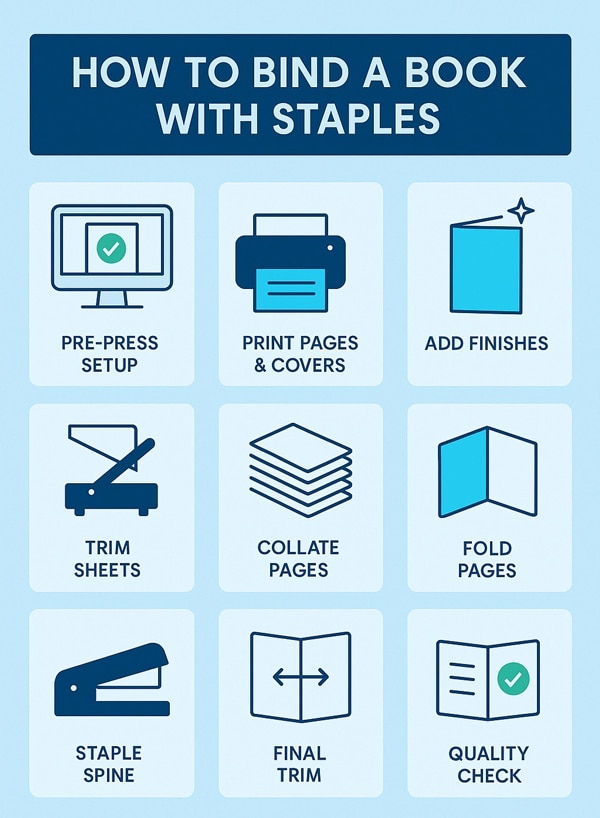
How To Bind A Book With Staples Step by Step?
Staple binding might look straightforward from the outside, but each booklet goes through a carefully managed process to ensure it looks sharp, feels professional, and holds together securely. So, if you're looking for an easy way to bind your own book, here’s a clear breakdown:
1. Get Your Artwork Print-Ready (Pre-Press)
Every book starts long before it touches a press. In the pre-press stage, the design files are checked thoroughly by the print team. This isn’t just about catching typos, it’s about ensuring the file is technically correct for printing.
File checks: margins, bleed (the area that gets trimmed away), image resolution, and color settings.
Page sequencing: The pages are laid out into signatures, sets of four pages printed together on one sheet. This ensures that when the sheet is folded later, the pages appear in the correct reading order.
Proofing: Often, a digital or physical proof is created so you can see exactly how the booklet will look before the full run begins.
Many creators wonder, “How are stapled books printed?” This step makes sure everything is ready for production. This step is crucial. Also, if anything is wrong here, it will carry through the entire production process
2. Bring Designs To Life With High-Quality Printing
With the files approved, printing begins. Large sheets of paper are fed through advanced machines like nanographic, litho, or digital presses. These machines print multiple pages on one large sheet, imagine a giant poster with your booklet pages laid out like a puzzle.
Inner pages and covers are usually printed separately, unless you’re using the same stock for both (called “self-cover”).
Bulk efficiency: Printing on large press sheets makes the process more efficient, as many pages can be produced at once before being cut down.
Example: A 36-page booklet will be printed as 32 inside pages plus a 4-page cover. This stage is where your design transforms from a digital file into something tangible.
If you’re creating something more specialised, such as storybooks or educational booklets, you may want to explore different binding styles for children’s books to ensure the right balance of strength and presentation.
3. Add Finishes That Elevate the Look
Once the sheets are printed, they can be enhanced with finishes. These optional steps are about both function and style:
Lamination: A thin plastic film (matte, gloss, or soft-touch) is applied to the cover. This protects the print from wear and gives it a professional look.
Spot UV and Foil: Specialised finishing machines can apply glossy highlights (spot UV) or metallic foils to specific areas. This technique is perfect for titles, logos, or patterns that need to stand out.
Finishes make your booklet more durable, eye-catching, and suited for premium projects like event programmes or product catalogues.
4. Trim Sheets For A Smooth Binding Process
The large printed sheets are then trimmed down to a manageable size. At this stage, an extra margin (usually about 3mm) is left because the final trim happens after stapling.
This preliminary cut ensures the sheets fit smoothly into the binding machines without jamming, while still leaving room for adjustments later.
5. Collate Pages Into Perfect Order
This is where the booklet starts to take shape. In a collator machine, each section of the booklet is placed into its own bin. The machine pulls one sheet from each bin and stacks them in the correct order, just like dealing a perfectly ordered deck of cards.
Automation: Modern collators can handle high volumes quickly and accurately.
Accuracy: If one page is missed, the whole booklet is out of order, so quality checks are essential here.
By the end of this step, you have a complete set of pages stacked in the right sequence, ready to be folded.
6. Fold Neatly To Create The Booklet Shape
The stacked sheets are fed into a folder, where they are folded neatly in half down the centre. This fold creates the spine of the booklet.
Precision folding ensures the edges of the pages line up perfectly.
A poorly folded booklet can look uneven, with inner pages sticking out past the cover.
At this point, your project already resembles a booklet, but without binding, it’s still just a folded stack of paper.
7. Secure The Spine With Custom Staples
This is the stage that gives the method its name: saddle stitch. The folded booklets are placed on a saddle-shaped guide in the stitching machine.
Custom-made staples: Instead of using pre-cut staples, a continuous roll of wire is fed into the machine. Each staple is cut to the exact size needed, based on the booklet’s thickness and paper type.
Strong and secure: The staple is pushed through the folded spine, piercing all the pages, and then clinched tight inside the centrefold.
This process ensures that the staples grip firmly without damaging the paper, even if the booklet is relatively thick.
8. Trim The Edges For A Professional Finish
After stapling, the booklet is still slightly uneven at the edges. To finish, it goes through a three-knife trimmer:
The top, bottom, and outer edges are cut cleanly.
The spine is left untouched to preserve the staples.
This gives the booklet a sharp, professional finish with perfectly aligned pages.
9. Final Checks Before Your Booklets Ship
Before leaving the factory, every batch of booklets goes through a quality control stage. Here’s what’s checked:
Page order is correct
Images and text are aligned properly
Staples are secure and even
Final size matches the order specifications
Once approved, the booklets are carefully packed and prepared for shipping.
The Result: What you receive is a neat, lightweight, and professional booklet that’s easy to open, easy to distribute, and cost-effective to produce. Whether it’s a brochure, a magazine, or a catalogue, stapled binding offers the perfect balance of simplicity and quality.
Why Choose Ex Why Zed For Staple Binding?
At Ex Why Zed, we take pride in producing stapled booklets that are sharp, professional, and cost-effective. Whether you need a zine, brochure, catalogue, or event program, we’ll make sure every copy is finished to the highest standard.
Here’s what you can expect from us:
A wide choice of sizes, paper stocks, and finishes to match your vision
Premium printing quality with vibrant colours and crisp detail
Fast turnaround times to meet even the tightest deadlines
Eco-friendly materials and processes as part of our commitment to sustainability
Flexible options for both short runs and large orders
We combine expertise with care, so your booklets don’t just look good, they make a lasting impression.
Ready to get started? Get a Quote today and let’s bring your booklet project to life.
Final Words
At the end of the day, staple binding is proof that simple really can be effective. You don’t need complicated tools or expensive processes to create something that feels polished and professional. A few well-placed staples turn loose pages into a booklet that people can flip through, keep, and actually enjoy.
Whether it’s a zine, a programme, or a catalogue, there’s something satisfying about holding a finished booklet in your hands. It’s quick, budget-friendly, and still manages to make an impact, which is why it’s a go-to choice for so many creators and businesses alike.
Frequently Asked Questions
Can you staple normal paper together to make a notebook?
Yes, you can easily turn plain sheets into a simple notebook using staples. Fold the papers in half or stack them neatly, then secure them along the spine. It’s a quick and affordable method for personal use, school projects, or small booklets.
Are there any creative techniques for staple binding a book for a more professional look?
Absolutely. You can use coloured or oversized staples, add a cardstock or patterned cover, or reinforce the spine with decorative tape. Combining these touches gives a more polished appearance while keeping the process simple and fast.
How does staple binding compare to other bookbinding methods in terms of durability and appearance?
Staple binding is ideal for short booklets and quick projects because it’s fast and cost-effective. However, it’s less durable than glue-based perfect binding or spiral binding, and the spine may not look as sleek. For larger books, other methods are better suited.
Is there any way to permanently bind a perfect bound book?
Yes, perfect bound books are glued along the spine using a strong adhesive, creating a durable and long-lasting finish. Unlike stapled booklets, the pages are secured permanently, giving a clean, professional look for larger projects.
What is side staple binding?
Side staple binding secures pages by placing staples along the edge of a stack rather than the center fold. It’s often used for reports, handouts, or smaller documents where folding isn’t needed, keeping the pages together neatly and efficiently.
Can I staple bind thick books, or is it only for thin booklets?
Staple binding is best suited for thin booklets. Due to the limited reach of staples, this type of binding works best for a page count under 64 pages. For thicker books, other methods like glue or spiral binding are more appropriate.
How do I make sure the pages are aligned perfectly before stapling?
To ensure perfect alignment, hold your stack of sheets of paper and tap the top and side edges on a flat surface. You can also use a ruler to check for squareness. Using clips to hold the pages together during the book binding process helps maintain alignment.
Are there tips for using a regular stapler for book binding at home?
Yes! Open your regular stapler to lie flat. Place your pages on a soft surface like a folded towel, press the stapler down firmly over the spine, and then manually fold the staple ends flat on the inside using a bone folder or ruler.
Can I decorate or reinforce a staple-bound book for durability?
Absolutely. You can use decorative cardstock or even fabric for the paperback cover. To reinforce the spine, you can apply a strip of decorative book tape or washi tape over the staples on the outside, which adds both strength and a creative touch.
Can I staple bind a book with a hard cover?
While staple binding is a great choice for softcover books and smaller projects, it is generally not suitable for books with a hard cover. The thickness and rigidity of hard covers make it difficult for standard staplers to penetrate and securely hold the pages together. For hard cover books, other binding methods like case binding or perfect binding are typically recommended.
Ever tried folding a piece of paper just right, only to look like a crumpled mess? Now imagine that with an entire booklet, and you'll understand why many people break a sweat when it comes to printing. Whether you're crafting a sleek marketing brochure, a personal portfolio, or a small magazine, getting the page arrangement right is essential for best results.
But don't worry—it's not as complicated as it seems. You can quickly and confidently design and arrange your booklet pages with the right approach. Think of this blog as your blueprint to booklet success. We break down the process step by step, ensuring your final product looks professional, polished, and purposeful. So let's begin!
Send Us A PDF File and We'll Do The Rest!
We will just need a high res PDF file to go ahead. SO do use the program you are most comfortable with laying out the artwork in. Ensure that you are happy with how everything looks on the page, then Export or Save As PDF. Easy!
We'll give the files a thorough check and preflight when they arrive and at that stage we will flag up anything that doesn't look right so you can change it before printing.
You need to understand some fundamentals to anchor your journey in booklet printing. For instance, the order of the blank pages and the booklet page is vital to ensure an easy and logical flow for readers. Additionally, you must learn about the various printing settings and how they affect the outcome. This includes understanding the importance of page order and differentiating between reader spreads and printer spreads.
Why Is Page Order Crucial in Booklet Printing?
When designing a booklet, getting the page order right is key to creating a smooth, enjoyable reader experience. Think of it like telling a story: each page should naturally lead to the next, guiding the reader effortlessly through the content. A misstep in page order can be jarring, causing confusion and frustrating your audience—not something you want in a polished, professional piece.
Not only does a proper page order make your booklet more engaging, but it also prevents costly production issues. Incorrectly arranged pages can lead to delays and wasted resources, especially if you must reprint the entire booklet. By ensuring your pages are in the correct order from the start, you avoid these headaches and create a booklet that's easy to read, flows well, and looks great.
Reader Spreads vs. Printer Spreads
Next, understanding the difference between Reader Spreads and Printer Spreads can significantly impact your booklet printing process. Here is a simple explanation:
Printer Spreads: These display booklet pages as they appear when printed side-by-side on a sheet. They reflect a sequential arrangement when folded and bound into a booklet. However, if the book printing layout is only set to printer spreads, and you decide to print in a different layout later on, you might face difficulties and increased costs.
Reader Spreads: This denotes a pair of pages that face each other in a booklet. The page order is based on their numbers. Reader Spreads offer a preview of how your booklet will look once bound, but sending them to the printer directly might lead to problems as the saddle-stitched order does not work this way.
How Do Page Count and Binding Affect Your Booklet's Final Look?
When preparing your book layout for printing, it's crucial to consider how the page count and binding method will influence its overall appearance and usability. Your booklet's page count must align with the binding technique chosen, considering each binding method's minimum and maximum page limits. Let's learn about these elements below.
Minimum and Maximum Page Limits
The number of pages your booklet contains is determined by its content and binding method.
Here is a general guideline:
Binding Method
Minimum Pages
Maximum Pages
Stapled
8
72
Perfect Bound
32
400
Hardback
32
400
Remember, too few pages might render your booklet too thin, and too many pages can make it bulky and expensive to print. Therefore, striking the right balance for an optimum reader's experience is essential.
Choosing the Right Binding Method
Your binding method affects not only the aesthetic appeal of your booklet but also its durability and ease of use. Here are different binding methods you might consider:
Stapled: This method works great for documents with fewer pages. It's cost-effective and gives a neat finish.
Ideally Bound: This method is perfect for booklets with many pages. It gives a professional and elegant look.
Wire-o: Offers a contemporary finish and allows the booklet to lie flat when open, providing ease of scrolling through pages.
Remember, the choice of binding impacts the maximum limit of pages that can be included in your booklet.
Meanwhile, do you want to simplify the process when choosing printing methods? ExWhyZed offers a range of professional printing methods to suit different booklet needs, including staple-bound (saddle-stitched) and perfect-bound (PUR-bound) options.
Whether you need a sleek, stapled booklet for up to 48 pages or a durable, glued spine for thicker publications, Exhyzed ensures high-quality finishing for every project. Their advanced printing techniques guarantee crisp visuals, sharp text, and a polished appearance.
To explore our full range of printing solutions and find the best fit for your booklet, check out our Booklet Printing in 2025 guide.
How to Design and Format Your Booklet?
Are you still trying to figure out, "how to layout a book for printing"? Once you've determined your booklet's page count and binding method, you can begin designing and formatting. Below, we'll discuss these aspects.
Margins and Font Selection
When designing your booklet, the right margins and font can significantly affect how easily your audience reads your content. Margins, typically around 13mm to 18mm, give your booklet room to breathe, ensuring it doesn't feel cramped. It's like giving your words some space to stand out.
And the font? It's all about readability. Fonts like Garamond or Georgia work well because they're easy on the eyes, but you should always choose a font that fits the vibe of your booklet.
Remember, you don't want your reader squinting or straining to read your text—a font that's too small or fancy can make your message hard to absorb.
Style Consistency and Page Numbering
Style consistency is key to making your booklet feel cohesive and professional. Keep your font, color, and alignment consistent across pages unless you're breaking it up intentionally for emphasis (like with headings or special sections).
The goal is to make your booklet easy to follow without sudden design jolts. And let's talk page numbers — they're more than just a small detail. Proper page numbering helps your readers stay on track, guiding them through your content without confusion.
To maintain a clean, streamlined look, keep them at the bottom, centered, and in a smaller font.
How to Use Software for Booklet Printing?
In our digital age, various software applications aid in booklet preparation. Let's quickly have a look at some of the best software available in the market:
Adobe Acrobat or Adobe Reader: Has a 'booklet printing' feature that arranges two pages per sheet to ensure a seamless reading order after binding and folding, making the most of both sides of the paper.
Microsoft Word: Provides pre-defined templates for booklets. However, learning to use its advanced features might require a learning curve.
Lulu's Book Template: This offers easy-to-use templates for different booklet sizes, genres, and designs.
InDesign: A premium tool with robust features for booklet design and arrangement.
When Should You Send the Cover of the Booklet as a Separate File?
Knowing when to send the cover as a separate file depends on several factors, like the thickness of the cover and the binding method you choose. For example, suppose you're working with a saddle-stitched booklet. In that case, the cover is usually thicker than the inside pages, so sending it as a separate file helps the printer give it extra sturdiness. This is especially important if you want a high-quality, professional finish.
However, sending the cover in the same file as the inside pages works fine if you're not focused on thickness and want a more straightforward approach. It's faster and easier, but you may lose some control over the final finish.
Let Ex Why Zed Handle Your Entire Booklet Printing Journey
Do you want to print your new booklet but are confused on how to make it look worthy and moreover professional? Do you need expert help for the same? At ExWhyZed, we don't just help you arrange pages for booklet printing — we guide you through the entire process from start to finish. Whether you're unsure about the right binding method, need expert design advice, or need assistance with software tools, our team ensures every detail is meticulously handled. From page order to final print-ready files, we ensure your booklet aligns perfectly with your vision and is ready to impress.
Ready to bring your booklet project to life? Contact us today and let ExWhyZed take the stress out of printing. We'll handle everything so you can focus on what matters most — sharing your content with the world.
Conclusion
To wrap things up, getting your booklet pages in order might feel like a challenge, but with the right steps and tools, you'll be able to tackle it like a pro. By focusing on key elements like page order, binding, font choice, and consistency, you're setting yourself up to create and enhance the reader’s experience by creating a product that reflects your vision.
As technology evolves, printing has never been easier or more efficient. So, take what you've learned, fine-tune your design, and get ready to impress your audience with a booklet that looks polished, professional, and well-crafted — a true reflection of your hard work and creativity.
If you're up for your printed journey and need a helping hand, quickly get a quote by ExWhyZed now!
Frequently Asked Questions
How do I set the booklet layout for printing?
To set a booklet layout for printing with a PDF printer, you must first design single pages in consecutive order. Use appropriate software to choose the 'Booklet' option in 'Print Mode.' Review the page layout, make any necessary adjustments, and then proceed to print.
How do I rearrange PDF pages to print a booklet?
Arranging PDF pages for booklet printing involves using software tools like Adobe Acrobat that offers 'Booklet Print' features. These tools automatically arrange your pages into a booklet format.
What binding methods are best for booklet printing?
Choosing the right binding method depends on your booklet's page count and purpose. Stapled, perfectly bound, or wire-o are some commonly used methods. Each has its benefits, making one perfect for smaller documents while another ideal for large, professional booklets.
How do I arrange booklet pages in Word?
Booklet arrangement in Word involves selecting 'Page Setup' from the 'File' menu. Then, choose ' Book Fold ' from the 'Pages' drop-down under the 'Margins' section. Set the inside and outside margins, considering the folded booklet and type of binding. Finally, place your content according to the sequence.
What is the optimal page count for a professional-looking booklet?
Considering the binding method, a professionally crafted booklet generally lies within 8 to 64 pages. This guideline helps ensure the booklet isn't too thin or bulky for a smooth reading experience. However, the content drives the ultimate decision on the page count.
Master the Art of Booklet Printing with InDesign
From layout to paper jam fixes, here’s how to print like a pro.
Printing a booklet from Adobe InDesign doesn’t have to feel overwhelming. This expertly structured guide walks you through every stage of the process—from setting up bleed and master pages to adjusting text frames, running a preflight check, and selecting the right printer spreads for your final output. Whether you’re crafting a zine, portfolio, or product guide, this article teaches you how to avoid rookie mistakes and achieve clean, professional results.
Bonus: If your printer setup doesn’t play nice with InDesign, simply export a high-res PDF and let Ex Why Zed handle the rest. We’ll preflight your file and print it to perfection.
Printing a Booklet from Word
It’s not InDesign, but with the right tweaks, Word can still produce a booklet that impresses.
This article takes a refreshingly honest look at using Microsoft Word to create printed booklets—and actually making them look professional. While Word isn’t the ideal design tool, it can get the job done with careful formatting, the right page setup, and proper double-sided print settings. You’ll learn how to manage bleed, avoid misaligned pages, and troubleshoot common preview errors. Plus, the guide covers built-in templates, how to create custom ones, and tips to avoid the most frequent mistakes.
Need top-tier results? Export your PDF and let Ex Why Zed handle the printing. We’ll make sure your Word-made booklet looks like a studio-quality publication.
Printing A5 booklets can feel overwhelming, especially with budget constraints and so many layout options to consider. Their compact size and informative nature make them perfect for impactful branding and communication, but finding cost-effective solutions can be tricky.
This guide is here to make it easier. We’ll walk you through the diverse uses of A5 booklets, the best printing options, and how to estimate costs effectively. Plus, we’ll share insider tips to help you cut costs while maintaining quality.
By the end, you'll be well-equipped to navigate A5 booklet printing in the UK and make smart choices to maximise your investment. Let’s dive in!
What drives the cost of printing?
Several factors influence the final cost of printing A5 booklets. While some, such as page count and ink type, are straightforward, others may be less obvious. Key elements affecting the cost include:
Paper type and quality: The type and thickness of paper used can significantly affect the cost. Choices range from budget options to high-quality, luxury paper.
Ink and colour options: Whether you choose black-and-white printing or full-colour printing considerably alters expenses, with the latter being relatively more expensive.
Binding style: The binding style (saddle-stitched, perfect bound, wire bound, etc.) also modulates the overall cost.
Finishing options: Decisions on finishing touches – whether you want a matte or gloss finish or perhaps special lamination for durability – can add to the total cost.
You can also check out our video on booklet printing guide to get actionable tips and insights on brochures, zines, and catalogues.
Remember, the idea is not just to find the cheapest option but to strategically select a blend that aligns with your brand image and audience expectations while fitting within your budget.
What are the various use cases of A5 booklets?
A5 booklets are incredibly versatile and perfect for a wide range of business needs. Their compact size and ample page space make them a go-to choice for various purposes. Whether you're looking to advertise your brand through postcards, flyers, leaflets, or a newsletter, showcase your products, or provide detailed manuals and guides, A5 booklets have got you covered.
Think of them as the ultimate multi-tasker in your marketing toolkit. They’re small enough to be easily carried around but large enough to hold all the essential information you want to share. So, let’s dive into how A5 booklets can boost your business and help you connect with your audience effectively.
Advertising
A5 booklets are one of the fantastic marketing materials you’ll need! Their handy size is perfect for sharing important information about your business without the bulk of larger posters. You can distribute them at trade shows, exhibitions, or even in stores, and they’re easy for customers to carry around and read later.
Whether you leave them at a help desk or hand them out door-to-door, A5 booklets can boost your brand’s visibility and make your advertising campaigns more effective. They’re a smart, portable way to get your message into the hands of potential customers.
Product Catalogues
A5 booklets are perfect for product catalogues. They let you showcase a wide range of products in a neat and attractive way. Even though they’re compact, they have enough space for detailed product lists, high-quality images, and key information.
These high quality booklets offer a fun-sized, effective way to present your products, making it easy for customers to browse through your offerings. Adding colour pages can make your catalogue even more eye-catching, blending great visuals with essential details to create a truly appealing package.
Manuals and Guides
Five booklets are perfect for manuals and guides. Their size strikes the right balance, offering enough space for detailed illustrations and instructions while remaining easy to handle. Whether you need a training manual for your team or an equipment guide for users, A5 booklets are a great choice.
You can opt for coloured or black-and-white pages for exceptional print quality, depending on what best highlights the important information. This flexibility ensures that your manuals and guides are not only informative but also user-friendly, making it easier for readers to understand and follow along.You can check out this video for information on different creative uses of booklet printing and more.
How do you estimate the cost of A5 booklet printing in the UK?
To estimate A5 booklet printing costs, consider factors like quantity discounts, booklet design, and whether you choose online or local printing. While some costs are clear, others depend on various factors. Let’s break down these details to get a clearer picture.
Quantity discount
Quantity discounts can significantly reduce the cost of book printing A5 booklets. The more you print, the lower the cost per unit, which is great for large-scale advertising or promotions. However, buying in bulk might not be ideal for short-term needs or frequently changing content. Weigh the benefits against storage and future needs before committing to large orders.
Online vs. local print shops
Choosing between online and local print shops can really impact your A5 booklet costs. Online printers often offer better rates and more options because they have lower overheads and serve a larger customer base. Plus, you can easily compare prices. Local print shops, however, can provide personalised service and fast turnaround without delay in the delivery date. Weigh the benefits of each based on your needs, budget, and timeline.
Customisation and design services
Customisation can really make your A5 printed booklet stand out, but it usually costs more. Extras like special paper, unique binding options, embossing, and custom designs add to the cost but can boost your booklet’s look and effectiveness. Professional design services can also ramp up expenses but may be worth it if you’re aiming for a strong impact on your audience.
How can you reduce your booklet printing costs?
To help you manage your printing expenses, we’ll explore several cost-saving tips. We’ll cover strategies like choosing the right printer, the perks of bulk ordering, and effective design principles.
Choosing the right printer
Choosing the right printer can make or break your A5 booklet project. High-end printers offer great quality but at a higher cost, while budget printers may lack in quality or options. Research your options—read reviews, order sample prints, and check for special discounts. Also, consider delivery time and location, as distant printers might add extra shipping costs or delays. Find a printer that balances quality and cost to fit your needs.
Bulk ordering
In the printing world, ordering in bulk can lead to big savings. Larger orders often come with significant discounts because the cost of setup and design is spread across more booklets. This works well for content with a long shelf life. However, for content that changes frequently or is time-sensitive, bulk ordering can lead to waste, negating the savings. So, weigh the benefits of discounts against potential wastage to make the best choice.
Effective design principles
A professionally designed booklet doesn't always require an outsized budget. By implementing a few smart design principles, you could create an impact without denting your pocket. Here are some tips to optimise design without escalating costs:
Experiment with digital design tools available online to minimise professional designer charges. Use templates where possible and then add personalised touches to tailor them to your brand.
Why choose ExWhyZed?
For top-notch A5 booklet printing at great rates, ExWhyZed is your go-to choice! We offer extensive customisation options, including page colour, binding, finishes, and materials. Our pricing adjusts based on your selections, ensuring you get the best value.
Get a quick cost estimate using our online project builder. Just enter your booklet’s details, and we’ll provide a quote. For more information or to start your project, email hello@exwhyzed.com. Let’s make your printing project a success!
Conclusion
Printing A5 booklets involves several key decisions that impact cost and quality. From choosing the right paper and finishes to selecting between online and local printers, each choice affects your budget. By balancing these factors and applying cost-effective design strategies, you can create a booklet that meets your goals and impresses your audience while staying within your budget. Use this guide to make informed decisions and achieve a successful, cost-effective printing project.
Frequently Asked Questions
How much does brochure printing cost?
The cost varies significantly depending on various factors, like paper type, page count, and colour options. As an estimate, basic A5 booklet printing can start at around £58 for an order of 25 copies, with prices escalating based on additional customisations or higher quantities.
How much is booklet printing?
The overall cost of booklet printing depends heavily on factors like the number of pages, paper quality, ink used, perfect binding style, etc. A Standard A5 booklet’s printing starts from approximately £58 for a minimum order, with costs rising for more extensive or premium selections.
What factors influence the cost of A5 booklet printing?
Several factors impact the cost of A5 booklet printing, including the number of pages, paper type and quality, colour and ink usage, finish options, and binding style. The chosen printer's pricing structure, quantity discounts, and any additional services like customisation or design could also significantly affect the costs.
Which binding styles are most affordable for A5 booklets?
Saddle-stitched (or stapled) binding style is often the most affordable option, given its minimalist approach with merely a few staples along the spine. However, the ideal binding style should be chosen as per the intended use and desired durability of the booklet.
What is the average turnaround time for A5 booklet printing?
Turnaround times are primarily dependent on your chosen printer and their specific production schedules. On average, it can range from a few days to a couple of weeks, though express services might offer quicker turnarounds at an additional cost.
Are there cost-effective alternatives to traditional offset printing?
Digital printing serves as a cost-effective alternative to traditional offset printing, particularly for short runs or customised printing requirements. With reduced setup costs and quicker turnaround times, digital printing can offer considerable savings without compromising on quality.
What design tips can help reduce printing costs?
Keeping content concise, limiting colour usage, optimising space usage, and leveraging available design templates or digital design tools can significantly reduce design-related costs. Additionally, matching the design complexity to the booklet’s purpose and audience can avoid unnecessary expenditure.