If you can do these five things confidently, you can design a book that’s professional, consistent, and print-ready. Nothing fancy. Just the fundamentals done properly — which, honestly, is where most book files win or lose.
In 5 minutes you will know how to:
1️⃣ Create a New Document 2️⃣ Add Images 3️⃣ Add Text 4️⃣ Set-Up 3mm Bleed 5️⃣ Export your finished design as a print ready PDF
We’ve outlined each skill with clear, exact steps and screenshots to illustrate the process.
🤩 Don’t be intimidated by InDesign. It’s made for print layouts — books, magazines, brochures, the lot. It is paid software, but Adobe currently offers a 7-day free trial.
If you’d rather use something free (or already on your computer), you can build simple layouts in other tools. Try Affinity Publisher, Canva, Quark Express, Word, Publisher or Powerpoint (listed in order of efficiency). For proper multi-page book design, InDesign and Affinity Publisher are the smoothest options.
1️⃣ Create a New Document Properly (size + pages)
This is where you decide the physical reality of the book: trim size, page count, and whether you’re working as spreads or single pages.
Go to the File menu → New → Document
File → New → Document — start your book file the right way.
• Set Intent: Print
Choose the Print tab so InDesign uses print-friendly defaults.
• Set your Width / Height to the trim size (the finished size after trimming).
• Set Pages to your total page count.
• Tick Facing Pages. This is a visually easier way to design a book so you can see double-page spreads.
• Set Bleed as 3mm (we’ll cover this properly in Skill 4).
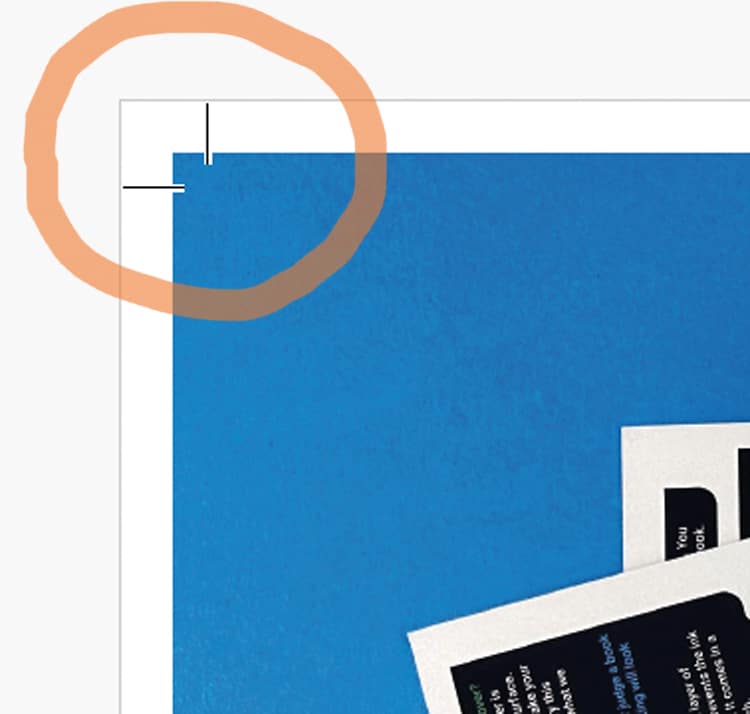
A5 example setup: 40 pages, Facing Pages on, 3mm bleed added.
⚠️ Two small but important notes
Perfect Bound Books: If you’re printing a perfect bound book, we need one file for the cover spreads, and a second file for the inside pages: Set up perfect bound book artwork.
Page count reality check: If you’re designing a stapled booklet/zine, the page counts work in multiples of 4 (because of how sheets fold). Stapled is also known as saddle-stitched or wire stitched. Preparing artwork for stapled booklets.
2️⃣ Place Images Into Frames (and control what’s inside the box)
InDesign is frame-based: you don’t “drop an image on the page” — you place an image into a frame. That’s what gives you control.
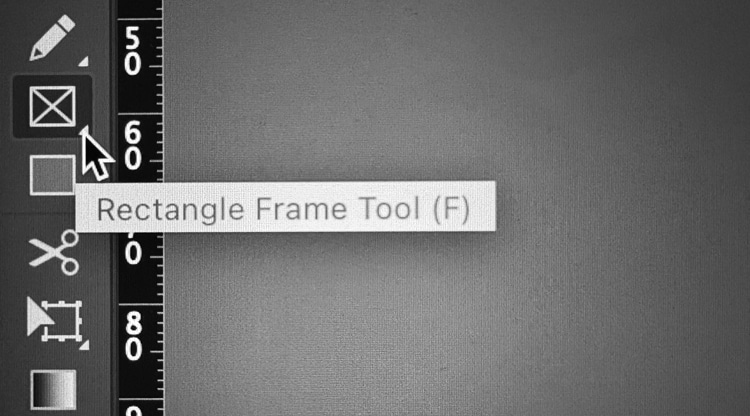
• Make a frame using the Rectangle Frame Tool (frame with an X), or
Use the Rectangle Frame Tool (F) to create picture boxes fast.
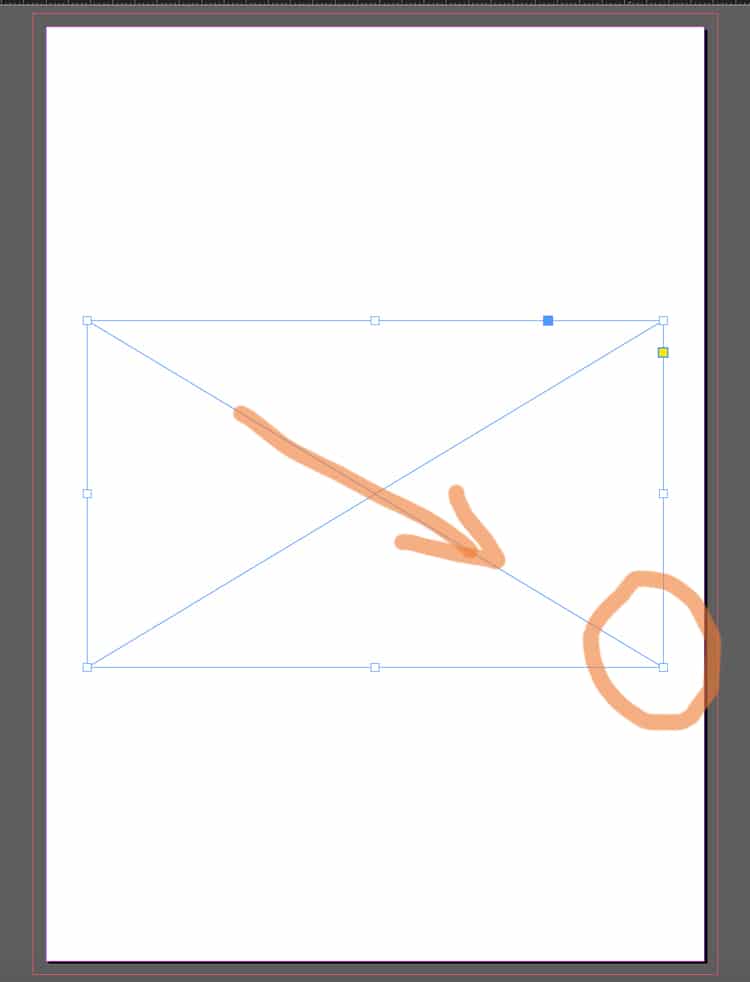
• Draw your frame. To do this, select the Rectangle Frame Tool, click on the page, then hold and drag to create a rectangle (or square) at the size you need.
Draw an image frame first (the box with an X).
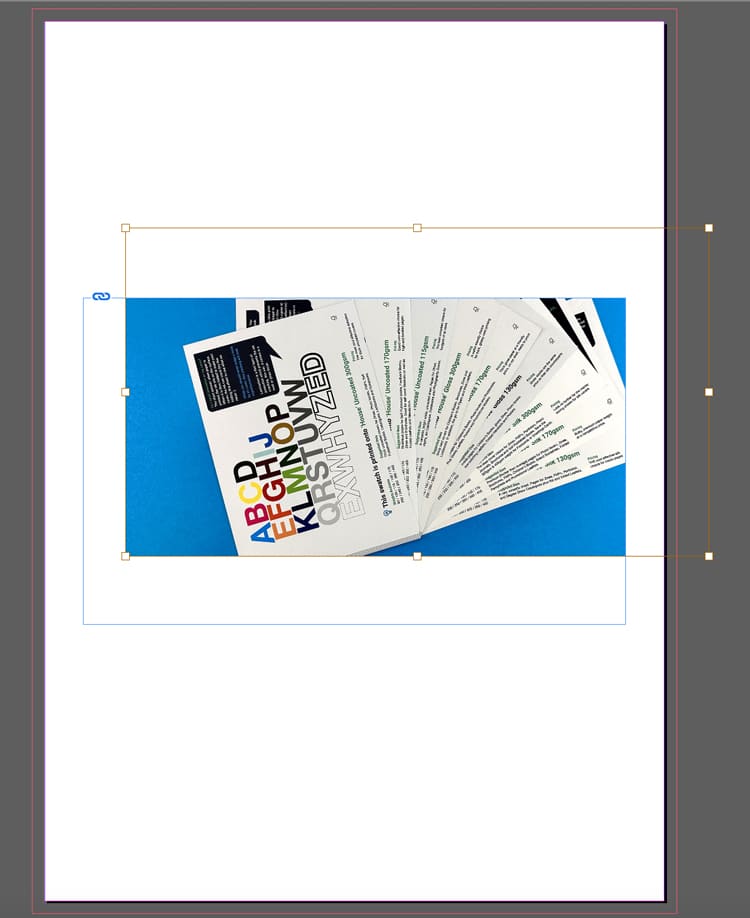
• Next, use Cmd+D (Mac) / Ctrl+D (Windows) or File Menu> Place. Choose the image from your computer and it will appear in the frame.
Import images via File → Place (or Cmd/Ctrl + D).Frame vs image: the frame crops, the image sits inside it.
• To move the image inside the frame:
Use the Direct Selection Tool (the white arrow) and drag the image content within the box until you are happy with its position.
A placed image sitting neatly in the layout — controlled and aligned.
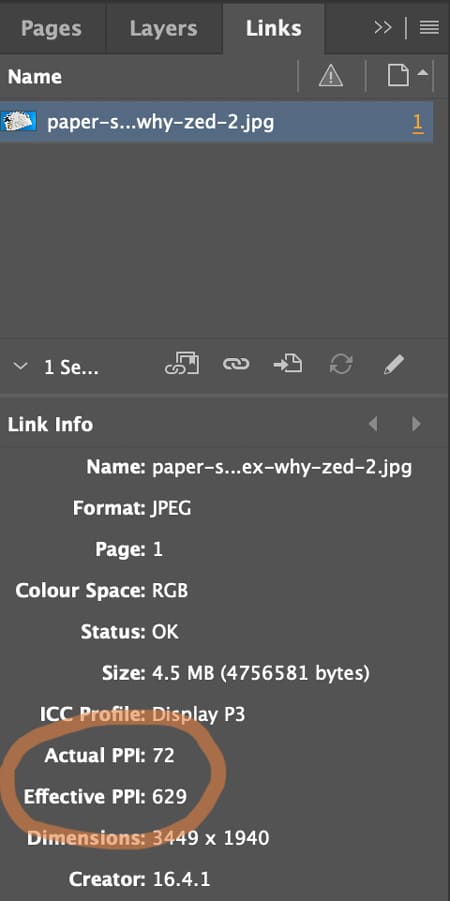
⚠️ Check the Image Quality (300 pixels per inch prints crystal clear)
Open Window → Links and check image quality. The Effective Pixels Per Inch (PPI) should be at least 300. Low-res images (typically under 200ppi) will look fine on screen but appear fuzzy and out of focus when printed.
Check quality in Window → Links — aim for ~300ppi at final size.
3️⃣ Create Text Frames and Format Typography
Yes: you can draw a text box, type, select-all, choose a font… and it will “work”.
But for books, the real skill is getting consistent type across dozens (or hundreds) of pages without manually fiddling.
The basics (still important)
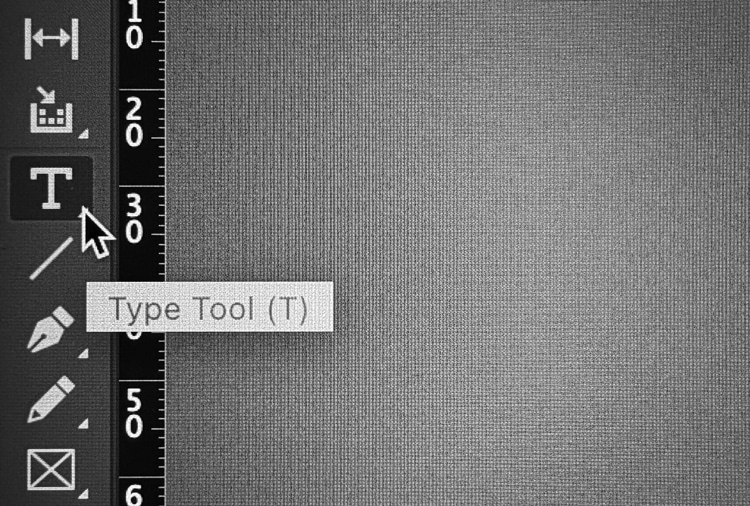
• Hit the T icon for the Type Tool.
Pick the Type Tool (T) to start adding text to your page.
• Click-and-drag to draw a text frame. To do this, click on the page, then hold and drag to create a text frame at the size you need.
• Type or paste your text into the frame.
A simple page build: heading text frame above a placed image.
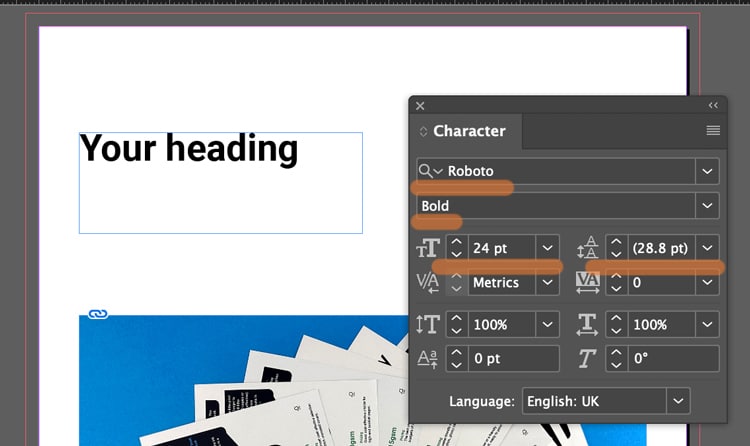
• Use the Character and Paragraph controls (Found in the Type menu) to set font, size, leading (spacing between each line of text), alignment (left, right justified or centre).
Style a heading by adjusting weight + size in the Character panel.
Not sure what size to make your text? Generally 8-10pt is good for main body text. 16-32pt is large enough for headings and titles. (For children's book, choose 16pt for the main story).
If you text frame isn't big enough, you can click the black arrow tool and drag out the corner handles to make it bigger.
Text frame too small? Use the black arrow and drag the handles.
⚠️ Book Design Hacks (still beginner-friendly)
Create Paragraph Styles for body text, headings, captions. One change updates the whole book.
Use character styles for small repeats (like italic emphasis) so you’re not hunting inconsistencies later.
If you have text running across pages, learn threading: click the out-port of one text frame and flow into the next.
4️⃣ Set Up 3mm Bleed (doing this now saves so much time later)
Bleed is an extra 3mm of artwork beyond the trim edge, so when our guillotine trims the printed sheets, you don’t get accidental white borders around the page edges.
The rule
If something should print to the edge, it must extend 3mm past the trim line on that edge. The trim line is generally indicated by the white artwork edge and inner pink line on your InDesign artwork. The outer magenta line shows the 3mm extra. (This will be visible if you have added '3 mm' into the bleed boxes during Step 1 when you created your new document).
The magenta bleed guide sits outside the page edge — that’s your extra 3mm.
CRUCIAL STEP: How to ADD bleed to your content in InDesign
Select the Black Arrow tool and drag the outer handles of your image frame to the magenta line. This extends the image by 3mm outside the trim line.
Correct setup: artwork extends past trim into the bleed area.
Following this repositioning, you might need to make some small adjustments to the image within its box: these include changing the size of the image, or moving it over using the White Arrow tool.
The example below ISN'T Bleed. Notice the image stops at the trim line.
Incorrect: artwork stops at trim — this risks white slivers after trimming.
However, this example below shows a page with generous white borders, so you don't need bleed. The content stops well within the trim line so there is no need for bleed because no content will go right to the edge of the finished pages.
Lets repeat that again: If none of the content is intended to go to the edge of your finished book's pages, you don't need to worry about the extra 3mm because you'll have lovely white borders around your artwork.
If your design has white borders, you don’t need bleed on that page.
⚠️ STOP AND READ
If you don't have bleed on the PDF and your images go to the edge, we will ask you to add it. We won't go to print without bleed on your PDFs so lets add it now.
For further guidance, here is Adobe’s own guide to creating a PDF with bleeds is a further handy reference.
5️⃣ Export your artwork as a Print Ready PDF (this makes us happy)
This is the handover. The file can be beautifully designed — and still fail here if the export is wrong.
The dependable export steps
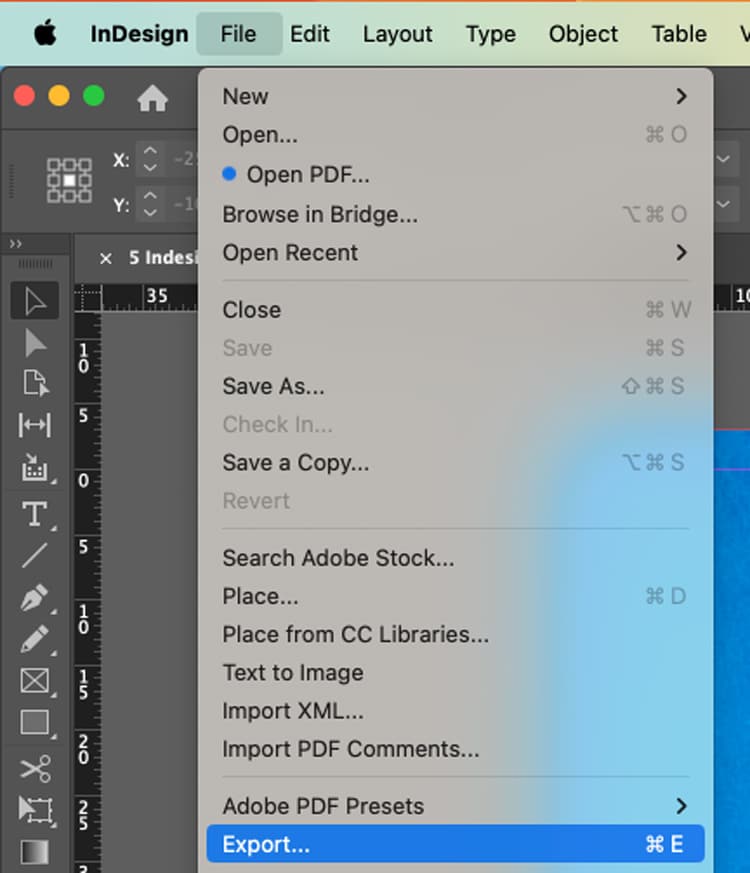
File → Export (or the keyboard shortcut Cmd+E)
Export your PDF via File → Export (Cmd/Ctrl + E).
Name your file, choose Adobe PDF (Print) as the Format, then click Save.
Choose Adobe PDF (Print) — not an interactive PDF.
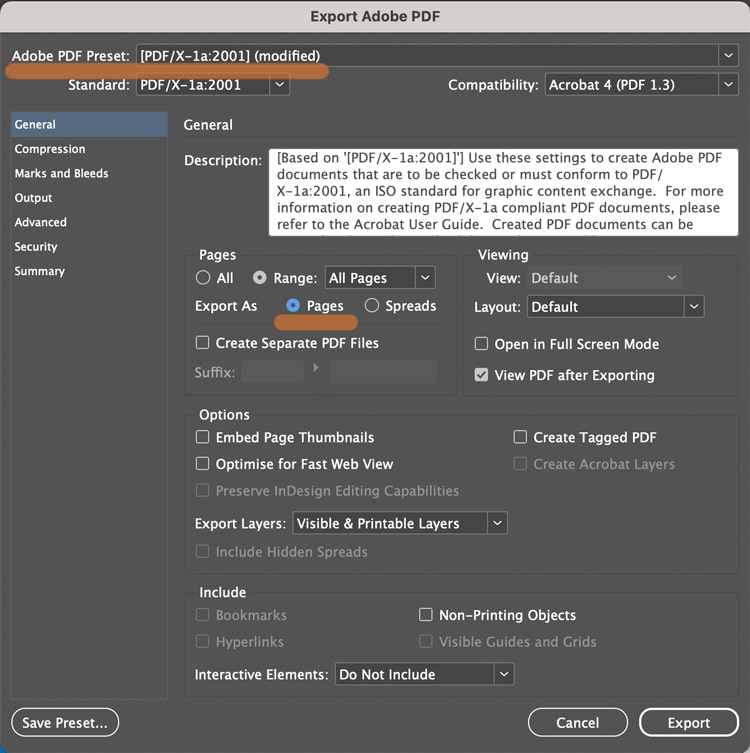
In the next box...choose Adobe PDF Preset: PDF/X-1a:2001 Further down the box, choose 'Pages'.
In General: select PDF/X-1a:2001 and export as Pages.
In the Marks and Bleeds tab (found by clicking it down the left):
Tick Crop Marks (they increase the PDF page size to make room for marks).
In the Bleed boxes, add '3 mm' into the Top, Bottom, Inside and Outside box.
Click Export.
In Marks & Bleeds: set 3mm bleed and add crop marks if requested.
What the finished PDF should look like. On the images below, notice the artwork goes past the crops marks on the correct example, but stops at the crop marks on the incorrect version>>>
Correct result. Artwork runs past crop marks — bleed is included.
Wrong result. Artwork stops at crop marks — add bleed and export again.
⚠️ Bleed Fix
If your artwork stops at the crop marks, to correct the problem, you need to amend one of two things (it is always one or the other of these):
➡️ Have you dragged the background image out 3mm beyond the trim line on your Indesign file into the bleed area? Try that then export again.
➡️ OR you have done the above, but then when you're exporting you need to click the Marks and Bleeds menu, then type '3mm' into the four bleed boxes. This will add the bleed to the pdf.
A quick “print-ready” checklist (save this bit)
Before you export:
✅ Correct trim size + page count set
✅ Images placed via frames, no missing links
✅ Text uses styles (or at least is consistent)
✅ 3mm bleed set, and full-bleed artwork extends to it
✅ Exported as Adobe PDF (Print) with bleed included
Any questions, do give us a shout, remember we are here to help on email, phone and live chat.
Helpful Ex Why Zed links to pair with this article