You’ve finally gathered the photos, funny quotes, and unforgettable memories—it’s all coming together. Now comes the part no one talks about enough: printing the yearbook. How much will it cost? If you're handling this for the first time, the pricing puzzle can feel confusing.
Should you go for hardcovers? Glossy pages? How many copies? These choices impact your budget more than you’d think. While trying to make the most of limited funds, understanding the cost breakdown can help you make smarter decisions.
This blog discusses the factors that affect yearbook printing costs and offers helpful tips for keeping things on track without sacrificing quality. Let's begin!
What Is A Yearbook, and How Much does It Cost To Print One?
A yearbook is a printed collection of memories, usually published annually by schools, colleges, or organizations to document the events, achievements, and people of that year. It typically includes student portraits, class photos, candid shots, club and sports highlights, quotes, and written reflections.
Think of it as a time capsule—capturing a moment people can look back on for years.
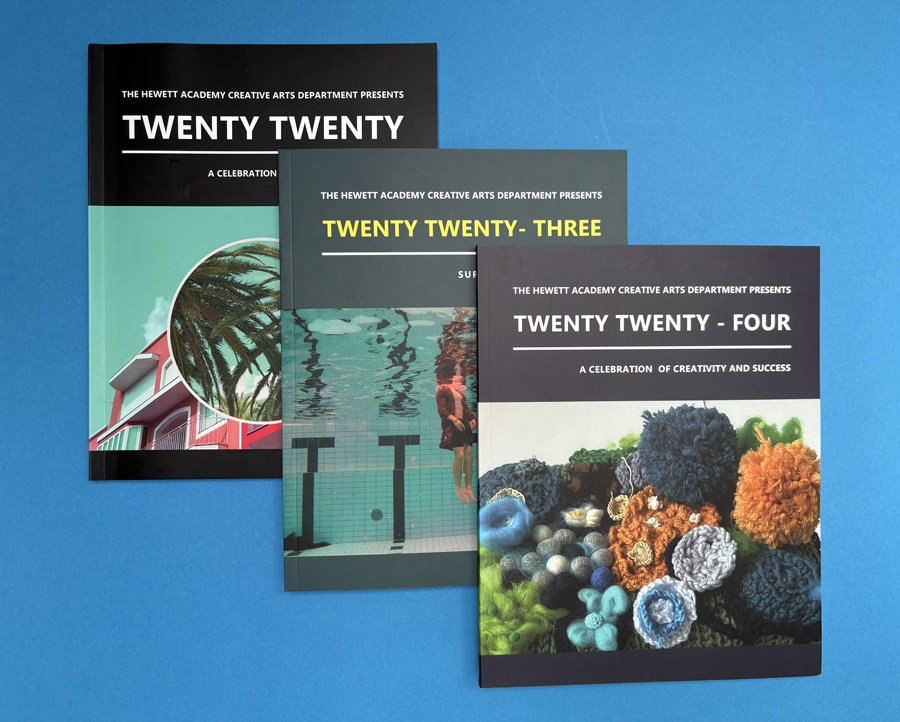
Traditional yearbooks typically range from £8 to £80 per copy, depending on the exchange rate. The final cost, however, comes down to factors like your cover style, total page count, number of copies, and any custom features you add. In short, more personalisation means a higher price, but also a more meaningful keepsake.
What Are the Major Factors That Influence Yearbook Costs?
Several factors significantly impact hardcover yearbook costs, primarily binding options, the quality of paper, the number of pages, and the choice of supplemental inserts and enhancements. Each component's customization options can elevate or lower the overall cost.
1. Types of Binding and Their Prices
The binding of your yearbook influences its aesthetic appeal and plays a key role in determining its cost.
The most basic and cost-effective binding option is Saddle-Stapled or Saddle Stitch. This method involves securing the booklet with staples along its spine. It's ideal for thinner yearbooks with fewer pages.
The next tier is the standard soft, perfect-bound, where sheets are glued together at the spine with a heavy-duty adhesive before being attached to a cover. This binding gives a neat, professional finish and can accommodate more pages than saddle stitching. Lastly, hardcover bindings offer a more sturdy and premium look but are understandably more expensive.
No matter what your preferred binding options are. At ExWhyZed, you can offer saddle stitch or perfect bound binding for both silk and gloss paper choices at the same rate. For example, a 100-copy A4 softback saddle stitched or perfect bound at ExWhyZed can cost you as little as 1.35 GBP per copy.
Paper quality significantly affects your yearbook's look, feel, and cost. Most yearbooks use either 80-lb. or 100-lb. stock. Here's a brief about these papers:
80-lb paper is lighter and budget-friendly. It shows off colors well but may feel thin, especially with double-sided prints.
100-lb paper is thicker, more opaque, and gives a premium feel, making your yearbook look and feel more high-end, but at a higher price point.
You’ll also choose between gloss-coated or matte finishes. Gloss makes colors pop, while matte offers a softer, more refined look.
Ex Why Zed offers various printing paper options, including coated, uncoated, gloss, silk, and recycled, to fulfill all your printing needs. Our quality of papers is premium and designed to meet all the requirements. Still unsure about the quality? No problem; reach out to us, and we’ll send you a paper sample pack right away. You'll only have to pay £5 for the postage costs.
3. Options for Custom Inserts and Enhancements
Want your yearbook to feel truly one-of-a-kind? Plenty of optional extras can add personality and flair—just remember they come at an added cost.
Year in Review: Capture major milestones and memorable moments from the school year.
Autograph Pages: Leave space for signatures, messages, and doodles from classmates and teachers.
Sports Highlights: Celebrate teams and their big wins with dedicated spreads.
Cover Upgrades: Add impact with features like foil imprints, colored end sheets, or glossy lamination.
These enhancements can elevate the final look and feel and affect your overall budget. Finding the right mix of creativity and cost for your school’s needs is key.
How to Calculate Your Yearbook Costs?
When planning your yearbook, every detail—from paper quality to cover design, including the front cover and back cover—impacts your budget. Beyond the basics, don’t forget to factor in taxes, shipping, and possible rush fees. Understanding all the cost drivers upfront helps you avoid surprises and make informed choices.
Tools and Resources Offered by Ex Why Zed for Estimating Costs
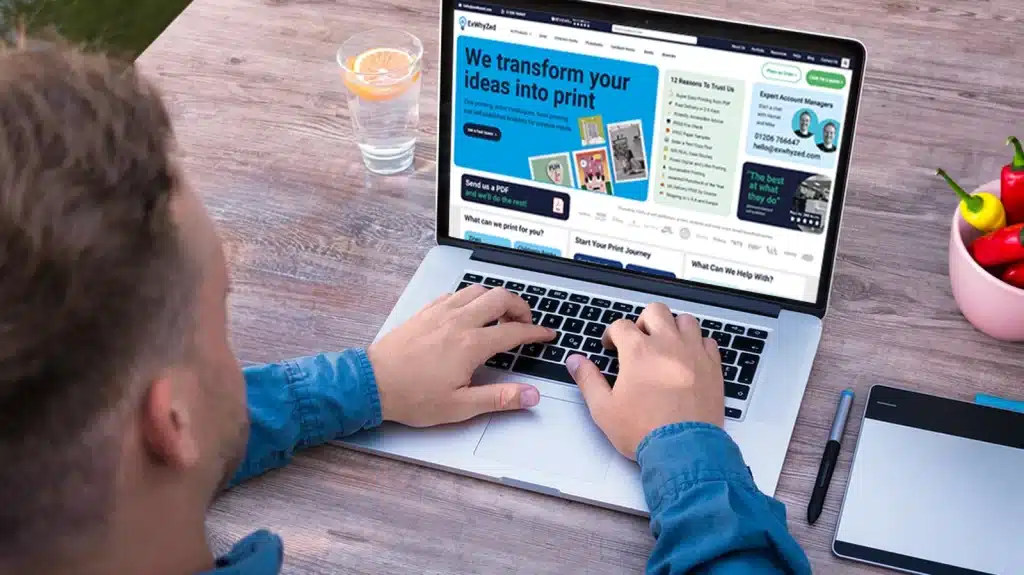
Not sure where to start? Ex Why Zed's Instant Price calculator can be of great help. Our tool allows you to instantly generate a printing quote based on your specific project requirements, like print quantity, type of product, and paper options. No more waiting around for a custom quote!
You can select from various options, such as exceptional print quality materials, sizes, and finishes, to match your exact needs. Whether you're ordering a yearbook, brochure, or flyer, you’ll see an accurate estimate that reflects your unique specifications.
Our calculator ensures transparency by giving you an upfront breakdown of all costs. You’ll know exactly what you're paying for, helping you make informed decisions without hidden fees creeping in later on.
What Are Some Smart Ways to Cut Yearbook Costs (Without Cutting Corners)?
You don’t have to blow your budget to create a memorable yearbook. With a little strategy, like ordering smart and designing simply, you can save big while delivering a quality keepsake.
1. Order in Bulk, But Strategically
Ordering more copies lowers the cost per book, but finding that sweet spot is key. Look at last year’s sales, run a quick survey, or offer early bird deals to lock in demand. For example, if 150 students ordered in the previous year, aim for 160 with a digital version option to cover late interest without extra printing costs.
2. Keep It Simple, Keep It Sharp
A clean layout with minimal frills can look timeless and cost less. Skip extras like foil stamping and stick to color only where it counts—like the cover or event pages. Even trimming just 8–10 pages from your design can shave off a noticeable amount.
Why Choose ExWhyZed for Yearbook Printing?
At Ex Why Zed, we know that a yearbook is a cherished keepsake, and we’re committed to making it as unique as its memories. From premium paper options to custom cover designs, we provide various high-quality choices to ensure your yearbook stands out. Our team works closely with you to ensure every detail, from binding to finishing touches, meets your vision.
With our expertise and dedication, ExWhyZed guarantees that your yearbook will be a lasting, beautiful reflection of your school’s unique spirit, without compromising quality or budget. Let us bring your vision to life with precision and care. Reach out to us now!
Conclusion: Maximizing Your Yearbook’s Value
Producing a school yearbook involves careful planning and decision-making to strike the right balance between cost, logistics, and quality, including the selection of a yearbook theme. Factors like binding, paper choice, printing, shipping, and the use of a PDF for design all significantly shape the final price. You can effectively manage your budget by using available resources, estimating costs, considering bulk orders, and simplifying designs.
Ultimately, creating a yearbook is more than just producing a product—it’s about preserving memories, celebrating achievements, including corporate milestones, and creating a lasting connection to a specific time in our lives. Remember, the actual value of your yearbook isn’t just in its price tag, but in the joy and nostalgia it brings for years to come.
Frequently Asked Questions
How many pages can a yearbook have?
The number of single pages in a yearbook can vary widely, depending mainly on the size of your school and the volume of content to be covered. A standard school yearbook typically has 40 to 200 pages.
What is the average time required to print yearbook?
Most printing companies require months in advance to schedule a yearbook print run. However, quick turnaround companies like Ex Why Zed can produce paperback yearbooks within two to five days, with options for ordering additional books.
Can digital yearbooks reduce overall costs?
Yes, digital copies of yearbooks can significantly reduce production and distribution costs. However, they lack the tangibility and traditional charm of a physical yearbook.
What are some common mistakes when ordering yearbooks?
One common mistake is ordering an incorrect quantity. This happens when estimations aren’t based on prior data or when faulty forecasting of likely purchases occurs. Another error is overlooking potential urgency premiums for reprints.
How can schools involve students in the yearbook design process?
Schools can form yearbook committees comprising students chosen for their art, writing, or organization skills. Under the guidance of an advisor, these committees can be responsible for creating designs and content, collecting photographs, and overall coordination.
Have you ever run your fingers across the embossed title of a beautiful hardcover book and felt that unmistakable thrill? That moment when a story transcends digital pixels to become something you can hold, cherish, and pass down through generations? At Ex Why Zed, we don't just print books—we transform creative visions into tangible treasures that readers can fall in love with page after page.
Reclaim Your Creative Power Through Self-Publishing
The publishing landscape has been democratised, placing unprecedented creative control in your hands. No more compromising your vision to fit a publisher's mold. Our eye-opening exploration of the pros and cons of self-publishing reveals how this path grants you not just creative sovereignty, but direct connection with your audience. We don't shy away from the challenges either—from marketing hurdles to distribution logistics—equipping you with clear strategies to overcome each one so your story reaches precisely who it needs to.
The Sensory Magic of Print Storytelling
In a world of fleeting digital content, printed books offer something increasingly precious: permanence. Our deep dive into storytelling through print explores how the weight of paper, the texture of a cover, and even the sound of turning pages creates an immersive experience digital formats simply cannot replicate. Discover how thoughtful design choices and quality materials transform reading from a mere activity into a multi-sensory journey that readers won't just remember—they'll revisit again and again.
Navigate the Book Printing Process with Confidence
What once seemed like an intimidating technical maze becomes an empowering creative adventure with the right guide. Our meticulously crafted step-by-step guide to printing your book eliminates confusion and builds confidence at every stage. From preparing your manuscript for professional printing to selecting finishing touches that make your book unmistakably yours, you'll move through each phase with clarity and purpose—no publishing degree required.
Book Printing Possibilities Unveiled
Dive into our curated collection of real-world print projects—each analysed to reveal the techniques, materials, and decisions that made them exceptional. Whether you prefer watching videos or reading articles, this resource hub empowers your printing journey with practical insights from diverse specialist niches, helping you envision and achieve your own remarkable printed piece.
The dimensions, format, and physical characteristics of your book are not mere technical decisions—they're powerful storytelling tools. Our accessible breakdowns in book sizes made easy and book format: a beginner's guide translate industry jargon into clear choices that enhance your narrative. Whether you're creating a pocket-sized poetry collection or a coffee table art book, you'll understand exactly how your book's physical form can amplify its emotional impact.
The Art of Booklet Architecture
Creating professional booklets requires a specific expertise in page arrangement that can make or break the reader's experience. Our visual tutorial on how to arrange pages for booklet printing transforms this technical challenge into an intuitive process. With clear examples and practical tips, you'll master the structural elements that ensure your booklet flows naturally, impressing readers with its professional polish.
Perfect Binding: Professional Finishes in Minutes, Not Years
The sleek spine of a perfectly bound book signals quality before a single word is read. Our streamlined guide to mastering perfect bound artwork in 5 minutes distills years of professional knowledge into actionable steps anyone can follow. Learn the precise file setup and design considerations that result in books that not only look professional on a shelf but maintain their integrity through years of reading and sharing.
Bridging Digital and Physical: From Screen to Bookshelf
Your carefully crafted PDF contains a world waiting to be experienced in three dimensions. Our practical article on how to print a PDF as a book ensures nothing is lost in translation during this critical transformation. Follow our guidance to preserve every nuance of your digital creation as it becomes a physical reality that readers can experience with all their senses.
Your Self-Publishing Power Tools
Behind every successful self-published author stands an arsenal of carefully selected tools that amplify their creative capabilities. Our curated collection of top self-publishing tools for success introduces you to platforms and resources that handle everything from professional editing to global distribution. These tools don't just streamline your workflow—they elevate your entire publishing journey, allowing your creative genius to shine without technical frustrations.
The Investment in Your Literary Legacy
Understanding the financial landscape of book printing empowers you to make choices that honor both your vision and your budget. Our transparent analyses of how much it costs to print a book and how much a custom hardcover book costs provide the clarity needed for confident decision-making. We break down every expense category, reveal potential savings opportunities, and help you invest wisely in elements that truly enhance your book's value to readers.
Your Masterpiece Awaits: The Ex Why Zed Difference
The journey from manuscript to masterpiece is one of the most rewarding creative adventures you'll ever undertake. At Ex Why Zed, we walk beside you not just as service providers, but as fellow book lovers who understand the profound significance of what you're creating.
Every page we print carries not just ink, but ideas, emotions, and experiences that will touch lives in ways neither of us can fully imagine. That's why we approach each project with reverence for your vision and commitment to exceptional craftsmanship.
Your book isn't just another product rolling off our presses—it's the culmination of your creative journey, and the beginning of countless reading journeys to come. Let's create something extraordinary together that will find its way into hands, hearts, and bookshelves for generations.
Ready to transform your manuscript into a masterpiece? Explore our resources, reach out with questions, or take that exhilarating first step toward holding your book in your hands. Your readers are waiting.
Writing a book is a major accomplishment; proper formatting ensures a professional, readable final product. Formatting covers font choice, spacing, alignment, title pages, page numbers, and chapter headings. It enhances both aesthetics and readability.
Even a great story can suffer from poor formatting, making it essential for self-published authors to get it right, especially when considering elements like book cover design. This guide breaks down the basics and offers tips to help you confidently format your best book.
What is the Importance of Proper Formatting in Books?
Proper formatting is an integral part of creating a readable and attractive book. It ensures smooth flow and cohesion throughout the book, making it easier for readers to follow the storyline or grasp the arguments.
Formatting enhances the reader's experience by ensuring intuitive navigation. A well-formatted book signals professionalism and commitment to quality, thus attracting more readers, reviewers, and publishers. Moreover, it meets the technical requirements of different publishing platforms and makes your book inclusive for readers of all abilities. Lastly, it allows for unique author identity across all your books.
What Are The Key Components of Book Formatting?
Formatting is just as important as the story itself when publishing a book. A well-formatted book enhances readability, ensures a professional appearance, and keeps readers engaged from start to finish.
Whether you're self-publishing or preparing a manuscript for traditional publishing, understanding the key components or parts of your book formatting—like margins, font choices, spacing, and chapter structure—can make all the difference.
Let’s break down the essential elements that give a book its polished, reader-friendly look.
The trim size you choose influences the margins you set. To give you a sense of typical margin settings for different page counts, refer to the text table below:
Page Count
Inside (gutter, inside margin) Margins
Outside Margins
24-150 pages
0.375 in (9.6 mm)
0.25 in (6.4 mm) or more if bleed is needed
151-300 pages
0.5 in (12.7 mm)
0.25 in (6.4 mm) or more if bleed is needed
The gutter margin is used to accommodate the space taken up by the binding process.
Mastering Typography: Top Font Choices for Self-Published Authors
Fonts do more than just look good—they shape readability and style! For body text, serif fonts like Times New Roman or Adobe Garamond Pro keep things classic and easy on the eyes. Chapter headings? Keep them distinct and consistent for smooth navigation.
Thinking of a fancy font? Make sure it fits your book’s tone and genre—whimsical for kids, sleek and professional for serious topics. And don’t forget size matters—too small, and it’s a strain; too big, and you lose space.
Our comprehensive guide delves into the nuances of typography, offering insights into how font choices can enhance the visual allure of your book and facilitate a seamless reading experience. We explore the impact of font size, spacing, and style on reader perception, emphasizing the importance of aligning your typography with your book's genre and target audience.
The guide also provides curated recommendations for top fonts suitable for various genres, such as Garamond, Caslon, and Janson for classic elegance, and Arial and Calibri for modern readability. Additionally, we address crucial considerations like font licensing and effective font pairing strategies to ensure a cohesive and professional book design. By following the insights shared in this guide, you'll be equipped to make informed typography decisions that enhance your self-published book's appeal and readability.
Proper Alignment and Spacing
The way text sits on a page affects readability and flow. Most books, including your own books, use justified alignment, which keeps both left and right edges neat and polished.
Spacing matters just as much! A 1.5 or double line spacing ensures readability, while consistent paragraph spacing keeps everything organized. Typically, the first line of each paragraph is indented, except for the first paragraph of a new chapter or section.
A well-formatted book isn’t just easier to read—it looks professional too!
Chapters, Sections, and Scene Breaks
Clear formatting helps readers navigate and absorb your book effortlessly. Chapters serve as main divisions, while sections break them into digestible parts, keeping the flow smooth.
Need to shift time, place, or perspective within a chapter? Scene breaks are your go-to tool! These subtle pauses prevent confusion and maintain engagement.
Well-structured formatting makes your book easier to read—and harder to put down!Here are some points to guide you when formatting these elements:
Provide clear and consistent chapter headings or titles. This could be numeric ("Chapter 1"), alphanumeric ("Chapter One"), or thematic ("The Lost City").
Consider using distinct symbols, blank space, or lines to denote scene breaks. This visually cues the reader about a change in narrative flow.
Ensure that new chapters always start on a new page.
How To Format A Book?
So, how to format a book to print? Different books require different formatting. While core principles apply to all, genres like novels, non-fiction, and anthologies have unique structures. Specialized books—academic, cookbooks, and children's books—demand even more tailored formatting.
Novels and Fiction
In case of novels, nonfiction books, and fiction, formatting should maximize the flow and immersive reading experience. Body text is typically set in a simple, easy-to-read font size of around 9 to 12 points, depending on the chosen font. It is crucial to consider how many lines of text can fit comfortably on a page. Serif fonts are often preferred due to their legibility and classical aesthetic.
The standard practice is to start a new chapter, especially the first chapter, on a new page, usually odd-numbered or right-side pages for print books. Many fiction books also include scene breaks within chapters, denoted by blank space or symbols.
Proper dialogue formatting keeps conversations clear—start a new paragraph for each speaker to avoid confusion. Consistency in tense and viewpoint strengthens the reader’s connection to your story.
Non-fiction Works
Nonfiction works serve to inform and often present complex information in an easy-to-follow format. Clear headings and subheadings are crucial in breaking up the text into digestible sections. Compared to fiction, nonfiction typically uses more line spacing and larger fonts, easing the reading of dense, informative content.
It is common to include design elements such as tables, diagrams, bulleted lists and text boxes. These should be consistently formatted for ease of reference. Chapters may be further divided into sections, each marked out by subheadings.
A detailed table of contents, index, and bibliography are also essential components. They assist in navigation and provide due credit and further reading resources.
Anthologies and Collections
Anthologies are collections of shorter works, like poems, short stories, or essays, by one or multiple authors. Each individual piece usually starts on a new page. The table of contents plays a significant role, providing an easy reference to the diverse inclusions.
Each piece may have its title and author name, often centered on the page. Consider adding distinct dividers, illustrations, or motifs to differentiate each work.
In a multi-author anthology, providing a brief author bio at the start or end of each contribution is standard practice. If the anthology holds an overarching theme, the collection may have an introduction that sets the tone and intention of the assembled works.
The front matter introduces your book with elements like the title page, copyright, acknowledgments, and point of view. The back matter wraps it up with appendices, endnotes, a bibliography, and an author bio. Clear, standard formatting ensures a professional, organized presentation.
Front Matter: Title Page, Copyright Page, and More
The front matter sets the stage for your book. Here are some elements you might consider including:
The title page is generally the first page of your book, presenting the book's title, subtitle (if any), and author’s name.
The copyright page generally follows the title page, carrying the copyright notice, edition information, publication information, and the ISBN.
The dedication page is an optional inclusion, allowing the author to dedicate the book to a person or cause.
The table of contents provides an outline of the sections or chapters in your book.
The visual presentation and order of these components significantly influence initial impressions of the book for potential readers, librarians, and reviewers.
Back Matter: Appendices, Notes, and Index
The back matter concludes your book, with supporting or supplementary material that may be too detailed or tangential to include in the work. Here are some common elements of back matter:
An appendix or appendices offers additional information germane to the text, such as tables, research data, or explanations of jargon.
Notes or endnotes can clarify specific passages or concepts covered in the main content.
The index is particularly central in academic or technical books, where it can help readers find specific topics or keywords within the body of text.
Non-fiction books typically have more elaborate back matter than fiction, owing to their educative purpose.
What Are Some Book Formatting Tools and Software?
Authors use various software to streamline book formatting. Microsoft Word offers accessibility, InDesign provides advanced design tools, with easy to learn basic skills needed to design a book. Choose based on your needs, skills, and budget.
Microsoft Word is a highly accessible and versatile word processor and an excellent tool for basic book formatting for new writers. Its familiarity to many potential authors can make the formatting process significantly less daunting.
Word offers many essential features, including styling and formatting text and paragraphs, inserting images and tables, and setting up page layouts. While it’s a generic office tool and not specifically designed for book formatting, Word is capable of admirably completing the job for most self-published authors.
However, Word doesn't support more sophisticated book designs or formats without substantial manual work or add-ins. Its auto-formatting sometimes contributes to incorrect formatting styles, calling for careful manual checks.
Adobe InDesign is a professional-level graphic design and layout software and considered a standard in the publishing industry. It delivers exceptional control over every aspect of the layout and formatting, catering proficiently to books, magazines, posters, and interactive PDFs.
InDesign supports rich typography, versatile page layouts, and various multicolumn, sidebars, and pull-quote designs. It allows easy management of master pages, nested styles, and object styles, which can greatly accelerate the formatting process of long and complex books.
While InDesign has an extensive set of features, it has a steep learning curve as compared to Word or Scrivener. It may be an overkill for simple text-based novels but is a potent tool for authors seeking highly customized formatting or dealing with heavy graphical content.
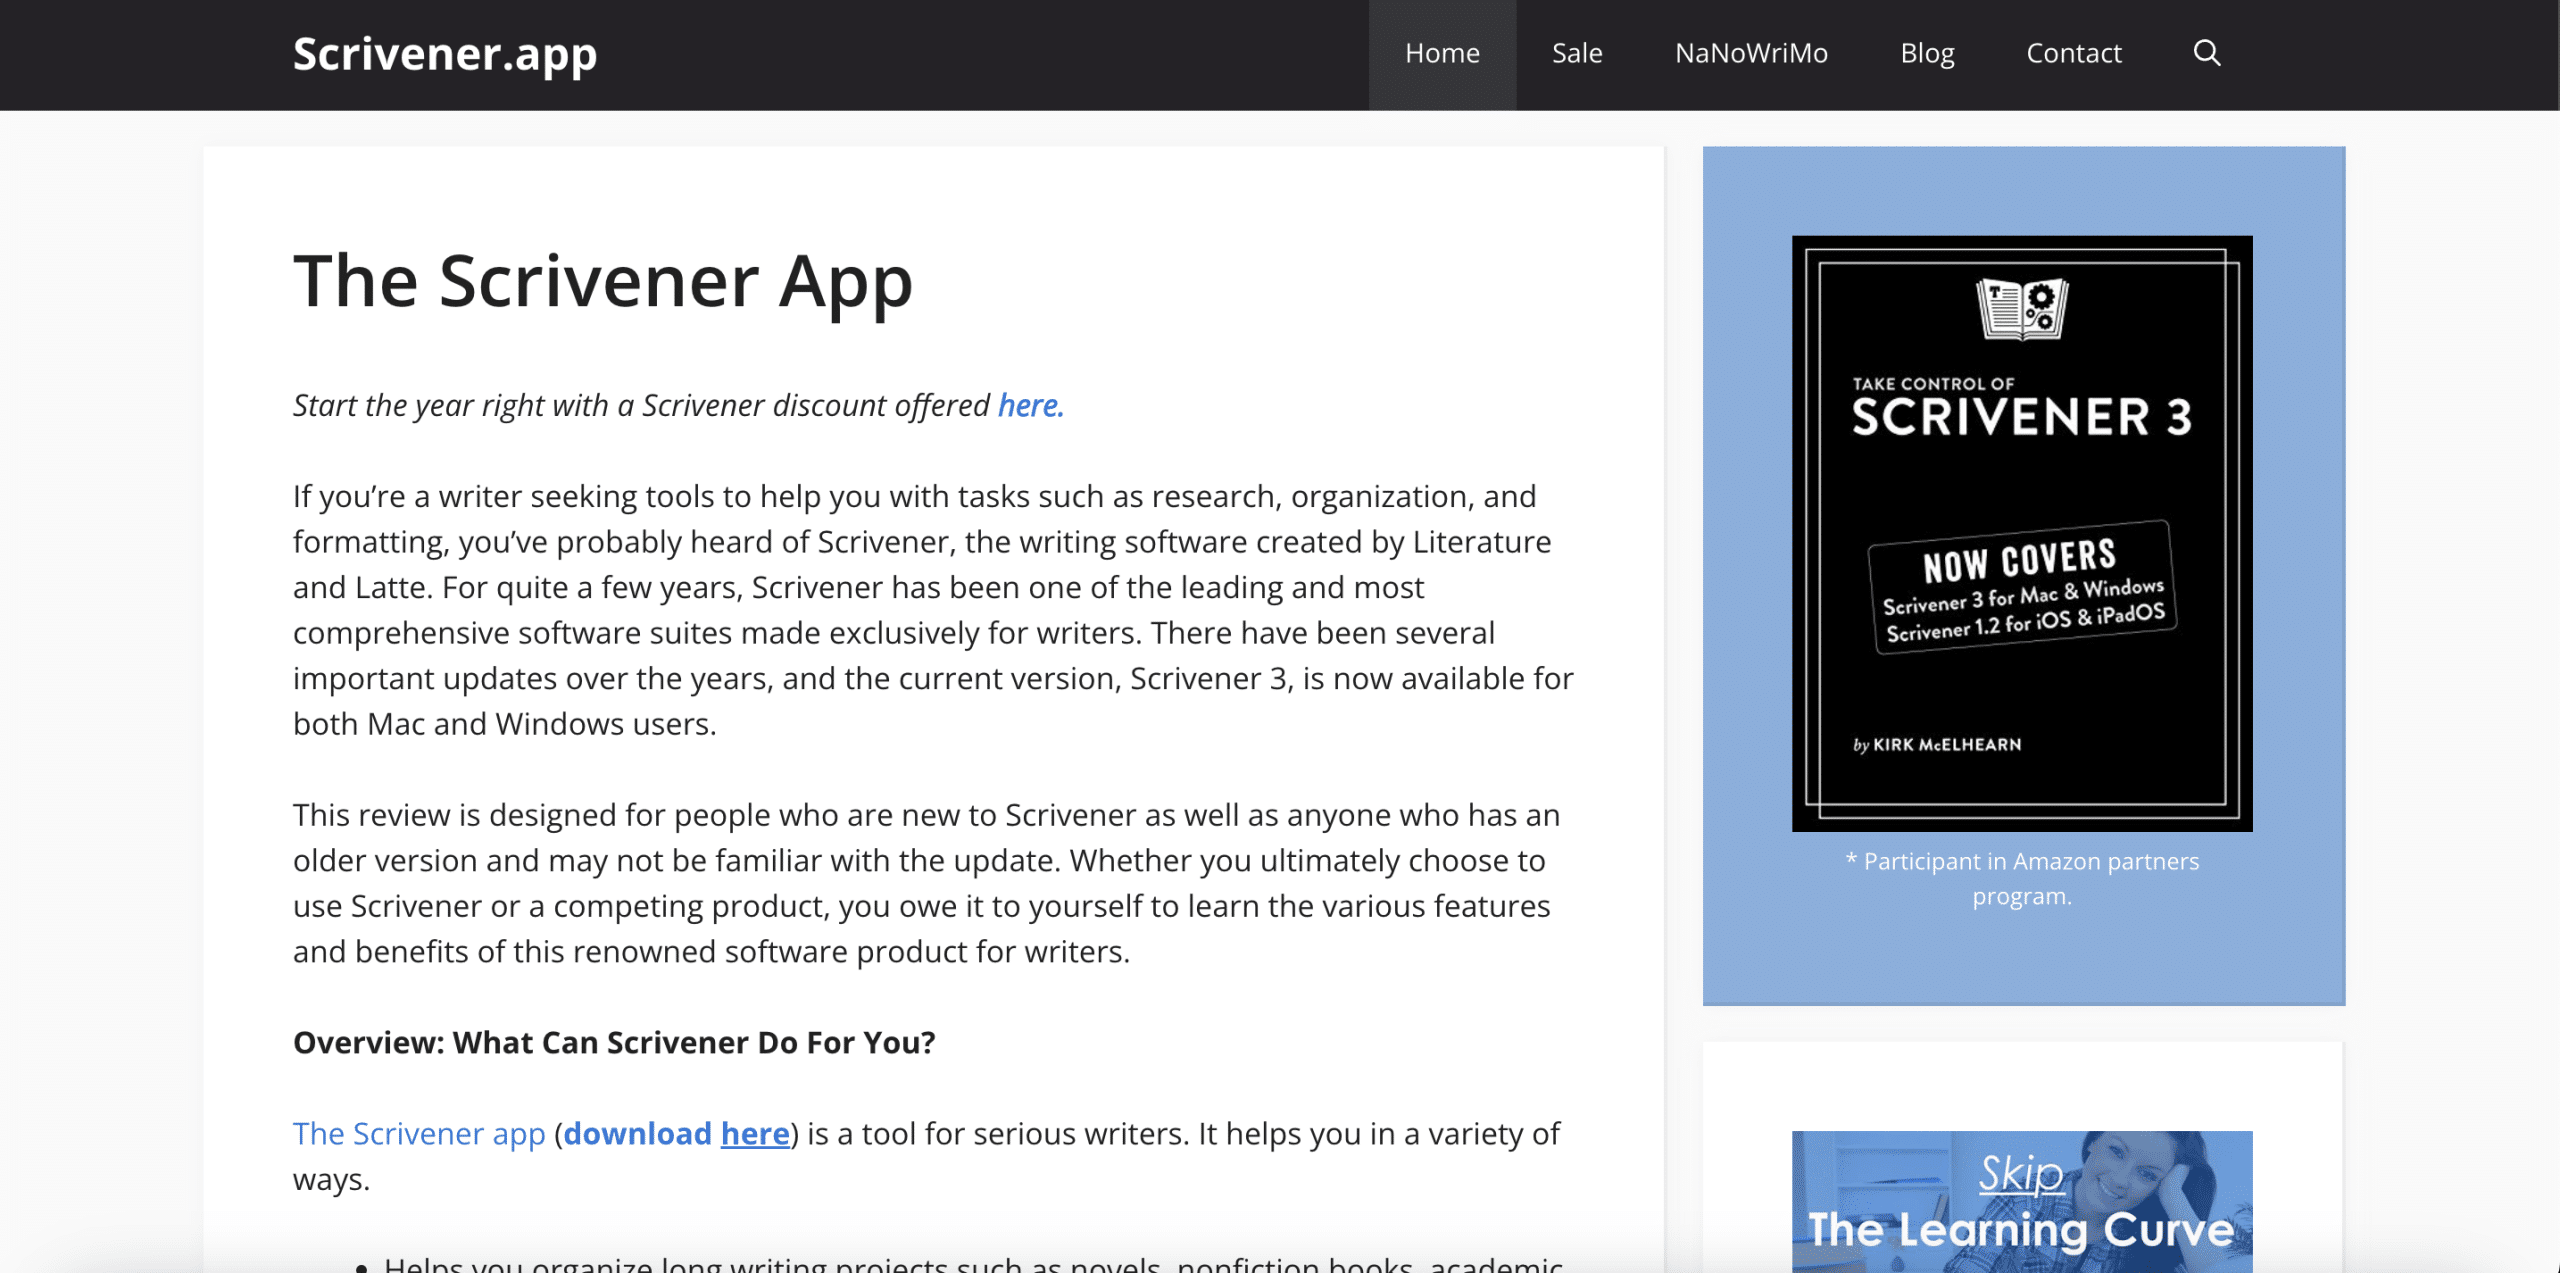
Scrivener is a comprehensive writing tool designed specifically for authors. Apart from offering powerful formatting capabilities, Scrivener provides an improved writing experience with its innovative writing workspace. This includes a corkboard view to visualize and restructure your work, a research area to keep reference materials at hand, and advanced composition tools to focus on writing.
Scrivener's Compile feature lets you export your work into multiple formats, including Microsoft Word, PDF, EPUB, and MOBI. The tool’s powerful style system and custom templates allow great flexibility and control during formatting.
However, like InDesign, Scrivener also has a learning curve. New users might find the extensive features somewhat overwhelming. Despite this, many authors swear by Scrivener for managing complex writing projects and producing professionally formatted books.
How To Format for E-books and Print Books?
Digital publishing has made e-books a popular alternative to print. While both follow core formatting principles, print books require trim size and margins, while e-books need reflowable text and linkable navigation. Adapting to each ensures a polished, readable book.
Key Differences between E-book and Print Book Formatting
While at their core, e-books and print books deliver the same content, the way readers interact with them differs significantly. This necessitates different approaches to formatting for each medium:
Aspect
E-book
Print Book
Pagination
Flexible, depends on device settings
Fixed, consistent across all copies
Images & Graphics
Must be compatible with various screens, less emphasis on high-resolution
High-resolution is essential for clear printing, precise positioning and alignment is important
Text
Reflowable, adjusts to various screen sizes
Fixed, does not adjust to book dimensions
Navigation
Interactive Table of Contents, hyperlinks utilized
Non-interactive, physical navigation
Fonts
Limited ability to embed fonts, depends on reader’s device
Full control over font selection
Understanding these nuances will ensure that your work looks and functions well in the chosen format.
Mastering Book Formats: How to Meet Any Publishing Requirement
When transitioning from print to e-book or vice versa, it's crucial to adapt your book to meet the unique formatting requirements of each file format. Reflowable e-book formats such as EPUB and MOBI enable the text to adjust to varying screen sizes, making it reader-friendly. When converting to an e-book, one also needs to replace the static table of contents with a dynamic, linkable one.
Conversely, converting from an e-book to print requires adding elements like page numbers, headers and footers and adhering to strict alignment and positioning for graphics and illustrations. Attention must be paid to trim size and margins, and ensuring high-resolution images for optimal printing while considering printing costs.
While several tools help automate conversion between formats, manual checks and adjustments are usually necessary to maintain high quality.
High-Quality Book Printing Services in the UK – ExWhyZed
At ExWhyZed, we specialize in premium book printing services for authors, publishers, and businesses across the UK. Whether you're producing novels, art books, photography collections, or corporate publications, we deliver exceptional quality with sharp printing, durable binding, and a professional finish.
Our bespoke printing solutions cater to both small and large print runs, offering a range of paper stocks, finishes, and binding options to bring your vision to life. With fast turnaround times, eco-friendly printing options, and dedicated customer support, ExWhyZed ensures a seamless printing experience from start to finish.
Transforming your manuscript into a finished book can feel overwhelming, but understanding the basics of formatting, including the chapter title, makes it easier. Focus on trim size, margins, fonts, alignment, spacing, and chapter structure. Adapt your approach based on the book type—novel, non-fiction, or anthology. Well-formatted front and back matter enhance readability and provide key information.
Use the right tools and software to streamline the process and ensure a polished result. Differentiate between e-book and print formatting to meet their unique requirements, including the necessary ebook format specifications. Book formatting blends aesthetics with technical precision—mastering both ensures a professional, reader-friendly book.
Frequently Asked Questions
What are some common book formatting mistakes?
Common book formatting mistakes include using too many different fonts or font sizes, inconsistent line spacing and indentation, not using scene breaks, having text that is too close to the edges of the page (outside the margins), and not starting new chapters on a new page, which can go a long way in greatly affecting readability.
How long does it take to format a book?
The time it takes to format a book largely depends on its length and complexity, and your familiarity with the process and the software used. Formatting a simple novel using a tool like Microsoft Word might take a beginner a lot of time and a few days.
Should I format an e-book differently than a print book?
Yes, e-books require different formatting than print books. Unlike print books, e-books are reflowable and allow for resizable text, so page numbers, headers and footers, and multi-column layouts don't apply. They also need a clickable table of contents that helps navigate to different sections.
How can I test my e-book's formatting before publishing?
Most self-publishing platforms offer a preview tool to examine your e-book before publishing. This allows you to review the formatting on various virtual devices, including alignment, spacing, and navigation. Ensure that your e-book is compatible with standard e-readers to guarantee a seamless reader experience.
Are you an author with a captivating children's story to tell? Or perhaps, you have a burning desire to stimulate young minds with fascinating tales and life lessons?
While the creative process of self-publishing is undoubtedly thrilling, it does beg the question - how much does it cost to self-publish a children's book? In this detailed guide, we will break down the cost associated with transforming your story from a manuscript into a beautifully written book.
How Much Does It Cost To Publish A Children's Book?
Publishing a children's picture book involves costs like editing, illustration, design, printing, and distribution, which vary based on factors such as illustration complexity and printing method, including the marketing budget. Researching industry rates and creating a detailed budget are essential for a successful launch in the publishing process. We'll make this easier for you, so check the detailed cost breakdown below with us.
ExWhyZed would print your children's book for $180 for 100 copies on A4 softback with wire stitched and perfect bound. This means one book would cost you about $1.8. Mass production of books would be more cost effective as you're printing more while paying less. To get a personalized quote on how much it would cost to print a children's book, get in touch with us now!
Manuscript Editing and Proofreading
Experienced copy editors with years of experience ensure impeccable sentence structure, grammar, and overall coherence. Investing in developmental editing guarantees a polished final product that resonates with young readers. Utilizing NLP tools or hiring professional editors on platforms likeReedsycan streamline this phase.
Authors should allocate a portion of their budget to guarantee a high-quality manuscript, which is vital for a successful book launch. Remember, the effort put into editing and proofreading reflects the book's overall professionalism.
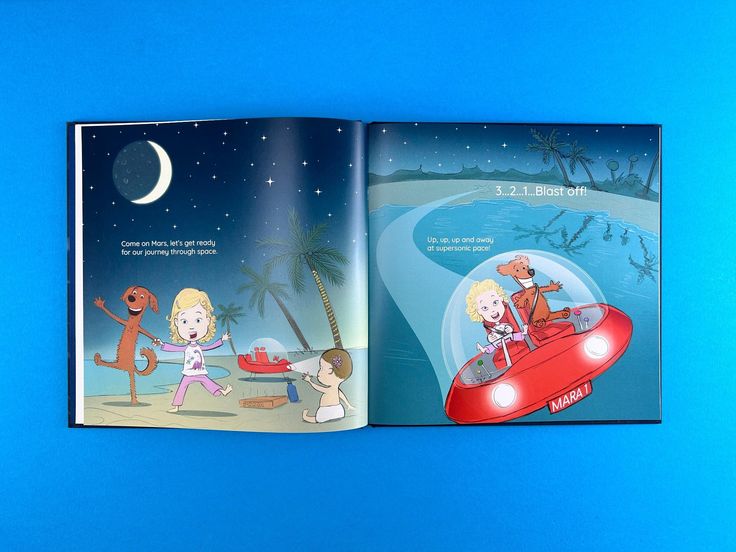
Illustration and Design
Illustration and design costs can vary a lot depending on the complexity of the artwork and the illustrator’s experience. But one thing’s for sure—high-quality illustrations can make your book truly stand out.
When planning your budget, think about how many illustrations you need and the level of detail required. Investing in a skilled illustrator, especially one experienced in children’s books, ensures your visuals perfectly complement your story.
At ExWhyZed, we help bring your vision to life, from stunning covers to beautifully formatted interiors. Let’s make your next book a bestseller! Check out our artist catalog here.
Formatting and Typesetting
For a children’s book, formatting and interior design are just as important as the story itself. A well-structured layout keeps young readers engaged and makes the text easy to follow.
Typesetting—how text and images are arranged on the page—plays a big role in creating a smooth reading experience. Using tools like Adobe InDesign and Photoshop helps ensure a polished, professional look. When done right, formatting makes your book stand out, drawing in both kids and parents. After all, a well-designed book isn’t just read—it’s experienced!
How Much Does Printing and Distribution Cost?
Printing and distribution costs depend on factors like printing method and quantity. Print-on-demand (IngramSpark) keeps upfront costs low, while offset printing is cheaper for large runs. Bulk orders can cut shipping costs, and distribution platforms take a fee or commission.
Print Your Book With ExWhyZed
If you're an author looking for a cost-effective way to print your book, Ex Why Zed is an excellent option. Whether you’re self-publishing or printing copies for an event, we offer high-quality printing at competitive prices.
Our services are designed to give authors flexibility, whether you need a small batch of books or a larger print run. We focus on excellent print quality, professional finishes, and affordability, ensuring your book looks exactly how you envisioned it.
Want to know how much it will cost? Contact us for a personalized quote! We’ll work with you to find the best printing solution for your budget.
Print on Demand vs Offset Printing
Print on demand (POD) and offset printing are two common methods for producing children's books. Offset printing, ideal for large print runs, offers cost efficiency but requires higher initial investments of several dollars.
In contrast, print on demand (POD) allows for smaller quantities, reducing upfront costs and minimizing inventory storage. However, per-unit costs tend to be higher with print on demand. Understanding the differences between these printing options is crucial in determining the most cost-effective approach for publishing children's books. Make an informed decision based on your budget and publishing goals.
Distribution Platforms for Children's Books
When considering distribution platforms for children's books, choosing ones that cater specifically to younger audiences is crucial. Platforms like Amazon Kindle Direct Publishing(KDP) and IngramSpark are popular due to their reach and ease of use.
KDP allows for easy eBook distribution, while IngramSpark offers a broader reach for standard distribution to traditional bookstores and assists authors in connecting with a traditional publisher. Selecting the right platform can significantly impact the visibility and success of your children's book.
What Is The Cost of Hiring a Professional Illustrator?
Quality illustrations are essential for children's books, and costs vary depending on the illustrator's experience, style, and timeline. Researching portfolios, seeking referrals, and exploring platforms like Fiverr can help you find the right illustrator within your budget.
Factors Affecting Illustration Pricing
Illustration costs for children's books can vary based on several key factors. Understanding these can help you budget effectively while maintaining a balance between quality and affordability. Key factors influencing illustration costs:
Complexity of artwork – Intricate or highly detailed illustrations may have higher fees.
Illustrator’s experience and reputation – Established freelancers and illustrators with strong portfolios typically charge more.
Project timeline – Tight deadlines may lead to additional rush fees.
Specialized skills – Unique styles or techniques may increase costs.
Making informed decisions about these factors ensures you get quality illustrations within your budget.
Tips for Hiring an Illustrator for Your Children's Book
Finding the right illustrator can make all the difference in bringing your children's book to life.
Start by exploring their artistic style and past experience with children's books to see if they align with your vision.
Check their portfolio to ensure their work fits your story’s tone.
Clear communication is key—make sure they understand your ideas and can meet deadlines.
Be upfront about your budget and negotiate a fair rate.
A strong collaboration with your illustrator will lead to a beautifully illustrated book that truly connects with young readers.
Want to create a visually stunning children's book? Our informative video guide walks you through the entire printing process—from choosing the right size, paper, and binding to exploring winning design styles used by top illustrators. Plus, get insights from iconic children's books that have stood the test of time. In a competitive market, ExWhyZed helps your book stand out and become a favorite on every child’s bookshelf!
What Are Some Marketing and Promotion Strategies?
Using social media and in-person events like book signings can create buzz for your children's book. Collaborating with bloggers and reviewers further boosts visibility and engagement.
Using Social Media with ExWhyZed
We also provide the perfect avenue for distributing children's books and help spread the word about them on social media. And now, with Ex Why Zed's Book Promotion Social Media Pack, you can take your book launch to the next level!
What's included, you ask?
A professionally crafted press release and blog post to announce your book launch.
A one-week social media calendar to organize your promotional activities.
A month-long social media planner with ideas to maintain momentum.
Social media post suggestions and content ideas for Facebook, Instagram, Threads, X (Twitter), TikTok, LinkedIn, Pinterest, YouTube, and blogs.
A collection of 10-20 high-quality photos of your finished book.
A one-minute landscape flick-through video for YouTube, Facebook, Instagram Grid, and blog posts.
A one-minute portrait flick-through video for YouTube Shorts, TikTok, Instagram Reels and Stories, Threads, Facebook Stories, X (Twitter), and mobile sharing.
An online flipbook of your book for easy sharing and previewing.This packed set of resources allows you to start promoting your book immediately across multiple channels—without the heavy lifting. Simply copy them into your Posts, Feed, Stories, and Blogs, and let the world see what you've created.
In-Person Events and School Visits
Engaging directly with your audience through in-person events and school visits can significantly boost the visibility and sales of your children’s book. These interactions offer a personal touch, connecting you with young readers and decision-makers.
Organizing book readings, signings, or workshops can create a memorable experience for children, parents, and educators, fostering a loyal readership. Collaborating with schools for author visits can also generate word-of-mouth buzz and establish credibility within the educational community. Maximize these opportunities to forge valuable connections and enhance your book's presence.
Collaborating with Book Bloggers and Reviewers
Want to get your children's book in front of more readers? Connecting with book bloggers and reviewers is a great way to boost visibility! Start by reaching out with a personalized pitch—highlight what makes your book special and why their audience would love it.
Focus on bloggers who cover children's books or parenting topics to reach the right readers. Offering review copies or running giveaways can help generate buzz and excitement. Positive reviews build credibility and attract more buyers. Just remember, building relationships takes time, but a solid connection with the right influencers can lead to long-term success!
Bring Your Children's Book to Life with ExWhyZed!
At ExWhyZed, we turn your stories into beautifully printed children's books with stunning colors, durable materials, and professional finishes—right here in the UK. Whether you're a self-publishing author or an independent publisher, we make the process seamless with expert guidance, eco-friendly printing options, and fast turnaround times. To enhance your publishing experience, consider using the Reedsy Book Editor to create a book that captivates young readers and stands out on the shelf! Get a free quote now!
Final Thoughts
Publishing a children's book involves various costs such as manuscript editing, illustration, formatting, printing (including options like paperback), and distribution. Hiring a professional illustrator can significantly impact your budget. Factors like the length of your book, illustrator experience, and complexity of illustrations influence pricing. Tips for hiring include reviewing portfolios and discussing project specifics. Printing costs vary based on print on demand or offset printing. Distribute through platforms like Amazon and IngramSpark. Marketing strategies like social media, in-person events, and collaborations are crucial for promoting your book effectively.
Frequently Asked Questions
What are the most important factors to consider when publishing a children's book?
Consider key factors like target age group, illustration style, printing options, and marketing strategy. Ensure the book aligns with children's interests and preferences. Attention to detail in editing, design, and distribution is crucial for a successful children's book launch.
How much does it cost to self-publish a children's book?
To self-publish a children's book, costs can vary. Expenses include editing, illustrations, formatting, printer services, and cover design, distribution. On average, total expenses may range from $1,000 to $10,000 or more depending on the quality and services chosen.
How much money can you make from a children's book?
Earnings from children's books vary based on sales, royalties, and deals. Success can lead to substantial income through book sales, merchandise, and adaptations, especially when using strategies like Amazon ads. Factors such as marketing efforts and audience engagement play a crucial role.
How much does it cost to self-publish a children's book?
Self-publishing a children's book can cost anywhere from $1,500 to $10,000+, with the average cost depending on expenses like editing, illustration, design, printing, and marketing. This comprehensive guide to self-publishing highlights that the biggest costs are typically illustrations and printing, which vary based on quality and distribution choices.
Are you looking to elevate the presentation of your written works or personal projects? Hardback binding might just be the solution you've been searching for. In this comprehensive guide, we delve into the intricate art of hardback binding, exploring the materials and tools essential for a successful endeavour. From selecting cover materials to understanding different paper types and weights, we've got you covered every step of the way.
Follow our expert step-by-step instructions to master the hardback binding process, ensuring a professional and durable finish. Discover the nuances of creating endpapers, attaching book blocks, and adding those final touches that truly make your project shine.
Let's set foot in the world of binding, where durability meets aesthetics to make physical copies of your work stand out. Stay tuned for valuable insights into achieving top-quality hardback binding results!
What are the Materials and Tools Used for Hardback Binding?
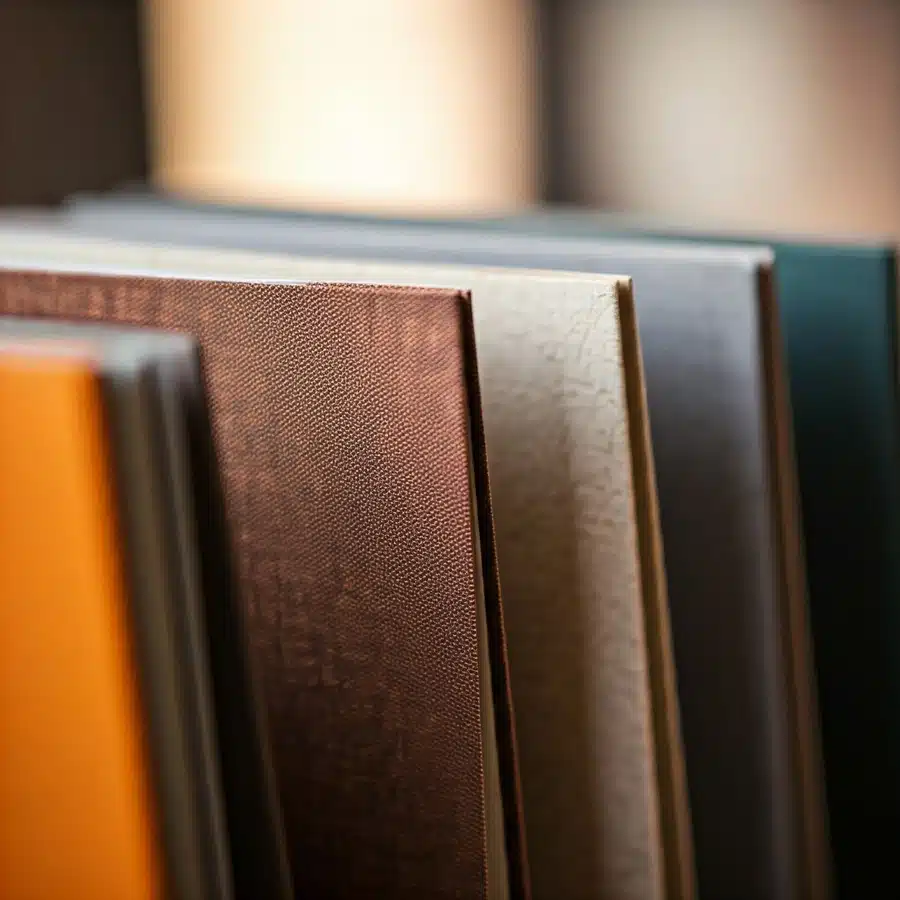
Hardback binding requires specific materials and tools to get the job done correctly. Be it the right quality of paper or the suitable glue; every material plays a critical role. These include the cover material, different paper types, and weights depending upon the need and usage of the book, as well as binding tools such as bone folders, brushes, and cutters. Let's discuss these in detail.
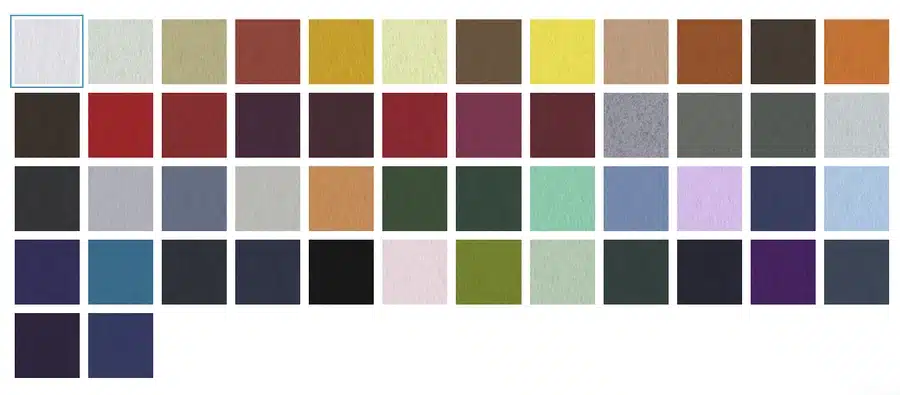
Classy, durable and with a textured surface - ideal for premium books and albums but less adept at taking foiling on it's coarse surface.
A closer look at Wibalin Natural
Wibalin® Natural by Winter & Company is a high-quality, uncoated, dyed-through paper that is 100% recyclable. Available in 50 vibrant colours, it serves as an excellent choice for book covers, premium packaging, stationery, hang tags, and labels. Its versatility allows for various printing techniques, including offset, digital, and screen printing, as well as finishing options like blind or hot foil stamping. Produced according to ISO 14001 standards, Wibalin® Natural is FSC™ certified (FSC-C007992), vegan, and REACH compliant, making it an environmentally responsible option for high-quality cover work.
Paper Types and Weights
Paper Type
Usage
90gsm Uncoated
Lightweight, ideal for black and white documents like thesis. Think, photocopier paper thickness.
120gsm Uncoated
Good for coloured documents, business reports
130gsm Silk
Gives a professional sheen, fitting for colour-printed books
Essential Binding Tools
Binding tools are indispensable for a successful binding process. Some of the vital tools include:
Bone folders, a versatile tool for folding and creasing.
Knives and cutters for clean and precise cuts.
Brushes to apply the glue evenly without any lumps.
A binding press or clamps to hold everything together while drying.
An awl or punch to make holes for threading in Smyth-Sewn binding.
Step-by-Step Guide to Hardback Binding
Ready to transform your written words into a tangible, beautiful book? This step-by-step guide will walk you through the process of hardback bookbinding. From preparing your pages to adding the finishing touches, you'll learn how to create a unique and personalised book that you can cherish for years to come. Let's get started.
Step 1: Prepare the Pages for Binding
Before we dive into the binding process, it's essential to prepare your pages. This involves collating your printed pages, ensuring they're in the correct order, and making any necessary adjustments to the page edges. Let's get started!
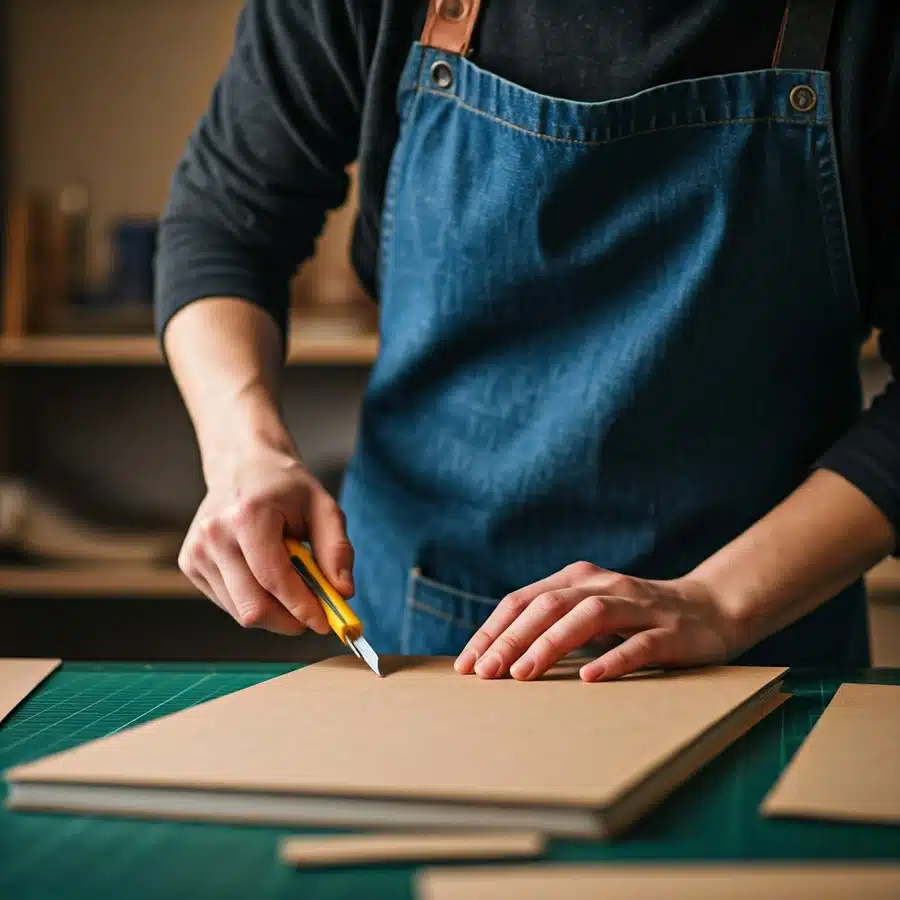
Print and Trim the Pages
To start the hardback binding process, the pages need careful printing and trimming. Precision is key in ensuring a professional finish. Whether it's for a thesis or a dissertation, accurate trimming is crucial for a polished outcome. The front cover, back cover, and book spine should all align perfectly once the pages are trimmed to size. This step sets the foundation for the entire binding process to follow. Utilise the right tools and techniques for crisp edges and a tidy final product.
Align the Pages
Ensure precise alignment of the pages before binding to maintain a professional look. Utilise a straightedge or aligning tool for accuracy. Proper page alignment is crucial for a flawless end result, especially in perfect binding. Pay attention to the edges and corners to avoid any misalignments that can detract from the overall quality of the final hardback binding. Take your time with this step to guarantee a clean and polished finish.
Sew or Glue the Pages
To ensure a secure binding, consider either sewing or glueing the pages together. Sewing provides durability and flexibility, ideal for thick or frequently referenced books. Conversely, Glueing offers a simpler and quicker method, often preferred for lightweight publications like booklets. Experiment with both techniques to find what suits your project best. Remember, the choice between sewing and glueing impacts the overall quality and longevity of your hardback binding. Explore different options before proceeding with your final decision.
Step 2: Prepare the Cover Board
The cover board is the backbone of your hardbound book. In this step, we'll guide you through the process of selecting the right materials, cutting the boards to size, and preparing them for the binding process. A strong and well-constructed cover will protect your book for years to come.
Select and Cut the Cover Boards as well as the Spine Board
For hardback binding, selecting and cutting the cover boards and spine boards is crucial. Choose durable materials for longevity. Cut the boards to the appropriate size, ensuring they fit the book snugly. The spine board is essential for the book's structural integrity. Precision in cutting is key to achieving a professional look. Take time to measure accurately and use sharp tools for clean cuts. Careful selection and cutting set the foundation for a well-bound hardback book.
Step 3: Choose and Prepare the Cover Material
The cover material is the face of your book. In this step, we'll explore various options for covering your book boards, from classic cloth to modern faux leather. We'll also discuss how to cut and apply the cover material to create a professional and attractive finish.
Select a Cover Material
When selecting a cover material for hardback binding, consider options like durable hard covers or flexible soft covers. Choose materials that complement your content, whether it's for reference books or artistic thesis projects. Ensure the cover colour and printing match the theme. In the UK, London-based services offer a range of cover options for booklets and dissertations.
Cut the Cover Material
When cutting the cover material for hardback binding, precision is key. Use a sharp blade and a cutting mat to ensure clean edges. Measure and mark the material according to the size of your book covers, adding extra for wrapping around the edges. Carefully trim along the marked lines to create precise covers for your hardback project. This step is crucial for achieving a professional and polished look for your finished book.
Glue the Cover Material to the Boards
To secure the cover material to the boards, apply a thin, even layer of adhesive using a brush or roller for a smooth finish. Carefully position the cover material over the boards, starting from one edge, to prevent wrinkles or bubbles. Press firmly to ensure proper adhesion, especially around the edges and spine. Trim any excess material for a clean look. Allow sufficient drying time before proceeding to the next step in the hardback binding process.
Wrap the Edges
To wrap the edges of a hardback binding, carefully fold the cover material over the boards' edges. Ensure a snug fit without bunching or overstretching. Use a bone folder to create crisp, neat folds for a professional finish. Secure the material by applying adhesive along the edges before neatly folding it in place. This step not only reinforces the durability of the binding but also adds a polished look to the overall presentation of the hardback book. Mastering this technique elevates your hardback binding project's aesthetic appeal and longevity.
Step 4: Attach the Book Block to the Cover
Now that we have our prepared book block and cover, it's time to combine them. This step involves attaching the book block to the cover, ensuring a strong and durable bond. We'll guide you through the process of glueing and pressing the book to achieve a professional finish.
Create Endpapers
To create endpapers, select a durable paper that complements your hardback binding. Endpapers provide a strong foundation and aesthetic appeal to your book. They are crucial for reinforcing the front and back covers, ensuring a professional finish. Carefully glue the endpapers to the book block, aligning them neatly for a seamless look. This step enhances the overall durability and presentation of your hardbound masterpiece. Choose quality endpapers that elevate the visual appeal and longevity of your project.
Glue Endpapers to the Book Block
To secure the endpapers to the book block, carefully apply a thin layer of adhesive on the trimmed endpaper edges. Position the pasted side of the endpapers against the first and last pages, ensuring a smooth attachment without any creases. Gently press the endpapers onto the pages to guarantee a firm bond, taking care not to affect the paper quality. This process contributes significantly to the hardback binding's overall stability and aesthetic appeal.
Attach the Book Block to the Cover
Carefully align the book block with the prepared cover. Securely attach the book block by glueing the endpapers to it, ensuring a tight bond. Press gently to set the binding in place and allow adequate drying time. Monitor the alignment and binding security to guarantee a professional finish. Add any final embellishments or trim excess material for a polished look. This step is critical in ensuring the durability and quality of the hardback binding. Success lies in meticulous attention to detail.
Step 5: Press and Let the Book Dry
After carefully assembling the book, pivotal step involves pressing the hardback to set the adhesive and allow it to dry thoroughly and firmly. This crucial step ensures that all components bond seamlessly, enhancing the finished product's durability. Patience is key here; allowing ample time for the book to dry naturally guarantees a professional outcome. A well-pressed and dried hardback speaks volumes about the precision and care invested in the binding process.
Step 6: Final Touches and Quality Check
The final step in the hardback binding process involves adding those finishing touches that elevate your book from good to great. We'll explore techniques like headbands, endpapers, and edge gilding to enhance the aesthetic appeal and durability of your book.
Check for Alignment and Binding Security
Inspecting alignment and binding security is crucial in hardback binding. Ensure the book spine aligns correctly with the front and back cover. Verify that all pages are secure and evenly bound within the cover. Additionally, check for any loose pages or potential weak spots in the binding. This attention to detail guarantees a professionally finished hardback book that looks appealing and stands the test of time. Quality checks in alignment and binding security are vital for a durable and aesthetically pleasing final product.
Add Finishing Touches
Take your hardback binding to the next level by adding elegant finishing touches. For a sophisticated touch, consider incorporating foil stamping or embossing on the front cover. Round off the look with a dust jacket for that extra layer of protection and style. These final details can elevate your hardcover book's aesthetic appeal, making it stand out on any shelf. Make sure to carefully inspect the alignment and overall quality before finalising your project. Finish strong with these expert touches.
Trim Excess Material (if necessary)
Removing excess material is crucial to give your hardback binding a professional finish. Using a sharp blade, carefully trim any protruding edges from the cover boards and book block to ensure a clean and neat appearance. Pay close attention to the corners and edges to maintain a consistent look. Precision in trimming excess material is key to enhancing the overall aesthetics and durability of your hardback-bound project. Always strive for a polished final product with no loose ends.
What are the 5 Most Common Types of Hardback Binding?
There are several types of hardback binding, each with its unique characteristics. The common types include Case-Bound Binding, Smyth-Sewn Binding, Perfect Binding, Library Binding, and Board Binding. Each type functions to cater to different requirements and purposes, offering a variety of aesthetics, durability, and functionality factors. Let's delve deeper into understanding these types.
Examples of Successful Hardback Books from Ex Why Zed
To help you make informed print choices when you embark on your hardback book printing journey, we have curated, analysed and dissected a series of recent hardback book projects to show you what can be achieved.
Case-Bound Binding
Case-bound binding, also known as hardcover binding, is a popular method for creating durable and professional-looking books. This technique involves attaching the book block to a sturdy cover made of rigid boards, typically wrapped with decorative materials like cloth or leather. Case binding ensures the book's longevity and enhances its aesthetic appeal, making it a preferred choice for high-quality publications such as novels, reference books, and art books. The process demands precision and attention to detail to achieve a flawless final product.
Smyth-Sewn Binding
Smyth-Sewn Binding is a durable and high-quality bookbinding method. It involves sewing together the gathered signatures of a book before attaching them to the cover. This technique ensures a strong and long-lasting binding that is commonly used for reference books and any publication requiring frequent use. The Smyth-Sewn Binding provides a professional finish, making it a preferred choice for those seeking a top-quality hardback binding solution.
Perfect Binding
When opting for perfect binding, the pages are glued to a cover along the spine, creating a clean and professional finish. This method is commonly used for paperback books, magazines, and catalogues, providing a sharp and modern look. Perfect binding offers a cost-effective solution for various printing projects, ensuring durability and a polished appearance. With its versatility in accommodating different paper weights and sizes, perfect binding is a popular choice for projects requiring a sleek and uniform finish.
Library Binding
Library Binding involves a durable, high-quality hardcover, making it ideal for reference books and dissertations. Typically seen in libraries, this method prioritises longevity and sturdiness. The process includes sturdy case binding that ensures the book's resilience. For reliable library binding, consider leveraging professional services that offer various delivery options. When opting for library binding, durability is key, guaranteeing that your content remains intact for an extended period.
Board Binding
For board binding, rigid boards like chipboard or binder board are utilised for the cover. This method is sturdy and commonly used for hardback books, especially for reference materials and photo albums. The cover boards provide strong support and protection for the book's content. Board binding ensures durability and a professional finish, making it a preferred choice for high-quality publications that require robust construction. This type of binding is ideal for projects that necessitate a solid and long-lasting hardcover solution.
Why Should You Choose a Professional Binding Service Provider Over Doing It Yourself?
Professional binding service providers offer a valuable solution for individuals and businesses seeking high-quality results in their hardback binding projects. Utilising these professionals' expertise, specialised tools, and experience can save time and ensure a flawless finish that exudes durability and professionalism.
One of the key benefits of engaging in a professional binding service is their ability to handle various types of binding techniques, such as perfect binding, saddle stitching, spiral binding, or case binding. These experts have in-depth knowledge of different materials and methods required for each type of project, ensuring that your final product meets the highest standards.
Moreover, professional binders can offer customisation options to suit your specific needs, whether it involves embossing, foil stamping, debossing, or other finishing touches. This level of personalisation adds a unique and professional touch to your bound documents or books.
Additionally, working with a professional binding service provider allows you access to a wide range of paper stocks, covers, colours, and textures to enhance your project's overall look and feel. Whether you are binding high quality annual reports, presentations, manuscripts, portfolios, or any other document, these experts can guide you in selecting the most suitable materials for your desired outcome.
Hence, opting for a professional binding service provider not only ensures high-quality results but also saves you time and effort in achieving a polished and professional finish for your hardback binding projects.
Leverage Ex Why Zed for Top-Quality Hardback Binding Services
For those wanting a professional finish to their hardback binding projects, look no further than Ex Why Zed for top-quality hardback binding services. With a reputation for excellence and precision, Ex Why Zed offers a wide range of paper coatings to ensure the best results for your hardback book printing. Our online ordering system is user-friendly, allowing for maximum file uploads and efficient processing.
We have a customer service team with print experts who can guide you through every step of the process, from selecting the correct number of pages to ensuring the clearest printed text. Choose Ex Why Zed for a premium hardback binding that exceeds expectations.
If you have any questions or need assistance, please reach out to our customer services team via phone at 01206 766647 or email us at hello@exwhyzed.com.
Hardback Book Printing Showcase Video
To help you make informed print choices when you embark on your hardback book printing journey, we have curated, analysed and dissected a series of recent projects to show you what can be achieved.
Final Thoughts
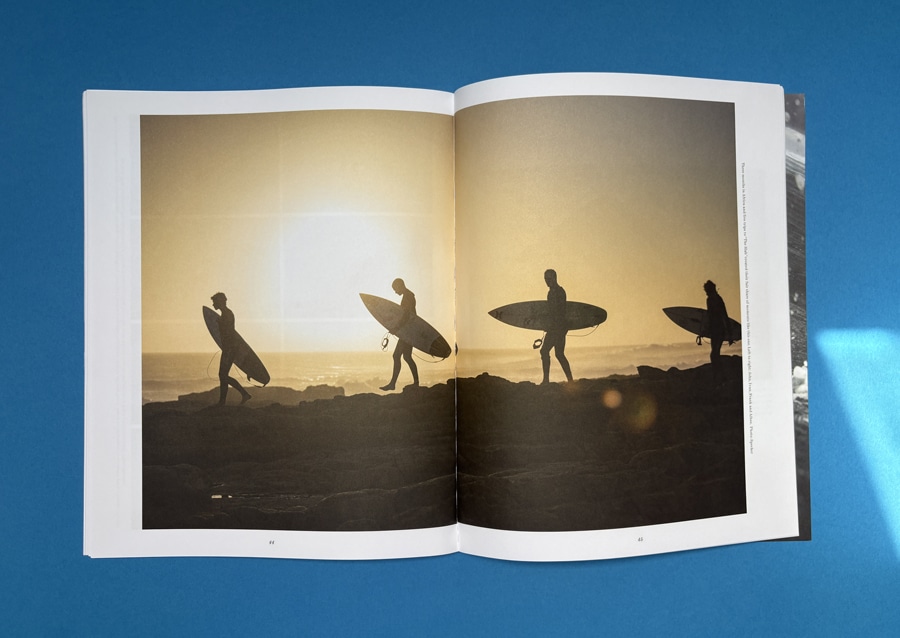
Creating a hardbound book is an experience in itself. It requires attention to detail, practice, and the correct materials and tools. The sophistication, durability, and quality that a well-bound hardback book provides are unparalleled. Whether you are looking to collate your thesis, create a memorable yearbook, or publish a novel, hardback binding can set your work apart.
By being mindful of the common mistakes and adopting measures to ensure longevity, you can successfully create a hardback project that stands the test of time. After all, a book is not just a collection of single pages held together; it's a seamless blend of information, creativity, hard work, experience, and a testament to the writer's dedication.
Frequently Asked Questions
How do I choose the right material for my project?
The choice of material chiefly depends upon the type of project and its intended usage. Use durable materials while opting for a classy, delicate appearance for special projects or books.
Can I bind my work with different types of bindings?
Yes, you can bind your work with various types of bindings, such as perfect binding, saddle stitching, wire-o binding, spiral binding, and hardcover binding. The best binding method depends on the specific requirements of your project, such as the number of pages, the desired look, and the intended use of the document.
How long does the binding process take?
The time frame varies depending on the type of binding, number of books, size, the service provider's capacity, and other factors. At Ex Why Zed, we aim to deliver hardback books in 7 working days if you are ordering up to 500 copies. For larger orders, litho printing the books will be most cost-effective and maximum quality. Rome wasn't built in a day so allow 4-6 weeks for this but in October to December we get super busy and turnaround on long run hardback books (700 copies+) can drift to 2-3 months. So, plan early!
Can you print a book online?
Yes, companies like Ex Why Zed offer an online printing system that allows you to upload your PDF file and have your books printed and delivered, offering maximum convenience without compromising on quality. Plus, they offer very competitive prices, so you can get your project printed without breaking the bank.
How much does it cost to bind a hardback book?
The cost varies greatly depending on the type of binding, size, page count, cover finish, and other features. However, companies like Ex Why Zed offer competitive, cost-effective pricing based on your specifications.